Eurosparx

Categories
Car Accessories

What’s Involved in Installing a Bluetooth or Hands-Free System in Your Vehicle?

Installing a Bluetooth or hands-free system means fitting a device that lets your phone connect to your car’s audio so you can take calls without touching it.

Depending on your vehicle, that’s either a plug-in adapter, a small add-on kit with its own microphone and speaker, a replacement head unit, or switching on a factory module your car already has.

An auto electrician removes trim, connects the wiring, mounts a microphone and tests the system before handing the keys back.

The right choice depends far more on what’s already behind your dashboard than on what you buy off the shelf.

Get it wrong, and you’ll end up with callers who can’t hear you, dead steering wheel buttons, or a flat battery every Monday morning.

What Does a Bluetooth or Hands-Free Installation Actually Involve?

A Bluetooth installation involves choosing the right type of system for your vehicle, removing the dashboard or trim panels to reach the wiring, connecting the new unit to power and to the car’s audio, fitting a microphone where it will pick up your voice clearly, then pairing and road-testing the system.

The work sits somewhere between fitting a stereo and repairing a wiring loom, because many modern cars run their audio through data networks and factory amplifiers rather than simple speaker wires.

On an older vehicle with a basic radio, the job is mostly mechanical: pull the unit, swap the connectors, refit.

On a late-model European car, the same job usually involves adapters, interface modules and sometimes software coding before anything works properly.

That’s why two cars sitting side by side in the workshop will need completely different approaches to reach the same result.

Which Bluetooth Option Is Right for Your Vehicle?

There are four main ways to get hands-free calling into a vehicle, and the best one depends on your car’s age, whether it has a usable input, and how much of the factory look you want to keep.

The table below compares them across the things that actually matter when you’re deciding.

OptionHow it connectsKeeps factory lookCall qualityBest suited to
Plug-in Bluetooth adapterAUX socket, or a USB port that carries audio rather than charging aloneYesBasic, uses a built-in or clip-on microphoneCars from roughly the mid-2000s onward with a usable AUX or audio-capable USB input
Add-on hands-free kitWired into power with its own speaker and separate microphoneYesGood, dedicated microphone placed near the driverOlder vehicles, work vans and utes with no usable audio input
Replacement head unitNew stereo wired in with a harness adapter and fascia kitNo, the stereo face changesVery good, plus phone mirroring and steering wheel control retentionJapanese imports, older cars, and anyone wanting a screen
Factory module retrofitGenuine module added and switched on with diagnostic softwareYes, fullyVery good, uses the car’s own speakers and microphoneEuropean and late-model vehicles whose systems support the module

The plug-in adapter is the cheapest route, but it borrows a microphone that sits nowhere near your mouth, so the person on the other end often hears as much road noise as they hear you.

An add-on kit fixes that problem with a proper microphone, and it’s the sensible answer for a work vehicle where you don’t want to touch the factory stereo at all.

A replacement head unit gives you the most capability, including phone mirroring for maps and music, though it does change how the dashboard looks.

The factory retrofit is the tidiest result of all, though it depends on your vehicle supporting the module, either through wiring already in place or a vehicle-specific loom added during the job.

FM transmitters and cassette adapters exist as well, and they’re worth knowing about as a last resort in a vehicle where nothing else will fit.

How Is the New System Wired Into Your Car?

The new system is wired into a switched ignition feed, a permanent 12-volt feed, an earth point, and then into the audio path, either through the speaker wiring or through the car’s data network.

Getting these feeds right is the single biggest difference between a professional installation and one that causes problems later.

The permanent feed keeps settings and pairings stored while the car is off, and the switched feed tells the unit when to wake up and shut down.

If an installer takes both feeds from a permanent live to save time, the unit never fully powers down and will drain your battery over a few days of the car sitting idle.

Proper installations use the correct wire gauge, soldered or crimped joints inside heat shrink, and fused connections so a fault trips a fuse rather than melting a loom.

Where a vehicle-specific harness adapter is available, the audio connection plugs straight into the factory connector without a single wire being cut.

That matters if you ever sell the car or want the original stereo back, because the loom is left untouched.

Where a car uses an amplified or fibre optic audio system, an amplifier retention or fibre optic adapter is needed to keep the audio working, and the installer has to identify that before ordering parts.

Where Does the Microphone Go?

The microphone goes as close to the driver’s mouth as possible while staying out of direct airflow, which usually means the A-pillar trim beside the windscreen, the headlining near the sun visor, or clipped to the rear-view mirror mount.

Placement does more for call quality than the price of the kit. A microphone mounted low in the dashboard sits below the level of a driver’s voice and picks up engine noise, tyre roar and pedal movement instead.

One mounted directly in front of an air vent will make every call sound like a windstorm, no matter how good the unit is.

Running the microphone cable neatly is part of the job too, tucked behind trim clips and away from any airbag deployment path.

Curtain airbags run down the A-pillars and along the roofline in most modern cars, so trim in those areas has to come off and go back on correctly.

This is a common reason to leave the work to an auto electrician rather than attempting it at home, since a cable routed through the wrong channel will interfere with an airbag doing its job.

Will You Keep Your Steering Wheel Controls?

Yes, in most vehicles, provided a steering wheel control interface is fitted at the same time as a replacement head unit.

In most modern vehicles, the buttons on your steering wheel don’t send audio commands directly to the stereo. They send data messages across the vehicle’s network, and an aftermarket unit doesn’t speak that language on its own.

Older cars use simpler resistive wiring for the same buttons, which needs a different type of interface again.

The interface module translates those messages so volume, track skip, and call answer keep working from the wheel.

Which buttons carry over depends on the vehicle, the head unit and the interface chosen, so it’s worth confirming the exact list of functions before any parts are ordered.

Vehicle-specific interfaces also handle other signals that pass through the same network, such as reversing camera triggers, parking sensor chimes and the mute signal used by some factory systems.

Skipping the interface to save money is a false economy, because reaching down to a screen for volume is precisely the sort of distraction a hands-free system is meant to remove.

What Happens on the Day of the Installation?

On installation day, the vehicle comes in, the battery is protected or a memory saver is fitted, trim and the existing stereo come out, the new hardware is fitted and wired, the microphone is mounted, everything is refitted, and the system is paired and tested before the car is handed back.

The first step is often the least obvious one: recording radio security codes and stored settings so nothing is lost when power is interrupted.

Many European vehicles will lock their audio system or throw warning messages if the battery is disconnected without the right precautions.

Once the trim is out, the installer confirms what’s actually behind the dashboard, because vehicle specifications change between model years and even between the same model sold new here and imported used.

The final stage is testing with a real phone: an outbound call, an inbound call, a test of audio streaming, a check that the stereo powers down with the ignition, and a listen for any noise picked up from the alternator or ignition system.

A quick check of battery drain after the car has gone to sleep is worth doing as well, since that’s where a rushed installation shows up weeks later.

Is It Legal to Use a Hands-Free System While Driving in New Zealand?

Yes, hands-free use is legal in New Zealand, provided the phone is either secured in a mounting fixed to the vehicle or operated without touching any part of the phone.

The NZ Transport Agency confirms that a phone may be operated by Bluetooth, by voice activation, or using controls that are part of the steering wheel or dashboard.

Holding and using a phone in your hand is an offence even when you’re stopped at an intersection or sitting in traffic.

The penalty is a $150 infringement fee and 20 demerit points, which has applied since 30 April 2021.

Twenty demerit points is a fifth of the way to a licence suspension, because 100 or more active points within any two year period means a three month suspension.

Points stay active on your licence record for two years from the date of the offence. This isn’t a rule that goes unenforced either.

Figures released by NZTA under the Official Information Act record more than 50,000 people convicted of using a mobile phone while driving in 2024 alone.

That count is of individual drivers rather than individual offences, so anyone caught more than once in the year is still counted only once.

The one exception is a 111 emergency call, which you may make without a hands-free setup if it isn’t safe or practical to stop the car first.

What Can You Legally Do With a Mounted or Hands-Free Phone?

With a properly mounted or hands-free phone, you may make or receive an audio phone call, use music or audio functions, and use the phone for GPS directions.

Everything else is off limits, including when you’re stopped at traffic lights or sitting in a queue.

That means no texting, no scrolling through messages, no reading emails and no selecting videos, whether the phone is in your hand or in a cradle.

The rule is written around what you’re doing rather than where the phone is sitting, so a mounted phone doesn’t permit you to interact with apps.

This is worth understanding before you spend money, because a hands-free system solves the calling part of the problem and nothing else.

Voice control is the practical answer for the rest, which is one reason systems that support voice assistants and steering wheel answer buttons are worth the extra outlay.

Will a Phone Mount or Screen Affect Your Warrant of Fitness?

A phone mount or added screen will fail a warrant of fitness if it obstructs the driver’s view of the road.

The vehicle inspection requirements list it as a reason for rejection when “a windscreen or front side window is so dirty or obstructed that the driver’s vision is impaired”.

In practice, that rules out large suction-cup mounts placed in the middle of the windscreen at eye level, and tablet-sized screens perched on top of the dashboard.

The safest positions are low on the windscreen near the bottom edge, on the dashboard well away from the driver’s sightline, or in a vent or CD-slot mount.

A head unit fitted into the factory stereo opening avoids the issue, because the screen sits where the original unit sat and stays below the driver’s line of sight.

Oversized floating screens that stand proud of the dashboard are a different matter and will attract attention at inspection time.

If you’re adding a mount alongside a hands-free system, sit in the driver’s seat with the car parked on level ground and check your view of the road before anything is fixed in place.

What Makes Japanese Imports and European Cars Different?

Japanese imports and European cars each carry their own complications, and both are extremely common on Auckland roads.

New Zealand’s fleet is also old by international standards, with the average light passenger vehicle reaching 15.3 years in 2024 according to Ministry of Transport figures.

A vehicle of that age was built well before hands-free calling became standard equipment, which is exactly why retrofit work is so common here.

The approach that works on a locally delivered car often won’t transfer to an import or a European model without extra parts.

Why Do Japanese Imports Need the Radio Changed?

Japanese imports need the radio changed because Japan’s FM band runs from 76 to 90 MHz while New Zealand uses 88 to 108 MHz, so a factory Japanese unit reaches only the bottom 2 MHz of our band and will miss most local stations.

Many imports arrive with a band expander fitted to work around this, and that device causes its own problems.

Radio Spectrum Management, the government body that manages the radio spectrum, does not endorse or encourage the use of band expanders and describes them as unsuited to New Zealand conditions.

They cause distortion, station intermixing and blank spots in the tuning range, and have been found to interfere with sensitive two-way radio systems at airports and other important radio infrastructure.

RSM’s own recommendation is to replace the Japanese radio with a model designed for the FM band used here.

That makes a replacement head unit the obvious move on an import, because one job fixes the radio band, adds Bluetooth hands-free, and usually replaces a Japanese-language screen with an English one at the same time.

Import owners also tend to inherit a factory satellite system that only holds Japanese maps, which becomes redundant the moment your phone handles directions instead.

What’s Different About European Vehicles?

European vehicles route audio through data networks and factory amplifiers rather than plain speaker wiring, so a straight swap of the stereo will disable other systems if the right interface isn’t used.

Many European models use fibre optic audio loops, and interrupting that loop without the correct adapter will silence the entire system, not just the stereo.

Others run their audio through an amplifier mounted elsewhere in the vehicle, so the wiring behind the dashboard carries data and low-level signals rather than anything a generic head unit can use.

There’s an upside as well. Several European cars left the factory with the wiring, microphone and menu structure for hands-free already in place, with only the module and the software setting missing.

On those vehicles, a genuine module can be fitted and switched on with diagnostic equipment, giving you a system that works through the original screen and steering wheel controls with no visible change to the interior at all.

Identifying which vehicles qualify takes model-specific knowledge and the right diagnostic tools, which is where an auto electrician who works on European cars daily saves you both money and disappointment.

What Can Go Wrong With a Poor Bluetooth Installation?

A poor Bluetooth installation will cause battery drain, poor call quality, dead steering wheel controls, warning lights, and interference noise through the speakers.

Most of these faults trace back to wiring problems created during installation rather than to the hardware itself.

Battery drain deserves the most attention. A unit wired to a permanent live without a switched trigger keeps drawing current after you lock the car, and it’s one of the things that drains a car battery overnight on a vehicle that only does short trips.

Interference is another common complaint, heard as a whine through the speakers that rises and falls with engine speed.

That often traces back to an earthing problem, caused by taking an earth from a painted panel or a convenient screw rather than a proper chassis earth point, though cable routing and amplifier connections will produce it too.

Then there are the faults that only appear later. Scotch-lock connectors and twisted joints wrapped in tape will corrode and work loose with vibration, and degraded wiring like this is far harder to trace than the original installation was to perform.

Poor installations also have a habit of triggering warning lights on modern vehicles, because this is one of the clearest ways aftermarket modifications affect your car’s electrics: interfering with a data network confuses control modules that expect specific messages at specific intervals.

What Should You Think About Before Booking a Hands-Free Install?

Before booking, check whether your vehicle already has Bluetooth built in, decide whether you want the factory look kept, think about who else drives the vehicle, and be clear about what you need beyond phone calls.

Answering these questions in advance means the installer can quote the right solution rather than guessing, and it’s the same groundwork that avoids electrical issues after installing aftermarket accessories.

It also stops you paying for capability you’ll never use, or discovering afterwards that the system won’t do the one thing you wanted.

Does Your Vehicle Already Have Bluetooth Built In?

Many vehicles already have Bluetooth built in, and the owner simply hasn’t found it, particularly on imports where the menus were originally set to another language.

Check the audio source list on your stereo for a “phone” or “BT” option, look for a phone button on the steering wheel, and search the vehicle handbook for pairing instructions.

Some cars have the module fitted with a previous owner’s phone still stored, and once the pairing memory is full the system won’t accept a new device until an old one is deleted.

Others have the module fitted but never activated, which is a module programming job rather than a hardware one.

It’s worth ten minutes of checking before you spend anything, and an auto electrician will confirm it with a diagnostic scan and a look through the vehicle’s equipment list.

What About Vans, Utes and Commercial Fleets?

Vans, utes and commercial fleets need hands-free systems that survive constant use, work in noisy cabins, and can be fitted consistently across multiple vehicles.

The environment is harsher than a private car, with more vibration, more road noise from bare metal panels, and drivers who take far more calls in a day.

A microphone position that works fine in a sedan will struggle in an empty van, where sound reflects off flat surfaces and echoes back to the caller.

Fleet operators fitting out commercial vehicles also carry health and safety duties for staff who drive as part of their work, which makes a properly fitted hands-free system part of managing that risk rather than a convenience item, in the same way electrical compliance applies to any commercial vehicle fitout.

Consistency matters too: fitting the same system, in the same position, across every vehicle in a fleet means drivers who swap vehicles don’t have to relearn anything, and any fault is quick to diagnose.

How Do You Get the Best Call Quality?

The best call quality comes from a dedicated microphone mounted close to the driver, a system that uses the car’s own speakers rather than a small built-in one, and a clean earth connection.

Beyond the installation itself, a few habits make a noticeable difference.

Wind noise from an open window will overwhelm even a well-placed microphone, so calls are clearer with windows up and the fan turned down.

Keeping the phone’s software up to date matters more than most people expect, because Bluetooth pairing problems are frequently resolved by manufacturer updates on both the phone and the head unit.

If call quality has slowly worsened over time, deleting the pairing and setting it up again from scratch resolves a surprising number of complaints without any parts being needed.

Need Help Installing Bluetooth or Hands-Free in Your Vehicle?

Fitting a Bluetooth or hands-free system is straightforward when it’s matched to your vehicle and wired properly, and a source of ongoing problems when it isn’t.

The right approach depends on what’s behind your dashboard, whether your car is an import, and what you need the system to do beyond taking calls.

As car stereo and head unit installation specialists in Auckland, Eurosparx can supply and fit the right hands-free solution for your vehicle, whether it’s a European model, a Japanese import or a work van.

Contact our team today by calling 09 218 7789 to discuss installing a Bluetooth or hands-free system in your vehicle.

Frequently Asked Questions

Can Bluetooth be added to any car?

Bluetooth can be added to almost any car, though the method changes with age and model. Older vehicles with no audio input need a replacement head unit or an add-on kit with its own speaker. Cars with a usable AUX input take a plug-in adapter. Many late-model vehicles only need a module activated.

Is it legal to use hands-free calling while driving in New Zealand?

Yes. New Zealand law allows audio calls, music functions and GPS directions if the phone is secured in a mounting fixed to the vehicle, or operated without touching it by Bluetooth, voice activation or steering wheel controls. Holding and using a phone carries a $150 fine and 20 demerit points, even when stopped in traffic.

Will installing a new stereo affect my steering wheel controls?

Your steering wheel controls will keep working in most vehicles, provided a steering wheel control interface is fitted alongside the new stereo. In modern cars those buttons send data messages across the vehicle network rather than direct commands, so an aftermarket unit can’t read them without a translator module. Which functions carry over varies by vehicle.

Why do Japanese imported cars need the radio replaced?

Japan broadcasts FM between 76 and 90 MHz while New Zealand uses 88 to 108 MHz, so a Japanese factory radio reaches only the bottom 2 MHz of our band and misses most local stations. Band expanders cause distortion and interference, and Radio Spectrum Management doesn’t endorse them. Replacing the head unit fixes both problems.

Can a badly installed Bluetooth system drain my car battery?

Yes, and it’s a frequent result of rushed installations. A unit wired to a permanent 12-volt feed without a switched ignition trigger keeps drawing current after the car is locked and will flatten the battery. Correct installations use a permanent feed for stored settings and a switched feed that shuts the unit down.

Do I need a microphone if my phone already has one?

You need a dedicated microphone for usable call quality. Your phone’s microphone is designed to sit near your mouth, so once it’s in a cradle it picks up road noise and cabin echo instead of your voice. A separate microphone on the A-pillar or near the sun visor points directly at the driver.

Categories
Auto Electrical Car Accessories

Adding an Aftermarket Alarm: Is It Worth It?

If you’re thinking about adding an aftermarket alarm to your vehicle, you’re not alone. Car theft remains a real concern for Auckland drivers, and factory-fitted security systems don’t always offer the level of protection you might expect. Whether you drive a European sedan through Ponsonby or a Japanese SUV around West Auckland, the question of whether an aftermarket alarm is a worthwhile investment comes up time and again. This article breaks down the real benefits, potential drawbacks, and practical considerations so you can make an informed decision about protecting your vehicle.

Why Factory Alarms Often Fall Short

Most modern vehicles come with some form of factory-fitted security, but these systems are often quite basic. A standard factory alarm might include central locking, an engine immobiliser, and a simple siren that sounds when a door is forced open. While these features are better than nothing, they’re widely understood by experienced thieves. Because factory systems are the same across thousands of identical vehicles, anyone who learns to bypass one can potentially bypass them all. This is a particular concern for popular models that are frequently targeted in Auckland.

Factory alarms also tend to lack advanced features like GPS tracking, smartphone notifications, and tilt sensors. These are the kinds of tools that can make a genuine difference when it comes to both deterring theft and recovering a stolen vehicle. If your car only has the basics, an aftermarket alarm can fill those gaps and offer a much more comprehensive layer of security tailored to your specific needs and driving habits.

Benefits of Installing an Aftermarket Alarm

Superior Theft Deterrence

The most obvious benefit of an aftermarket alarm is improved theft deterrence. A visible alarm system, complete with a flashing LED indicator on the dashboard, sends a clear signal to would-be thieves that your car has additional protection. Most opportunistic criminals are looking for easy targets, and the presence of an aftermarket alarm can be enough to make them move on to a less protected vehicle. This is especially relevant in areas of Auckland where car crime rates are higher, including some parts of South and West Auckland.

Beyond the visual deterrent, aftermarket alarms offer more sophisticated triggering mechanisms. While a factory alarm might only respond to a forced door entry, a quality aftermarket system can detect glass breakage, movement inside the cabin, impacts to the vehicle body, and even changes in the vehicle’s tilt angle, which is useful for detecting wheel theft. These multiple layers of detection make it far harder for a thief to access your vehicle without triggering the alarm.

GPS Tracking and Vehicle Recovery

One of the standout features available with many aftermarket alarm systems is GPS tracking. If your vehicle is stolen, a GPS-enabled alarm allows you to track its location in real time through a smartphone app or web portal. This information can be passed directly to the police, dramatically increasing the chances of recovering your vehicle quickly and in good condition. Without GPS tracking, a stolen vehicle can be stripped for parts or shipped out of the region before you even realise it’s gone.

Some premium aftermarket systems also allow for remote engine immobilisation. This means that if your car is stolen, you or the monitoring service can remotely disable the engine, bringing the vehicle to a safe stop. This kind of feature goes well beyond what any factory-fitted system offers and can be the difference between getting your car back and losing it for good.

Smartphone Integration and Real-Time Alerts

Modern aftermarket alarm systems often come with smartphone connectivity, allowing you to receive instant alerts if your alarm is triggered. Whether you’re at work in the Auckland CBD or at home in Avondale, you’ll know within seconds if something is happening to your vehicle. Many systems also let you arm, disarm, and check the status of your alarm remotely, giving you complete control from wherever you are.

This kind of real-time communication is something factory alarms simply don’t provide. With a factory system, you’re typically reliant on hearing the siren yourself or hoping a passer-by notices the alarm going off. Smartphone integration means you’re always in the loop, which can speed up your response time and improve the chances of preventing a theft before the vehicle is driven away.

Insurance Benefits

In some cases, having an aftermarket alarm installed can positively affect your car insurance premiums. Some insurance providers in New Zealand offer discounts or more favourable terms for vehicles fitted with approved aftermarket security systems. It’s worth checking with your insurer before installation, as the savings over time can help offset the cost of the alarm itself. Even where a direct discount isn’t offered, having a quality alarm system fitted can strengthen your position if you ever need to make a theft-related claim.

Insurers generally view aftermarket alarms as a sign that the vehicle owner is taking reasonable steps to protect their property. This can be particularly beneficial if you own a high-value European vehicle, which tends to attract higher premiums due to the increased risk of theft and the cost of replacement parts.

Potential Drawbacks to Consider

Upfront Cost

The most common concern about aftermarket alarms is the cost. A quality system, professionally installed, typically ranges from a few hundred dollars to over a thousand, depending on the features you choose. Basic systems with a siren, immobiliser, and remote are at the lower end, while systems with GPS tracking, smartphone integration, and advanced sensors sit at the higher end. For some vehicle owners, this upfront cost can feel significant, especially if the car itself isn’t particularly high in value.

However, it’s important to weigh this cost against the potential financial impact of a car theft. The inconvenience, the excess on your insurance policy, the loss of personal belongings inside the vehicle, and the potential increase in your premiums after a claim can all add up quickly. When you look at the numbers, a one-time investment in a quality alarm system often makes solid financial sense, particularly for vehicles that are commonly targeted by thieves.

False Alarms

False alarms are a frustration that some aftermarket alarm owners experience. A poorly installed or overly sensitive system can be triggered by heavy rain, strong winds, passing trucks, or even a cat jumping on the bonnet. Frequent false alarms are not only annoying for you and your neighbours, but they can also lead to complacency, where people start ignoring the alarm altogether because they assume it’s just going off for no reason.

The key to avoiding false alarms is professional installation and proper calibration. When an aftermarket alarm is fitted by an experienced auto electrician, the sensitivity of each sensor is carefully adjusted to suit your vehicle and the environment where it’s typically parked. This is one of the biggest reasons why professional installation matters so much. A DIY or budget installation might save you money upfront, but it can lead to ongoing headaches and a system that doesn’t perform reliably.

Compatibility with Your Vehicle’s Electrical System

Modern vehicles, especially European models like BMW, Audi, Mercedes-Benz, and Volkswagen, have highly complex electrical systems with multiple electronic control units communicating over CAN bus networks. Installing an aftermarket alarm on these vehicles requires specialist knowledge to ensure the new system integrates correctly without causing faults, warning lights, or interference with existing features like keyless entry, push-button start, or factory immobilisers.

A poorly integrated alarm can cause all sorts of issues, from battery drain to intermittent electrical faults that are difficult and expensive to diagnose. This is why it’s essential to have the work done by an auto electrician who has specific experience with your vehicle’s make and model. In Auckland, specialists who work regularly with European and Japanese vehicles are best placed to handle these installations correctly the first time.

Choosing the Right Aftermarket Alarm System

Assess Your Security Needs

Before choosing a system, think about what you actually need. If you park in a secure garage at home and a monitored car park at work, your requirements are different from someone who parks on the street overnight in a high-theft area. Consider factors like the value of your vehicle, how visible it is when parked, and whether you carry expensive equipment or tools in the car. A tradie who leaves tools in a work van in West Auckland has very different security needs from someone with a daily commuter car parked in a locked garage in Remuera.

It’s also worth thinking about the features that matter most to you. If vehicle recovery is your main concern, GPS tracking should be a priority. If deterrence is what you’re after, a system with a loud siren, flashing lights, and a visible LED indicator might be sufficient. An experienced auto electrician can help you match the right system to your situation and budget, so you’re not paying for features you don’t need or missing out on ones that could make a real difference.

Quality of Components

Not all aftermarket alarms are created equal. Cheaper systems sourced from generic suppliers may use lower-quality components that are more prone to failure and less effective at deterring theft. Look for well-known brands that are widely used and supported in New Zealand. Quality components are more reliable, come with better warranties, and are easier to service or upgrade down the track.

Your installer should be able to recommend reputable brands and explain the differences between the options available. Don’t be tempted to buy the cheapest unit you can find online and ask someone to fit it. The alarm itself is only as good as the installation, and pairing a quality product with professional fitting gives you the best possible outcome.

Professional Installation Is Essential

This point cannot be overstated. A professional installation by a qualified auto electrician is the single most important factor in getting a reliable, effective aftermarket alarm. The installer needs to understand your vehicle’s wiring, integrate the alarm with existing systems, mount sensors in the correct locations, and calibrate everything properly. Shortcuts during installation lead to problems later, including false alarms, battery drain, and even damage to your vehicle’s electrical system.

A professional installer will also ensure the alarm’s wiring is neatly routed and hidden, making it much harder for a thief to locate and disable the system. If the wiring is easily visible or accessible, a knowledgeable thief can bypass even the best alarm in a matter of minutes. Proper concealment of wiring and components is a hallmark of a quality installation.

The Auckland Context: Why It Matters Here

Auckland consistently sees some of the highest rates of vehicle-related crime in New Zealand. From opportunistic break-ins in shopping centre car parks to organised vehicle theft rings, the risks are real and varied. Suburbs across West Auckland, South Auckland, and even central areas experience regular vehicle crime, making security a practical concern for a wide range of drivers.

On top of that, Auckland’s diverse vehicle fleet means that thieves have a broad range of targets. Popular Japanese models like Toyota Hilux, Mazda Demio, and Subaru Legacy are frequently stolen due to their high demand for parts. European vehicles, while less commonly targeted in terms of volume, are attractive because of their higher resale value and the demand for their components. Regardless of what you drive, taking proactive steps to secure your vehicle is a sensible move in the Auckland environment.

It’s also worth noting that catalytic converter theft has become increasingly common across Auckland. While an alarm won’t prevent every type of theft, a system with tilt sensors and impact detection can alert you if someone is attempting to jack up your vehicle or work underneath it. This added layer of protection is something many Auckland vehicle owners are now considering when choosing an aftermarket alarm.

Aftermarket Alarms vs. Other Security Options

An aftermarket alarm is just one tool in the vehicle security toolkit. Steering wheel locks, wheel clamps, and gear shift locks provide a visible physical deterrent. Dash cameras with parking mode can record suspicious activity around your vehicle. GPS trackers that operate independently of an alarm system can be hidden in the vehicle as a dedicated recovery tool.

For most people, the best approach is a combination of measures. An aftermarket alarm provides active deterrence and real-time alerts, while a physical device like a steering wheel lock adds a visible obstacle. Together, these layers of security make your vehicle a much harder target. Your auto electrician can advise on the best combination of products based on your vehicle, your budget, and your typical parking situation.

Need Help Choosing and Installing an Aftermarket Alarm?

Adding an aftermarket alarm to your vehicle is a worthwhile investment for most Auckland drivers, particularly if your factory security system is basic or your vehicle is parked in higher-risk areas. The key is choosing the right system for your needs and having it professionally installed to avoid issues with false alarms, electrical faults, or poor integration with your vehicle’s existing systems.

At Eurosparx, we are experienced auto electricians based in Avondale, West Auckland, specialising in European and Japanese vehicles. We supply and install quality aftermarket alarm systems, ensuring full integration with your vehicle’s electrical system and proper calibration for reliable, hassle-free operation. Whether you need a straightforward alarm upgrade or a comprehensive security solution with GPS tracking and smartphone alerts, our team can help. Contact us today by calling 09 218 7789 or visit our website at eurosparx.co.nz to learn more about our services.

Frequently Asked Questions

Is an aftermarket alarm worth the cost?

For most vehicle owners in Auckland, an aftermarket alarm is a worthwhile investment. The upfront cost is relatively modest compared to the financial and personal impact of a vehicle theft. Quality systems offer features like GPS tracking, smartphone alerts, and advanced sensors that go well beyond what factory alarms provide, giving you significantly better protection and peace of mind.

Will an aftermarket alarm void my vehicle’s warranty?

A professionally installed aftermarket alarm should not void your vehicle’s warranty, provided the installation is done correctly and does not damage existing components. It is important to use a qualified auto electrician who understands your vehicle’s electrical system. If you have concerns, check with your vehicle’s manufacturer or dealer before proceeding with the installation.

How long does it take to install an aftermarket alarm?

Installation time depends on the complexity of the alarm system and the vehicle. A basic system can typically be installed in two to three hours, while a more advanced system with GPS tracking and multiple sensors may take half a day or more. Professional installation ensures everything is properly integrated, calibrated, and tested before you drive away.

Can an aftermarket alarm cause electrical problems in my car?

If installed incorrectly, an aftermarket alarm can cause issues such as battery drain, warning lights, or interference with factory systems. This is why professional installation by a qualified auto electrician is essential. An experienced installer will integrate the alarm with your vehicle’s existing wiring and electronics without causing faults or long-term problems.

Do aftermarket alarms work with keyless entry and push-button start vehicles?

Yes, quality aftermarket alarm systems are designed to work with modern vehicles that have keyless entry and push-button start. However, these vehicles require more careful installation due to their complex electrical architecture. A specialist auto electrician with experience in European and Japanese vehicles will know how to integrate the alarm without affecting your existing keyless and start systems.

What features should I look for in an aftermarket alarm?

Key features to consider include a loud siren, LED dashboard indicator, impact and tilt sensors, glass-break detection, GPS tracking, and smartphone integration. The right combination depends on your vehicle, where you park, and your budget. An auto electrician can assess your situation and recommend a system that offers the best protection for your specific needs.
Categories
Air Conditioning Car Accessories

Guide to Adding Rear Entertainment Systems to Family Vehicles

Long drives with children can be challenging, especially when boredom sets in and the familiar chorus of “are we there yet?” begins. Rear entertainment systems have become an increasingly popular solution for Auckland families looking to make their journeys more enjoyable for everyone in the vehicle. This article will explore everything you need to know about adding rear entertainment systems to your family vehicle, from the different types available to installation considerations and the benefits they offer.

Types of Rear Entertainment Systems Available

Overhead Flip-Down Monitors

Overhead flip-down monitors remain one of the most popular choices for family vehicles in Auckland. These systems mount to the ceiling of your vehicle, typically between the front and rear seats, and flip down when in use. When not needed, they fold flat against the roof, keeping them out of the way and maintaining a clean interior appearance. Modern flip-down monitors come in various sizes, ranging from 10 inches to 17 inches or larger, giving you flexibility based on your vehicle’s interior space and your family’s viewing preferences.

These monitors often come with built-in DVD players, though many newer models also include HDMI inputs, USB ports, and wireless connectivity options. This means your children can watch movies, play video games through a connected console, or stream content from tablets and smartphones. The central mounting position ensures that all rear passengers have a clear view of the screen, making it an excellent choice for vehicles that regularly carry multiple children.

Headrest-Mounted Screens

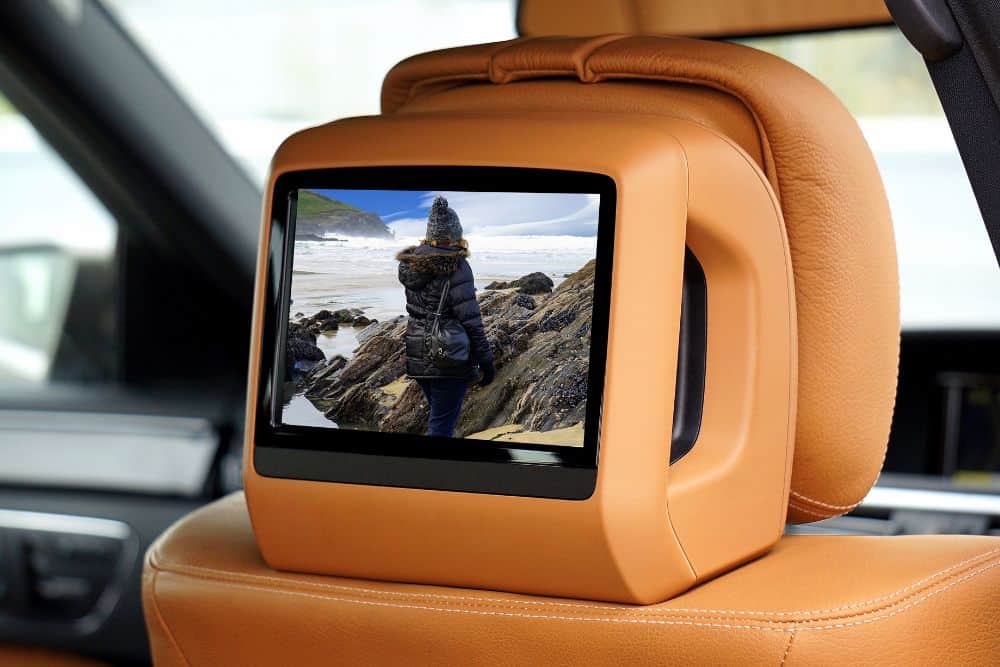
Headrest-mounted entertainment systems offer a different approach, with individual screens built into or attached to the back of the front seat headrests. This setup provides each rear passenger with their own dedicated screen, which can be particularly beneficial when children have different viewing preferences. One child might want to watch a cartoon while another prefers to play a video game, and headrest systems make this possible without any arguments over what to watch.

These systems come in two main varieties: replacement headrests with built-in screens and portable units that attach to existing headrests. Replacement headrests provide a more integrated, factory-fitted appearance and are permanently installed in the vehicle. Portable options offer more flexibility, as they can be moved between vehicles or removed entirely when not needed. Many headrest systems now include wireless headphone capabilities, allowing passengers to listen to their content without disturbing others in the vehicle.

Portable and Tablet-Based Solutions

For families who want flexibility without permanent installation, portable entertainment solutions offer an attractive alternative. These systems typically involve mounting brackets or holders that secure tablets or portable DVD players to the back of front seats. While not as integrated as built-in options, they provide a cost-effective entry point into rear entertainment and can easily be transferred between vehicles.

Many Auckland families choose to use iPads or Android tablets with purpose-built vehicle mounts. These setups take advantage of the tablets’ existing content libraries, streaming capabilities, and app ecosystems. When combined with a quality mount and perhaps a dedicated vehicle power supply, tablets can provide an entertainment experience that rivals dedicated systems. Some families prefer this approach because the devices can also be used outside the vehicle for other purposes.

Key Features to Look For

Screen Quality and Size

When selecting a rear entertainment system, screen quality should be a primary consideration. Higher resolution screens provide clearer images and are easier on young eyes during extended viewing sessions. Look for systems that offer at least 1080p resolution, as this has become the standard for modern entertainment. Screen size matters too, but bigger is not always better. The ideal size depends on your vehicle’s interior dimensions and the typical viewing distance for rear passengers.

Anti-glare coatings are another important feature to consider, particularly for New Zealand’s bright sunny conditions. A screen that becomes washed out in direct sunlight will frustrate passengers and limit when the system can be used effectively. Quality systems incorporate coatings and screen technologies that maintain visibility even when light enters the vehicle from various angles.

Audio Options

Sound management is crucial in a vehicle environment where the driver needs to concentrate on the road. The best rear entertainment systems offer multiple audio output options to suit different situations. Wireless Bluetooth headphones allow children to enjoy their content at whatever volume they prefer without affecting the driver or other passengers. Many systems support multiple headphone connections simultaneously, so each child can have their own set.

For times when headphones are not desired, quality systems can route audio through the vehicle’s existing speaker system. This might be appropriate for family movie time during long holiday drives when everyone wants to watch and listen together. Some systems also include built-in speakers in the monitor itself, providing a middle-ground option that keeps sound localised to the rear seating area.

Connectivity and Input Options

Modern rear entertainment systems should offer a variety of input options to accommodate different media sources. HDMI inputs allow connection of gaming consoles, streaming devices, and other external equipment. USB ports enable playback of content stored on flash drives and can also charge mobile devices. Some systems include SD card slots for easy playback of downloaded movies and shows.

Wireless connectivity has become increasingly important in rear entertainment systems. Screen mirroring capabilities allow content from smartphones and tablets to be displayed on the vehicle’s screens without physical cables. This feature is particularly useful for streaming services that may not have direct compatibility with the entertainment system. Built-in WiFi in some premium systems even allows direct streaming when the vehicle is within range of a hotspot or when connected to a mobile data source.

Installation Considerations for Auckland Vehicles

Professional Installation Benefits

While some rear entertainment systems are marketed as DIY installations, professional installation offers significant advantages that make it worthwhile for most Auckland families. A qualified auto electrician understands how to properly integrate the system with your vehicle’s electrical system, ensuring reliable operation without risking damage to existing components. Professional installation also ensures that wiring is properly routed and concealed, maintaining your vehicle’s interior appearance.

Safety is another critical reason to choose professional installation. Rear entertainment systems must be securely mounted to prevent them from becoming projectiles in the event of sudden braking or an accident. An experienced installer knows how to properly anchor these systems and will ensure all mounting hardware is rated for automotive use. They will also position screens and cables so they do not interfere with seatbelts, airbags, or other safety equipment.

Professional installers can also advise on the best system and configuration for your specific vehicle and family needs. They understand the electrical demands of different systems and can ensure your vehicle’s alternator and battery can handle the additional load. This expertise helps avoid electrical issues after installing aftermarket accessories like premature battery drain or blown fuses that can occur with improper installations.

Vehicle-Specific Considerations

Different vehicle types present different installation challenges and opportunities. SUVs and minivans typically offer ample headroom for overhead flip-down monitors and often have existing power points that can be utilised. Smaller vehicles may be better suited to headrest-mounted systems or compact overhead units that do not compromise headroom for rear passengers.

The electrical system capacity of your vehicle is another important consideration. Older vehicles may require upgrades to handle the power demands of modern entertainment systems, particularly if you plan to run multiple screens, gaming consoles, or other high-draw accessories simultaneously. A professional auto electrician can assess your vehicle’s capacity and recommend any necessary upgrades to ensure reliable operation.

Some newer vehicles come pre-wired for rear entertainment systems, even if they were not originally equipped with one. Taking advantage of this existing wiring can simplify installation and reduce costs. Your installer can determine whether your vehicle has this wiring and the best way to utilise it.

Benefits of Rear Entertainment Systems for Families

Peaceful and Enjoyable Journeys

The most immediate benefit of a rear entertainment system is the transformation of travel time for both children and parents. Children who are engaged with movies, shows, or games are far less likely to become restless or disruptive during long journeys. This allows parents to focus on driving without constant interruptions, making travel safer and more relaxing for everyone. Many Auckland families report that rear entertainment systems have completely changed their experience of long drives to holiday destinations.

Beyond simply keeping children occupied, entertainment systems can make car time something children actually look forward to. Instead of dreading long trips, kids may become excited about the opportunity to watch their favourite shows or play games. This positive association with travel can make family outings more frequent and enjoyable, as parents no longer avoid longer drives due to concerns about children’s behaviour.

Educational Opportunities

Rear entertainment systems are not limited to passive entertainment. Many families use travel time for educational content, turning drives into learning opportunities. Educational programmes, audiobooks, and learning apps can all be enjoyed through a properly equipped entertainment system. Some parents find that their children are actually more receptive to educational content during car journeys, perhaps because there are fewer distractions than at home.

Language learning programmes, nature documentaries, and historical content can all be incorporated into family travel time. For Auckland families with children of different ages, individual headrest screens allow each child to engage with age-appropriate educational material. This flexibility means that a teenager studying for exams can watch revision content while a younger sibling enjoys an educational cartoon.

Value Addition to Your Vehicle

A professionally installed rear entertainment system can add value to your vehicle when it comes time to sell or trade in. Family-oriented buyers actively seek vehicles with entertainment features, and a quality system can make your vehicle more attractive in the competitive used car market. The key is ensuring the installation is done professionally, as poorly installed aftermarket systems can actually detract from a vehicle’s value.

Quality systems from reputable brands that are properly integrated with the vehicle’s interior will always command better resale value than cheap alternatives that look out of place. When choosing a system, consider it as an investment in both your family’s current enjoyment and your vehicle’s future value.

Need Help Adding Rear Entertainment to Your Family Vehicle?

Adding a rear entertainment system to your family vehicle can transform your travel experiences and bring peace to every journey with your children. As Auckland’s trusted auto electricians, Eurosparx can help you select and professionally install the perfect entertainment system for your vehicle and family needs. Contact our team today by calling 09 218 7789 to discuss your options and book an installation.

Categories
Car Accessories

How to Avoid Electrical Issues After Installing Aftermarket Accessories

Installing aftermarket accessories in your vehicle can significantly improve its functionality and appearance, but without proper electrical knowledge and installation techniques, these modifications can lead to serious electrical problems. From blown fuses and drained batteries to complete electrical system failures, the consequences of improper installation can be costly and potentially dangerous. Understanding the correct methods for integrating aftermarket accessories into your vehicle’s electrical system is essential for maintaining reliability and safety.

Essential Steps for Safe Aftermarket Accessory Installation

Calculate Your Vehicle’s Electrical Load Capacity

Before installing any aftermarket accessory, you need to determine whether your vehicle’s electrical system can handle the additional load. Every vehicle has a specific alternator output capacity, typically ranging from 70 to 150 amps in standard passenger vehicles. To calculate available capacity, add up the current draw of all existing electrical components when they’re operating simultaneously, then subtract this total from your alternator’s maximum output. This calculation tells you how much spare capacity you have for additional car accessories.

Most vehicles in Auckland operate with approximately 20-30% spare electrical capacity under normal conditions. However, this margin can quickly disappear when you factor in peak loads during cold starts or when multiple systems are running. For high-draw accessories like powerful sound systems, auxiliary lighting, or winches, you may need to upgrade your alternator or install a secondary battery system to prevent overloading.

Use Appropriate Wiring and Fuses

Selecting the correct wire gauge is crucial for preventing electrical fires and ensuring your accessories function properly. Wire gauge requirements depend on two main factors: the current draw of the accessory and the length of the wire run. For example, a 20-amp accessory with a 10-foot wire run requires at least 12-gauge wire, while a 5-amp accessory might only need 18-gauge wire for the same distance. Using undersized wire causes resistance buildup, leading to heat generation, voltage drops, and potential fire hazards.

Every aftermarket accessory must have its own properly sized fuse installed as close to the power source as possible. The fuse rating should be approximately 25% higher than the accessory’s normal operating current but lower than the wire’s maximum capacity. For instance, if your accessory draws 8 amps during normal operation, use a 10-amp fuse with wire rated for at least 15 amps. This configuration protects both the accessory and your vehicle’s electrical system from damage due to short circuits or overloads.

Establish Proper Grounding Connections

Poor grounding is one of the most common causes of electrical issues with aftermarket accessories. A proper ground connection requires direct metal-to-metal contact with the vehicle’s chassis or a designated grounding point. Remove any paint, rust, or coating from the grounding location to ensure optimal conductivity. The ground wire should be the same gauge or larger than the positive wire to handle return current effectively.

In modern vehicles, especially those common in Auckland’s varied climate conditions, corrosion at ground points can develop quickly due to moisture and road salt exposure. Use dielectric grease on ground connections to prevent corrosion while maintaining conductivity. For high-current accessories, consider running a dedicated ground wire directly to the battery’s negative terminal rather than relying on chassis grounds, which can introduce resistance and interference into sensitive electronic systems.

Common Mistakes That Lead to Electrical Problems

Tapping Into Existing Circuits

One of the most frequent errors DIY installers make is connecting aftermarket accessories to existing vehicle circuits without considering the circuit’s capacity. Factory wiring and fuses are designed to handle specific loads, and adding extra accessories can cause fuses to blow repeatedly or, worse, overheat wiring harnesses. This practice is particularly risky with modern vehicles that have complex multiplexed wiring systems where a single wire might carry signals for multiple components.

Instead of tapping into existing circuits, run dedicated power lines directly from the battery or fuse box using an auxiliary fuse holder or distribution block. This approach ensures your aftermarket accessories have their own protected circuits that won’t interfere with factory systems. Many vehicles have empty slots in the fuse box specifically designed for auxiliary accessories, making this the safest connection point for new electrical loads.

Ignoring Voltage Sensitive Systems

Modern vehicles contain numerous voltage-sensitive electronic control units (ECUs) that can be damaged or disrupted by voltage spikes, electromagnetic interference, or improper wiring practices. Installing high-power accessories like amplifiers or inverters without proper isolation can create electrical noise that interferes with engine management systems, ABS controllers, or infotainment systems. These issues often manifest as intermittent faults, warning lights, or erratic behaviour that can be difficult to diagnose.

To protect sensitive electronics, install noise suppressors or filters on high-current accessories, keep power cables separated from signal wires, and use shielded cables where appropriate. When installing audio equipment, maintain at least 45 centimetres of separation between power and signal cables, crossing them at 90-degree angles when necessary. For accessories that create significant electrical noise, such as HID lighting ballasts or large inverters, consider installing them in locations away from sensitive electronic modules.

Professional Installation Considerations

When to Seek Expert Help

While many basic accessories can be installed by competent DIY enthusiasts, certain modifications require professional expertise to avoid costly mistakes. Any installation involving airbag systems, CAN-bus integration, or modifications to factory wiring harnesses should be handled by qualified auto electricians. These systems are not only complex but can also affect vehicle safety and warranty coverage if improperly modified.

Professional installation becomes particularly important for high-value vehicles or those with sophisticated electrical architectures. European vehicles, which are common on Auckland roads, often have particularly complex electrical systems that require specialised diagnostic tools and programming procedures when adding accessories. Attempting to install accessories without proper knowledge of these systems can trigger fault codes, disable features, or cause permanent damage to expensive control modules.

Cost Versus Risk Analysis

While professional installation might seem expensive initially, it often proves more economical than repairing damage caused by improper DIY installation. The cost of replacing a damaged ECU, which can range from $500 to $3000 or more, far exceeds typical installation fees. Professional auto electricians also provide warranties on their work, giving you recourse if problems arise after installation.

Furthermore, professional installers have access to vehicle-specific wiring diagrams, proper crimping tools, and diagnostic equipment that ensure installations meet manufacturer specifications. They understand how to integrate accessories without voiding vehicle warranties and can often identify potential issues before they become problems. This expertise is particularly valuable for complex installations involving multiple accessories or integration with factory systems.

Maintaining Your Vehicle’s Electrical System After Modifications

Regular Inspection and Testing

After installing aftermarket accessories, establish a routine inspection schedule to catch potential problems early. Check all connections monthly for signs of corrosion, loosening, or heat damage. Look for discoloured wiring insulation, which indicates overheating, and test fuses to ensure they’re not running near their maximum capacity. Battery terminals and ground connections deserve special attention, as these are common failure points that can affect your entire electrical system.

Use a multimeter to periodically check voltage levels at various points in your electrical system. With the engine running, battery voltage should read between 13.5 and 14.5 volts, indicating proper charging system operation. Measure voltage drop across connections and fuses – anything over 0.2 volts suggests resistance that needs addressing. These simple tests can identify developing problems before they cause accessory failure or damage to your vehicle’s electrical system.

Documentation and Future Planning

Maintain detailed records of all electrical modifications, including wiring diagrams, fuse ratings, and connection points. This documentation proves invaluable for troubleshooting issues, performing future modifications, or when selling the vehicle. Take photographs during installation showing wire routing and connection locations, as these details are easily forgotten but crucial for maintenance or removal.

Plan for future electrical needs when installing your initial accessories. Installing a larger gauge main power wire or a distribution block with extra terminals now can save significant time and effort when adding accessories later. Consider the cumulative effect of multiple accessories on your electrical system, and be prepared to upgrade components like the alternator or battery if you continue adding electrical loads.

Need Help With Your Vehicle’s Electrical System?

Installing aftermarket accessories safely requires careful planning, proper materials, and thorough understanding of automotive electrical systems. By following correct installation procedures, using appropriate components, and recognising when professional help is needed, you can enjoy your vehicle modifications without experiencing electrical problems.

As experienced auto electricians in Auckland, Eurosparx specialises in the professional installation of aftermarket accessories and resolving electrical issues in all vehicle makes and models. Our team ensures your modifications are installed safely and correctly, protecting both your investment and your vehicle’s electrical system. Contact our expert team today by calling 09 218 7789 to discuss your aftermarket accessory installation needs.

Categories
Car Accessories

What’s Involved in Retrofitting Parking Sensors in Older Vehicles?

Retrofitting parking sensors to older vehicles has become increasingly popular as drivers seek to add modern safety features to their trusted cars. This comprehensive guide explores the entire process of installing parking sensors in vehicles that didn’t originally come equipped with them, from selecting the right system to understanding the installation requirements and costs involved.

The Complete Process of Retrofitting Parking Sensors

Retrofitting parking sensors involves installing ultrasonic or electromagnetic sensors into your vehicle’s bumpers to detect obstacles when reversing or parking. The process begins with selecting an appropriate parking sensor kit that matches your vehicle’s specifications and your personal requirements. Most retrofit kits include four to eight sensors, a control unit, a display or audible warning system, and all necessary wiring harnesses.

The installation process starts with carefully measuring and marking the exact positions where sensors will be mounted on your bumper. Professional installers use templates to ensure sensors are evenly spaced and positioned at the correct height, typically 50-60 centimetres from the ground. This precise placement is crucial for optimal detection range and accuracy, as sensors positioned too high might miss low obstacles while those too low could trigger false warnings from the road surface.

Once positions are marked, holes must be drilled through the bumper using specialised drill bits that match the sensor diameter exactly. This step requires extreme precision, as bumpers on older vehicles may be made from various materials including steel, fibreglass, or early plastics that each require different drilling techniques. After drilling, sensors are inserted and secured, with careful attention paid to ensuring they sit flush with the bumper surface for both aesthetic and functional reasons.

Types of Parking Sensor Systems Available

Ultrasonic Sensor Systems

Ultrasonic parking sensors are the most common choice for retrofitting and work by emitting sound waves that bounce off nearby objects. These systems typically include four sensors for rear installation, though front sensors can also be added for comprehensive coverage. The sensors connect to a central control unit that processes distance information and triggers appropriate warnings through beepers or visual displays. Modern ultrasonic systems can detect objects from as far as 2.5 metres away and provide graduated warnings as you approach obstacles.

The sophistication of ultrasonic systems varies considerably, with basic models offering simple beeping alerts while advanced versions feature LCD displays showing exact distances and obstacle positions. Some premium retrofit kits include wireless connectivity, allowing integration with aftermarket head units or smartphone apps for enhanced visualisation of your vehicle’s surroundings.

Electromagnetic Sensor Systems

Electromagnetic parking sensors offer a different approach, using an electromagnetic field created by a strip mounted inside the bumper. These systems don’t require drilling holes in your bumper, making them particularly attractive for vintage or collectible vehicles where maintaining original bodywork is important. The electromagnetic strip creates an invisible detection field behind your vehicle, alerting you when objects enter this zone.

While electromagnetic systems offer easier installation and preserve bumper integrity, they generally provide less precise distance information than ultrasonic sensors. They work best for detecting large obstacles but may struggle with smaller objects or those made from materials that don’t interact strongly with electromagnetic fields. The detection range is also typically shorter, usually extending only about one metre from the bumper.

Camera-Based Systems

Though not technically parking sensors, many older vehicle owners choose to combine sensor retrofitting with reversing camera installation for maximum safety. Modern retrofit camera systems can integrate with parking sensors to provide both visual and audible assistance. These systems require additional wiring to connect the camera to a display screen, which might be mounted on the dashboard or integrated into the rear-view mirror.

Electrical Integration and Wiring Requirements

The electrical aspect of retrofitting parking sensors requires careful integration with your vehicle’s existing systems. The sensor system needs to connect to your vehicle’s reverse light circuit to activate automatically when you engage reverse gear. This involves locating the reverse light wire, typically found in the boot area or under the vehicle, and making a secure connection that won’t interfere with other electrical systems.

Power supply for the system usually comes from the vehicle’s 12V electrical system, requiring connections to both positive and negative terminals. Professional installers use automotive-grade connectors and proper insulation to ensure these connections remain secure and weatherproof. The wiring must be routed carefully through the vehicle’s body, often requiring removal of interior panels to hide cables and protect them from damage.

Older vehicles may present unique electrical challenges, particularly those with 6-volt systems or positive earth configurations found in classic cars. These vehicles require special voltage converters or modified sensor systems designed to work with non-standard electrical configurations. Some vintage vehicles may also lack sufficient electrical capacity to power modern sensor systems without upgrading the alternator or battery.

Installation Costs and Time Requirements

Professional installation of parking sensors in Auckland typically ranges from $400 to $1,200, depending on the complexity of the system and your vehicle’s specific requirements. Basic four-sensor rear systems sit at the lower end of this range, while comprehensive eight-sensor systems with front and rear coverage command premium prices. The sensor kit itself usually costs between $150 and $500, with installation labour accounting for the remainder.

Installation time varies considerably based on vehicle type and system complexity. A straightforward rear sensor installation on a modern vehicle might take two to three hours, while fitting sensors to a classic car with unique bumper materials or electrical systems could require a full day’s work. Vehicles with plastic bumpers that require painting after sensor installation will need additional time for paint matching and curing.

Some installations require extra work that increases both time and cost. Vehicles with spare wheels mounted on the rear, tow bars, or unusual bumper designs may need custom sensor positioning or additional brackets. Cars with existing parking aid systems that have failed might require complete removal of old components before new sensors can be installed, adding to labour costs.

Important Considerations for Older Vehicles

Bumper Material and Condition

Older vehicles often have bumpers made from materials that present installation challenges. Chrome bumpers on classic cars require special drilling techniques and may need reinforcement to support sensors properly. Rust or corrosion in metal bumpers must be addressed before installation, as sensors won’t function correctly if not mounted securely. Some vintage vehicles have bumpers that are too thin or fragile to support standard sensors, requiring creative mounting solutions or specially designed sensor brackets.

The aesthetic impact on classic or collectible vehicles deserves careful consideration. While parking sensors improve safety, visible sensors on a restored vintage car might affect its value or appearance at car shows. Some owners choose colour-matched sensors or systems designed specifically for classic cars that minimise visual impact while still providing modern safety benefits.

System Calibration and Testing

After installation, parking sensors require careful calibration to work effectively with your specific vehicle. This involves adjusting sensitivity settings to account for permanent fixtures like tow bars or spare wheel carriers that might trigger false warnings. The warning distances must be programmed to suit your vehicle’s size and your personal preferences, with different zones for initial warning, cautionary, and danger alerts.

Testing the system thoroughly involves checking detection ranges at various heights and angles, ensuring all sensors respond correctly, and verifying that warning systems activate at appropriate distances. Professional installers use calibrated test objects to verify sensor accuracy and adjust settings for optimal performance. This calibration process is particularly important for older vehicles with non-standard dimensions or unusual body shapes.

Compatibility with Other Vehicle Systems

Retrofitting parking sensors to older vehicles requires careful consideration of compatibility with existing or planned modifications. If your vehicle has an aftermarket stereo system, you’ll need to ensure the parking sensor display can integrate properly or find alternative warning methods. Vehicles with modified exhausts or lowered suspensions might require adjusted sensor positioning to maintain proper detection angles and avoid interference from vehicle modifications.

Future modifications should also be considered when planning sensor installation. If you intend to fit a tow bar, bike rack, or other rear-mounted accessories, sensor positioning must accommodate these additions. Some sensor systems offer programmable modes that can be activated when towing or carrying rear-mounted loads, preventing false warnings while maintaining safety when these accessories aren’t in use.

Maintenance and Long-term Reliability

Parking sensors retrofitted to older vehicles require regular maintenance to ensure continued reliable operation. Sensors should be cleaned periodically to remove dirt, mud, or ice that can affect their sensitivity. In Auckland’s coastal environment, salt spray can corrode sensor surfaces and electrical connections, making regular inspection and cleaning particularly important for vehicles frequently driven near beaches.

The longevity of retrofitted parking sensors depends largely on installation quality and component selection. Professional-grade sensors with proper weatherproofing typically last eight to ten years, though sensors on vehicles regularly exposed to harsh conditions may require replacement sooner. Wiring connections should be inspected annually for signs of corrosion or damage, particularly in older vehicles where existing electrical issues might affect sensor system reliability.

When sensors fail, individual units can usually be replaced without replacing the entire system, provided compatible replacements are available. However, finding replacement sensors for older retrofit kits can become challenging over time, making it worth considering future car parts availability when selecting a system. Keeping documentation about your sensor system’s make and model ensures you can source compatible replacements when needed.

Need Expert Help With Parking Sensor Installation?

Retrofitting parking sensors to older vehicles involves selecting the right system type, ensuring proper installation and electrical integration, and considering your vehicle’s specific requirements and limitations. While the process requires technical expertise and careful attention to detail, the added safety and convenience make it a worthwhile upgrade for many older vehicle owners.

As auto electricians in Auckland, Eurosparx specialises in retrofitting modern safety features like parking sensors to vehicles of all ages. Our experienced team can assess your vehicle’s requirements, recommend the most suitable sensor system, and ensure professional installation that maintains your vehicle’s integrity while adding valuable safety features. Contact our team today by calling 09 218 7789 to discuss how we can help modernise your vehicle with parking sensors.

Categories
Car Accessories

Can You Add Apple CarPlay or Android Auto to an Older Car?

Many drivers across New Zealand are eager to bring modern technology into their older vehicles, and one of the most desired features is Apple CarPlay or Android Auto. If you own an older car but want the convenience of using your phone hands-free, navigating with Google Maps, or streaming music seamlessly, this article is for you. We’ll explain how adding Apple CarPlay or Android Auto to your older vehicle is possible, what the installation process involves, and what you should know before getting started.

Installing Apple CarPlay or Android Auto in an Older Car

Retrofitting Through Aftermarket Head Units

The most practical approach to integrating Apple CarPlay or Android Auto into an older car is by replacing the existing stereo system with an aftermarket head unit. These units are designed to support smartphone connectivity and deliver a user experience similar to that found in modern vehicles. Popular brands like Pioneer, Kenwood, Alpine, and Sony offer models that are CarPlay and Android Auto compatible.

Aftermarket head units come in various sizes, including standard single-DIN and double-DIN formats. It’s important to check which format fits your vehicle. Many older cars have double-DIN spaces, which are ideal for large touchscreen displays. If your car only allows single-DIN units, some models come with pop-out or fold-up screens, still offering full CarPlay or Android Auto functionality.

Professional Installation Is Recommended

While some DIY enthusiasts may attempt to install a new head unit themselves, professional installation is recommended—especially if you want a tidy, seamless finish. Wiring must be correctly configured to link your car’s existing power supply, speaker system, and steering wheel controls, where applicable. A professional auto electrician like Eurosparx in New Zealand can ensure the system is installed safely and functions as expected.

Professional services also reduce the risk of damaging the vehicle’s internal electronics. Some installations may require integration with factory amplifier systems, reversing cameras, or dashboard trimming. Trained technicians have the tools and experience to manage these complexities efficiently.

Wireless vs. Wired CarPlay/Android Auto

Depending on the head unit you choose, you may get wired or wireless CarPlay or Android Auto. Wired options use a USB connection, which keeps your phone charging while in use. Wireless systems connect via Bluetooth or Wi-Fi, offering more freedom but requiring a compatible phone and head unit.

Keep in mind that wireless systems tend to cost more, and some users report minor connection lags. However, wireless options provide a cleaner cabling solution and add convenience, especially during short trips where plugging in a cable may seem like a hassle.

Smartphone Compatibility Requirements

Apple CarPlay requires an iPhone 5 or later running iOS 7.1 or newer. Android Auto generally supports Android 6.0 (Marshmallow) and later. Before making any investments, ensure your mobile phone is compatible with the system you plan to install. This ensures a smooth user experience and avoids unexpected issues after installation.

While most modern smartphones support these systems, check with an expert such as Eurosparx to verify compatibility with your specific phone model and the aftermarket unit you are considering. This will prevent any costly surprises during or after the installation process.

Additional Factors to Consider Before Installation

Vehicle Dashboard and Aesthetic Integration

Older vehicles often have dashboards that weren’t designed to house modern infotainment systems. This raises the question of how neatly a new head unit will fit and whether trimming or panel modifications will be required. Some installers use customised fascia kits to create a factory-style finish so the upgraded head unit doesn’t look out of place.

If maintaining the aesthetic integrity of your classic car is important to you, be sure to discuss dashboard integration with the installer beforehand. Eurosparx has experience customising installations to match a wide range of interiors, ensuring the upgraded system doesn’t detract from your car’s original look.

Reversing Camera and Parking Sensor Integration

Many aftermarket units that support Apple CarPlay or Android Auto also offer integration with reversing cameras or parking sensors. If your older vehicle lacks these features, upgrading your head unit can be a great opportunity to install additional driving aids for safety and convenience.

Integrating a reversing camera doesn’t just improve parking; it also enhances rear visibility, making driving safer overall. Eurosparx can advise on compatible camera systems and assist with professional installation tailored to your vehicle.

Steering Wheel Control Compatibility

If your existing car has steering wheel audio controls, you may want to retain functionality with your new system. Some aftermarket head units are compatible with steering wheel controls, but an additional interface module may be needed to connect everything properly.

This functionality allows you to change music tracks, answer calls, or adjust volume without taking your hands off the wheel. Eurosparx carries interface kits and can program them to work with your vehicle’s electrical system.

Cost of Installation

The total cost of adding CarPlay or Android Auto to an older vehicle depends on several factors, including the brand and features of the head unit, required accessories, and labour fees. Entry-level compatible head units start from a few hundred dollars, while more advanced options can exceed $1000 NZD.

Installation costs vary based on the vehicle’s complexity. Additional features like reversing cameras, fascia kits, or steering control modules add to the final price. For a tailored quote, it’s best to consult with a qualified auto electrician such as Eurosparx, who can assess your vehicle and recommend solutions that meet your technology needs and budget.

Why Adding CarPlay or Android Auto Is Worth It

Enhanced Driving Safety

One of the greatest advantages of using Apple CarPlay or Android Auto is enhanced safety. By enabling hands-free calling, voice-controlled navigation, and minimised phone distractions, drivers can focus more on the road. Instead of fumbling through your phone’s interface, important apps are simplified and displayed on the head unit’s screen for easier use.

This compliance with road safety laws is especially important in New Zealand, where using a mobile phone while driving carries significant penalties. Installing such a system can help avoid legal issues while improving overall safety for yourself and other road users.

Improved Navigation and Travel Experience

Navigation apps like Google Maps, Waze, or Apple Maps update in real time, helping drivers avoid traffic, find the fastest routes, and reach destinations efficiently. These apps also provide voice guidance, live traffic updates, and alternative route suggestions, making them far superior to traditional GPS units or printed maps.

Whether you’re exploring new places across the North Island or making regular commutes around Auckland, having reliable navigation at your fingertips can vastly improve your journey. It also allows for quick searching of fuel stations, cafés, or accommodation along your route.

Entertainment on the Go

Apple CarPlay and Android Auto support a variety of entertainment apps, including Spotify, Audible, YouTube Music, and Podcasts. This makes daily drives or long road trips far more enjoyable. Having easy access to your audio entertainment system enhances driver experience without compromising on safety.

Passengers can also benefit, with easier control over media playlists and better quality audio when your system is upgraded with modern head units and improved speaker configurations.

Increased Vehicle Value

Fitting your older car with Apple CarPlay or Android Auto can actually increase its desirability and resale value. Many used car buyers in New Zealand are looking for vehicles with modern features. Having a professionally installed infotainment system makes your car more competitive in the market.

Although it’s not a guarantee of increased resale value, the presence of a name-brand infotainment upgrade can have a positive impact when it comes time to sell or trade in your vehicle.

Get Expert Assistance with Apple CarPlay or Android Auto Installations

Adding Apple CarPlay or Android Auto to your older vehicle is not only possible—it’s a smart upgrade for better safety, comfort, and resale value. Whether you want clearer navigation, easier communication, or a modern entertainment system, professional installation is key to enjoying all these benefits worry-free.

As expert auto electricians in New Zealand, Eurosparx can help you choose the right components and ensure a seamless, professional installation. Contact our team today by calling 09 218 7789.