Eurosparx

Categories
Car Batteries

Why European Cars Need Special Battery Registration

If you’ve ever replaced a battery in a European car, you may have noticed that simply swapping out the old battery for a new one isn’t enough. Most modern European vehicles require a process called battery registration, which tells the car’s computer system that a new battery has been installed. Skipping this step can lead to charging problems, premature battery failure, and even damage to other electrical components. This article covers why European cars need special battery registration, what happens if you skip it, and how the process works.

Why Do European Cars Require Battery Registration?

European cars require battery registration because their charging systems are controlled by an intelligent battery management system (BMS) that monitors and adapts to the condition of the battery over time. When a battery ages, its ability to hold and accept charge changes. The BMS adjusts the charging voltage and current to match the battery’s condition, which helps extend its life and keep the electrical system running efficiently. Without registration, the car’s computer doesn’t know a new battery has been installed and continues to charge it as though it were the old, degraded one.

This intelligent approach to battery management is a hallmark of European manufacturers like BMW, Mercedes-Benz, Audi, Volkswagen, and Porsche. These brands have led the way in adopting complex electronic architectures that rely heavily on software to manage everything from engine performance to comfort features. The battery sits at the centre of all of this, providing the power that keeps every system running. Because of this, the BMS needs accurate information about the battery’s age, capacity, and type to manage charging correctly.

Japanese and other non-European vehicles are increasingly adopting similar systems, but European cars have used this technology for much longer and in more advanced ways. For Auckland drivers who own European vehicles, understanding battery registration is essential to avoiding costly electrical problems down the line.

What Is a Battery Management System?

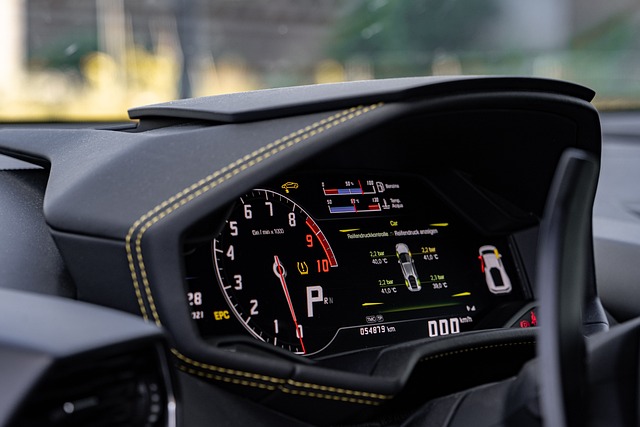
A battery management system is an electronic control module that constantly monitors the state of your car’s battery. It tracks data points like the battery’s state of charge, state of health, voltage, temperature, and the number of charge and discharge cycles it has been through. Using this data, the BMS communicates with the alternator to control exactly how much charge the battery receives. This is a far cry from older vehicles, where the alternator simply pushed a fixed charge into the battery regardless of its condition.

In many European cars, the BMS also controls rest current management. When the car is parked and turned off, various modules continue to draw small amounts of power for things like alarm systems, keyless entry, and onboard memory. The BMS decides which modules can remain active and which should be shut down to preserve battery life. If the system doesn’t have accurate information about the battery, it can’t make these decisions correctly, which can lead to a flat battery or modules not functioning as expected.

What Happens During Battery Registration?

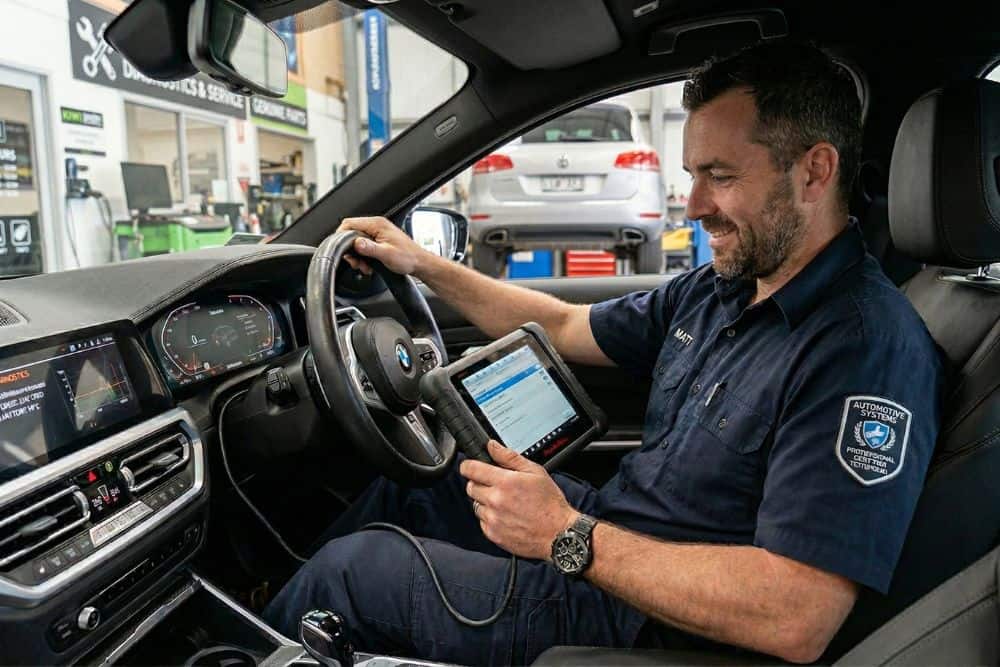
Battery registration is a software-based process carried out using a diagnostic tool that communicates with the car’s onboard computer. During registration, the technician inputs the details of the new battery, including its capacity (measured in amp hours), its type (such as AGM, EFB, or standard lead-acid), and its serial number or part number. The car’s BMS then resets its internal counters, clearing all the historical data it had stored about the old battery. From that point forward, it treats the battery as new and adjusts its charging strategy accordingly.

On some vehicles, particularly BMWs and Mercedes-Benz models, the registration process also involves coding the battery. This means the car’s software is updated to recognise the specific type and specification of the replacement battery. If the wrong battery type is coded in, or if the process is skipped entirely, the BMS may overcharge or undercharge the battery. Both scenarios can significantly shorten the life of the new battery and potentially cause damage to the vehicle’s sensitive electronic systems.

What Happens If You Skip Battery Registration?

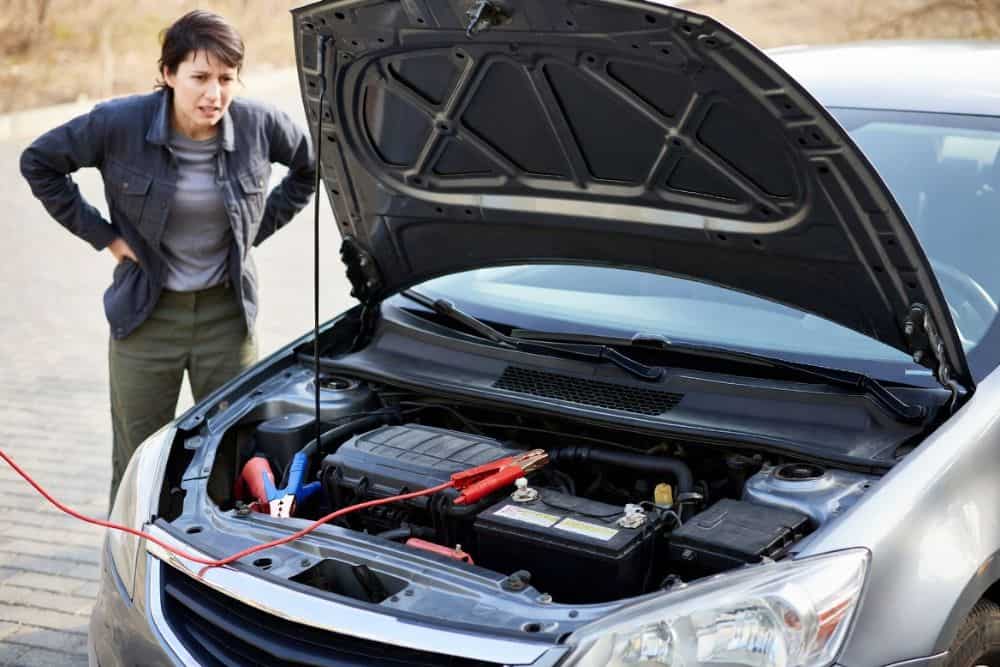
Skipping battery registration on a European car is one of the most common mistakes made during DIY battery replacements, and the consequences can be serious. The most immediate issue is that the BMS continues to use the charging profile it had developed for the old battery. Since the old battery was likely degraded, the system would have been compensating by increasing the charging voltage. When this higher voltage is applied to a brand-new battery, it causes overcharging, which generates excess heat and accelerates wear on the battery’s internal plates.

Overcharging can also cause the battery’s electrolyte to break down more quickly, leading to gassing and potential swelling of the battery case. In AGM batteries, which are commonly used in European cars with start-stop systems, overcharging is particularly damaging because the sealed design means lost electrolyte cannot be replaced. The result is a new battery that fails in a fraction of its expected lifespan. Instead of getting four to six years of use, you might find the battery failing within one to two years.

Beyond the battery itself, the knock-on effects can spread to other parts of the electrical system. Fault codes may be stored in the BMS and other control modules, triggering warning lights on the dashboard. Features like start-stop functionality may stop working. In some cases, the car may even go into a reduced power mode to protect itself from what it perceives as a failing electrical system. For Auckland drivers dealing with stop-and-go traffic, losing start-stop functionality also means increased fuel consumption and higher running costs.

Can an Unregistered Battery Damage Other Components?

Yes, an unregistered battery can cause damage to other electrical components over time. The alternator is one of the first components at risk. When the BMS sends incorrect charging instructions to the alternator based on outdated battery data, the alternator may work harder than it needs to. This extra strain can lead to premature alternator failure, which is a significantly more expensive repair than the battery registration process itself. Alternator replacements on European cars can easily cost over a thousand dollars in parts and labour.

Other sensitive electronic modules can also be affected. European cars contain dozens of control units that rely on stable voltage to function correctly. Fluctuations caused by improper charging can lead to intermittent faults in systems ranging from the infotainment screen to safety features like ABS and electronic stability control. Diagnosing these kinds of intermittent electrical faults can be time-consuming and expensive, which is why it’s always better to get the battery registered properly from the start.

Which European Cars Require Battery Registration?

Almost all modern European cars built from the mid-2000s onwards require some form of battery registration. BMW was one of the earliest adopters, with models from 2002 onward requiring registration when a new battery is fitted. The BMW IBS (Intelligent Battery Sensor) system is one of the most well-known examples and is fitted to virtually every BMW model sold in Auckland today. If you own a BMW 1 Series, 3 Series, 5 Series, X3, X5, or any other model from the last two decades, battery registration is essential.

Mercedes-Benz vehicles use a similar system, and registration is required on most models from around 2005 onwards. Audi and Volkswagen, which share many electrical platforms under the VAG group, also require registration on most models fitted with a BMS. This includes popular Auckland vehicles like the Audi A3, A4, and Q5, as well as the Volkswagen Golf, Tiguan, and Passat. Porsche, MINI, and Volvo also require battery registration on most of their modern lineup.

It’s worth noting that the specific process and requirements can vary from model to model, even within the same brand. A 2010 BMW 3 Series may have a slightly different registration procedure compared to a 2020 model. This is why it’s important to have the work done by an auto electrician who has experience with European vehicles and access to the correct diagnostic equipment for your specific car.

Why You Need the Right Battery for Your European Car

Battery registration is only part of the equation. Fitting the correct battery in the first place is just as important. European cars are designed to work with specific battery types, capacities, and sizes. Many modern European vehicles require AGM (Absorbent Glass Mat) batteries, particularly those equipped with start-stop technology, regenerative braking, or high electrical demands from advanced infotainment and driver assistance systems. Fitting a standard flooded lead-acid battery in a car that requires an AGM battery can cause problems even if registration is performed correctly.

The battery’s capacity, measured in amp hours (Ah), must also match the manufacturer’s specification. Installing a battery with a lower capacity than what’s required can result in the battery being unable to meet the car’s electrical demands, especially during short trips or in cold Auckland winter mornings when the battery is under the most stress. On the other hand, installing a battery with a significantly higher capacity than specified can also cause issues, as the BMS may not be able to manage the charging cycle correctly for a battery outside its expected parameters.

Physical size matters too. European cars often have purpose-built battery compartments, sometimes located in the boot or under the rear seat rather than under the bonnet. The battery must fit precisely in the designated location, with the correct terminal orientation and hold-down arrangement. Using a battery that doesn’t fit properly can lead to vibration damage, poor connections, and even safety hazards. A specialist auto electrician will ensure the correct battery is sourced and fitted for your specific make and model.

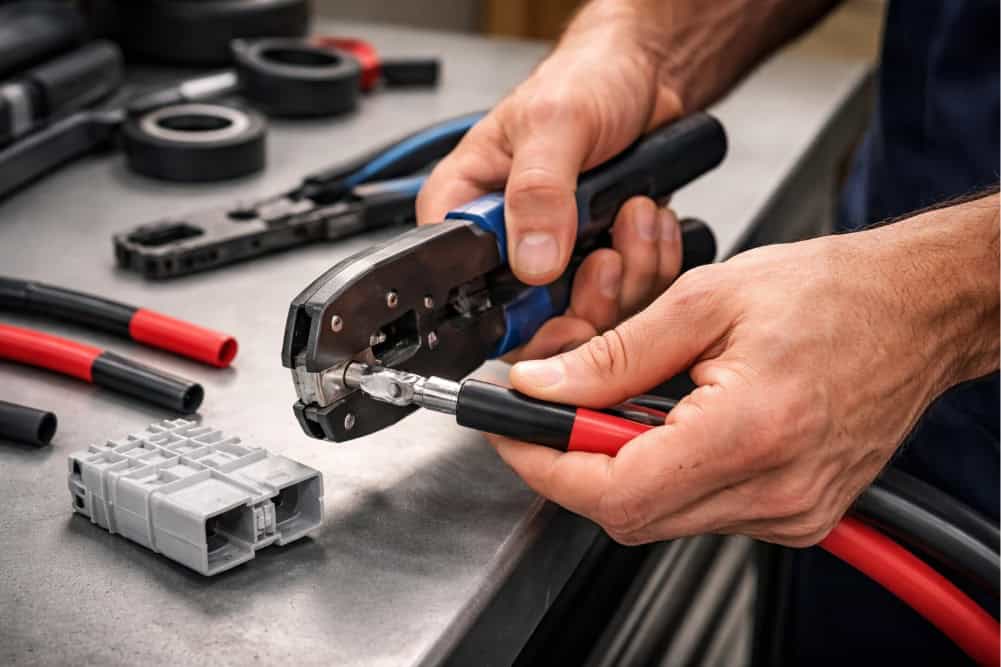
The Role of Diagnostic Equipment in Battery Registration

Battery registration cannot be done without the right diagnostic tools. Generic OBD2 code readers, which are popular for reading and clearing basic fault codes, typically do not have the capability to perform battery registration on European vehicles. The process requires either the manufacturer’s own proprietary diagnostic software or a high-quality aftermarket diagnostic system that supports battery registration for specific makes and models.

For BMW vehicles, the standard dealer tool is ISTA, while Mercedes-Benz uses Xentry. VAG group vehicles (Audi, Volkswagen, Porsche, SEAT, Skoda) use ODIS or similar platforms. These systems allow the technician to input the exact battery specifications and complete the registration or coding process correctly. Quality aftermarket tools from brands like Autel and Bosch can also perform battery registration on many European vehicles, provided they are kept up to date with the latest software.

At Eurosparx, we use advanced diagnostic equipment that covers a wide range of European and Japanese vehicles. This means we can perform battery registration accurately and efficiently, ensuring your car’s BMS has the correct information from the moment the new battery is installed. Having the right tools makes the difference between a proper battery replacement and one that could lead to ongoing problems.

Common Signs Your European Car Needs a New Battery

Knowing when your European car’s battery is on its way out can save you from being stranded. One of the most common signs is slow engine cranking when you turn the key or press the start button. If the engine takes noticeably longer to turn over, especially on cold mornings, the battery may be losing its ability to deliver the high current needed for starting. Modern European cars may also display a battery warning light or a specific message on the dashboard telling you that the battery’s state of charge is low.

Other signs include electrical accessories behaving erratically, such as flickering interior lights, the infotainment system resetting itself, or power windows moving more slowly than usual. If your car’s start-stop system stops functioning, this is often a sign that the BMS has detected the battery is no longer healthy enough to support the feature. Some drivers also notice that their car takes longer to lock or unlock with the keyless entry system, as the body control module reduces functionality to conserve battery power.

If you notice any of these symptoms, it’s a good idea to have your battery tested before it fails completely. A professional battery test can measure the battery’s state of health and cold cranking amps to determine whether it still has enough life left or whether replacement is needed. Having the test done by a specialist who understands European cars ensures that the results are interpreted correctly and that any replacement includes proper registration.

Need Your European Car Battery Replaced and Registered?

Battery registration is a critical step that should never be skipped when replacing the battery in a European vehicle. It ensures the car’s battery management system has the correct information to charge and manage the new battery properly, which protects the battery, the alternator, and every other electrical system in the car. Getting the right battery and having it professionally installed and registered will save you money and headaches in the long run.

As experienced auto electricians and suppliers of car batteries in Auckland, Eurosparx specialises in European and Japanese vehicles and can supply, fit, and register the correct battery for your car. We have the diagnostic tools and expertise to make sure the job is done right the first time. Contact our team today by calling 09 218 7789 to book your battery replacement.

Frequently Asked Questions

What is battery registration on a European car?

Battery registration is a software process that tells your European car’s battery management system (BMS) that a new battery has been installed. Using a diagnostic tool, a technician inputs the new battery’s details, including its type, capacity, and specifications. The BMS then resets its internal data and adjusts its charging strategy to suit the new battery, ensuring correct charging voltage and proper management of the vehicle’s electrical systems.

What happens if I don’t register my new car battery?

If you skip battery registration, your car’s BMS will continue charging the new battery as if it were the old, degraded one. This typically results in overcharging, which generates excess heat and dramatically shortens the new battery’s lifespan. You may also experience dashboard warning lights, loss of start-stop functionality, stored fault codes in multiple control modules, and in some cases, premature failure of the alternator or other electrical components.

Can I register a car battery myself?

In theory, you can register a car battery yourself if you have the correct diagnostic tool and software for your vehicle. However, basic OBD2 code readers cannot perform battery registration on most European cars. You need a manufacturer-level or professional-grade aftermarket diagnostic system. Because incorrect registration can cause charging problems and damage, it’s generally recommended to have the process done by a qualified auto electrician with the right equipment.

Which European car brands require battery registration?

Most modern European car brands require battery registration, including BMW, Mercedes-Benz, Audi, Volkswagen, Porsche, MINI, and Volvo. BMW has required it on most models since around 2002, and other brands adopted similar systems from the mid-2000s onward. The specific procedure varies by make, model, and year, so it’s important to work with a specialist who understands the requirements for your particular vehicle.

How long does a battery last in a European car?

With proper registration and correct battery selection, a battery in a European car typically lasts between four and six years. Factors that affect battery life include driving habits, climate, the number of short trips versus longer drives, and the electrical demands of the vehicle’s accessories. Regular testing can help identify when a battery is nearing the end of its useful life, allowing you to replace it before it fails unexpectedly.

Does Eurosparx supply and register batteries for European cars?

Yes, Eurosparx supplies, installs, and registers batteries for a wide range of European vehicles, including BMW, Mercedes-Benz, Audi, Volkswagen, and more. Based in Avondale, West Auckland, we carry batteries suited to European specifications including AGM and EFB types. Our diagnostic equipment allows us to complete the registration and coding process correctly, ensuring your car’s electrical system operates as intended with the new battery.

Categories
Car Batteries

Signs Your Car Battery Is Dying (Before It Leaves You Stranded)

Few things are more frustrating than turning your key or pressing the start button only to hear a weak groan from your engine, or worse, complete silence. A dying car battery rarely fails without warning. In most cases, there are clear signs that your battery is on its way out well before it leaves you stranded in a car park or on the side of the road. This article covers the most common warning signs of a failing car battery, what causes batteries to deteriorate, and what you can do to stay ahead of the problem.

What Are the Most Common Signs of a Dying Car Battery?

The most common signs of a dying car battery include slow engine cranking, dimming headlights, electrical issues with accessories, a dashboard battery warning light, and a swollen or corroded battery case. If you notice any combination of these symptoms, your battery is likely nearing the end of its life and should be tested or replaced as soon as possible.

Slow or Sluggish Engine Cranking

When you turn the key or press the ignition button, the starter motor draws a large amount of current from the battery to get the engine turning. If your battery is losing its charge capacity, the engine will crank more slowly than usual. You might notice that the engine takes longer to turn over, or the cranking sound is lower-pitched and laboured compared to how it normally sounds. This is one of the earliest and most recognisable signs that your battery is struggling.

In colder weather, slow cranking can be even more pronounced. Cold temperatures reduce a battery’s ability to deliver current, so a battery that is already weak will have an even harder time starting the engine on a chilly Auckland morning. If you notice this happening repeatedly, do not ignore it. A battery that cranks slowly today could fail entirely tomorrow.

Dimming or Flickering Headlights

Your headlights are one of the biggest electrical draws on your vehicle, and they are a reliable indicator of battery health. If your headlights appear dimmer than usual, especially when the car is idling or when you first start the engine, it could mean the battery is not holding enough charge to power them at full brightness. You might also notice the lights flickering or briefly dimming when you use other electrical accessories like the air conditioning or power windows.

This dimming effect happens because a weakened battery cannot supply consistent voltage to all the electrical systems at once. As the alternator works harder to compensate, you may also notice the lights brighten slightly when you rev the engine. While a faulty alternator can also cause similar symptoms, a dying battery is the more common culprit and should be checked first.

Dashboard Battery Warning Light

Modern vehicles are equipped with an array of sensors that monitor critical systems, including the charging system. If your dashboard battery light comes on while you are driving, it is telling you that the charging system is not maintaining the correct voltage. This could point to a dying battery, a failing alternator, or a problem with the wiring between the two. Either way, it is a warning that should not be ignored.

In some cases, the battery light may flicker on and off intermittently before staying on permanently. This is often a sign that the battery is on the edge of failure. If you see this light, it is a good idea to get your battery and charging system tested promptly. Driving with a failing charging system can leave you stranded if the battery drains completely while the engine is running.

Electrical Accessories Acting Up

Your car battery powers everything from the radio and interior lights to the power windows, central locking, and infotainment system. When the battery starts to fail, these accessories may behave erratically. You might notice your radio resetting itself, your clock losing time, your power windows moving more slowly than usual, or your seat memory settings disappearing. These electrical gremlins are often the battery’s way of telling you it cannot keep up with demand.

On newer vehicles with more complex electronics, a weak battery can cause even stranger issues. You may see random warning lights on the dashboard, experience glitches with the touchscreen, or find that your keyless entry system becomes unreliable. Because modern cars rely so heavily on stable voltage to run their electronic control units, even a slight drop in battery performance can trigger a cascade of odd symptoms that might seem unrelated to the battery at first glance.

A Swollen or Misshapen Battery Case

If you pop the bonnet and notice that your battery case looks bloated or swollen, this is a serious warning sign. A swollen battery is usually caused by excessive heat or overcharging, both of which cause a build-up of hydrogen gas inside the battery. This distortion of the case means the internal chemistry of the battery has been compromised, and the battery is no longer safe or reliable to use.

In Auckland’s climate, heat can be a significant factor in battery degradation, particularly during summer months. High temperatures accelerate the chemical reactions inside the battery, which speeds up wear on the internal plates and can lead to premature failure. If your battery case is visibly swollen or deformed in any way, it should be replaced immediately rather than tested or recharged.

Corrosion Around the Battery Terminals

A build-up of white, blue, or greenish powdery residue around your battery terminals is a sign of corrosion. While some minor corrosion can develop over time on any battery, excessive or rapidly forming corrosion often indicates that the battery is leaking acid or venting gases more than it should. This can be a sign that the battery is failing internally and is no longer sealed properly.

Corrosion on the terminals also creates resistance in the electrical connection, which means less current gets from the battery to the starter motor and other components. This can make a battery that still has some life left in it perform as though it is nearly dead. Cleaning the terminals can help in the short term, but if the corrosion keeps coming back quickly, the battery itself is likely the problem and will need to be replaced.

The Engine Only Starts With a Jump

If you find yourself needing to jump-start your car more than once, your battery is almost certainly on its way out. A healthy battery should be able to hold a charge from the alternator and start the engine reliably every time. Needing a jump-start once could be explained by leaving the lights on or an accessory draining the battery overnight, but if it happens repeatedly, the battery can no longer hold a sufficient charge on its own.

Relying on jump-starts as a temporary fix is not a good long-term strategy. Each time a battery is fully drained and then jump-started, it puts additional stress on the battery’s internal plates. This further reduces its capacity and lifespan. On top of that, repeated jump-starting can also put strain on your alternator, which has to work overtime to recharge a deeply discharged battery while also powering the rest of the vehicle’s electrical systems.

What Causes a Car Battery to Die?

Car batteries degrade over time due to a combination of age, usage patterns, climate, and the demands placed on them by your vehicle’s electrical systems. Understanding what causes a battery to fail can help you recognise the warning signs earlier and take preventative action before you end up stranded.

Age and Natural Wear

Most car batteries have a lifespan of roughly three to five years, depending on the type of battery, the vehicle it is in, and how it is used. Over time, the lead plates inside the battery gradually corrode and lose their ability to hold a charge. This is a natural and unavoidable process. No matter how well you maintain your battery, it will eventually reach a point where it can no longer reliably start your engine.

If your battery is more than three years old, it is worth having it tested periodically, even if you have not noticed any obvious symptoms. A battery can go from performing adequately to failing completely in a very short space of time, and proactive testing is the best way to avoid being caught off guard.

Short Trips and Infrequent Driving

Your alternator recharges the battery while the engine is running, but it needs time to fully replenish the charge that was used to start the engine. If you regularly make short trips of just a few minutes, the alternator may not have enough time to fully recharge the battery. Over weeks and months, this leads to a gradual decline in the battery’s state of charge, which accelerates wear on the internal plates.

Similarly, if a car sits unused for extended periods, the battery will slowly discharge on its own. Modern vehicles have numerous electronic systems that draw small amounts of power even when the car is turned off, such as the alarm system, keyless entry receiver, and clock. These parasitic draws can flatten a battery over a few weeks of inactivity, and repeated deep discharges shorten the battery’s overall lifespan significantly.

Extreme Temperatures

Both heat and cold affect battery performance, but in different ways. Heat accelerates the chemical degradation of the battery’s internal components, effectively shortening its lifespan. Cold temperatures, on the other hand, reduce the battery’s ability to deliver current at the moment you need it most. While Auckland does not experience the extreme cold of some regions, summer heat can certainly take a toll on batteries, and even a moderately cold winter morning can expose a battery that is already weakened.

The combination of summer heat degrading the battery followed by cooler autumn and winter temperatures demanding more from it is one of the main reasons batteries tend to fail as the weather changes. If your battery survived summer but seems sluggish as the temperatures drop, it may have been damaged by the heat and is only now showing symptoms.

Electrical System Issues

A faulty alternator, a parasitic electrical drain, or corroded wiring can all place additional stress on your battery and cause it to fail prematurely. If the alternator is not charging the battery properly, the battery will be in a constant state of undercharge, which damages it over time. A parasitic drain from a malfunctioning component that stays on when the car is off can flatten the battery overnight. These kinds of issues can make even a brand-new battery fail within months if they are not identified and fixed.

This is why it is important to have the entire charging and electrical system checked when you replace a battery. Simply swapping in a new battery without diagnosing the root cause of the failure can result in the new battery dying just as quickly as the old one. A proper auto electrical inspection will identify any underlying faults that need to be addressed alongside the battery replacement.

How to Test Your Car Battery

If you are experiencing any of the symptoms described above, getting your battery tested is the logical next step. A professional battery test gives you a clear picture of your battery’s current condition and how much life it has left, taking the guesswork out of the equation.

Professional Load Testing

The most reliable way to test a car battery is with a professional load test or conductance test. These tests measure the battery’s ability to deliver current under load and assess the condition of the internal plates. A load test will tell you whether the battery is in good health, marginal, or needs to be replaced. Most auto electricians can perform this test quickly, and it is often done at no charge or for a small fee.

A professional test is far more accurate than simply checking the voltage with a multimeter. A battery can show a healthy voltage reading of around 12.6 volts when sitting idle but still fail under the load of starting the engine. The load test simulates this demand and reveals whether the battery can actually perform when it counts. If you suspect your battery is on the way out, a professional test is the quickest way to get a definitive answer.

Checking the Battery at Home

If you have a multimeter at home, you can do a basic check of your battery’s resting voltage. With the engine off and no accessories running, a fully charged battery should read around 12.4 to 12.6 volts. A reading below 12.2 volts suggests the battery is partially discharged, and anything below 12.0 volts means it is significantly depleted. While this does not tell you about the battery’s overall health or capacity, it can give you a rough indication of its current state of charge.

You can also do a simple visual inspection. Check the terminals for corrosion, make sure the connections are tight, and look at the battery case for any signs of swelling, cracking, or leaking. If the battery has a built-in charge indicator (a small window on the top), a green dot typically means the battery is charged, while a dark or clear indicator suggests it is low or needs attention. These checks are not a substitute for a professional test, but they can help you decide whether a trip to the auto electrician is warranted.

When Should You Replace Your Car Battery?

You should replace your car battery as soon as testing confirms it is no longer performing to specification, or if you are experiencing multiple warning signs at the same time. Waiting until the battery fails completely is a gamble that often results in being stranded at the worst possible time. If your battery is more than three years old and showing any of the symptoms discussed in this article, proactive replacement is the smartest move.

When choosing a replacement battery, it is important to select one that matches your vehicle’s specifications. This includes the correct group size, terminal configuration, and cold cranking amps (CCA) rating. European and Japanese vehicles in particular can have specific battery requirements, and fitting the wrong battery can lead to poor performance or damage to the electrical system. An experienced auto electrician will be able to recommend and fit the right battery for your vehicle, ensuring it is properly secured and the terminals are correctly connected.

It is also worth considering the type of battery technology that suits your driving habits. Standard flooded lead-acid batteries are the most common and affordable option, while AGM (Absorbent Glass Mat) batteries offer better performance for vehicles with start-stop systems or high electrical demands. Your auto electrician can advise you on the best option based on your vehicle and how you use it.

Need Help With Your Car Battery in Auckland?

A dying car battery gives you plenty of warning signs before it fails completely. Slow cranking, dimming headlights, dashboard warning lights, erratic electronics, and visible damage to the battery case are all signals that you should act sooner rather than later. By keeping an eye out for these symptoms and getting your battery tested when something feels off, you can avoid the inconvenience and stress of an unexpected breakdown.

As a car battery specialist in Auckland, Eurosparx can test, supply, and install the right battery for your vehicle. We stock a complete range of batteries for both European and Japanese vehicles and can also inspect your charging system to make sure a new battery will last as long as it should. Contact our team today by calling 09 218 7789 to book a battery test or replacement.

Frequently Asked Questions

What are the first signs of a dying car battery?

The first signs of a dying car battery are usually slow engine cranking, dimming headlights at idle, and small electrical glitches like the radio resetting or the clock losing time. These symptoms indicate the battery is no longer able to supply consistent power to the vehicle’s electrical systems. If you notice any of these signs, it is a good idea to have your battery professionally tested before it fails completely.

How long do car batteries typically last?

Most car batteries last between three and five years, depending on the type of battery, your driving habits, and the climate. Frequent short trips, extreme temperatures, and high electrical demands can all shorten a battery’s lifespan. If your battery is older than three years, it is worth having it tested regularly to check its condition and avoid an unexpected failure.

Can a car battery die suddenly without warning?

While it can feel like a battery has died suddenly, there are almost always warning signs beforehand. Slow cranking, dim lights, and electrical issues typically develop gradually over days or weeks before the battery fails completely. These signs are easy to overlook or dismiss, which is why many drivers feel caught off guard. Paying attention to how your car starts and how the lights perform can help you spot trouble early.

Does a car battery charge while the engine is idling?

Yes, the alternator does charge the battery while the engine is idling, but the charge rate is much lower than when driving at higher engine speeds. If you regularly only idle or take very short trips, the alternator may not fully replenish the charge used to start the engine. Over time, this leads to a gradual decline in the battery’s state of charge and can shorten its lifespan.

Should I replace the battery myself or go to a professional?

While replacing a battery is straightforward on some older vehicles, many modern cars require specific procedures to avoid losing electronic settings or triggering fault codes. European and Japanese vehicles in particular can need the new battery to be registered with the vehicle’s computer system. An auto electrician can ensure the correct battery is fitted, the terminals are properly connected, and the charging system is working as it should.

Categories
Auto Electrical

What Does It Mean When the Check Engine Light Comes On After a Battery Change?

Seeing your check engine light come on after a battery change usually means your Engine Control Unit (ECU) has lost its stored data and needs to relearn settings such as idle speed, fuel trim and emissions readiness.

In most cases the light is triggered by a temporary reset, a loose sensor connection, dirty terminals or a battery that doesn’t match the vehicle’s specifications, rather than a serious mechanical fault.

The cause matters though, because some triggers clear on their own after a few drive cycles while others, particularly on modern European vehicles, need a proper diagnostic scan and battery registration before the light will go out.

Why Does the Check Engine Light Turn On After a Battery Replacement?

The check engine light comes on after a battery replacement because cutting power to the ECU wipes its short-term memory, disturbs sensor calibration and can expose poor connections or incompatible batteries that the vehicle’s diagnostics flag as faults.

Modern vehicles run almost every system through the ECU, so any interruption to the 12-volt supply forces the computer to restart its diagnostic monitors from zero.

Until those monitors complete, the system may log temporary codes that illuminate the warning light even when nothing is mechanically wrong.

For drivers in Auckland and across New Zealand, this is one of the most common workshop concerns after a DIY battery swap or roadside replacement.

How Does Disconnecting the Battery Reset the ECU?

Disconnecting the battery removes the constant low-voltage supply that keeps the ECU’s volatile memory alive, which erases learned values for idle, fuel trim, transmission shift points and emissions readiness.

When you reconnect the new battery, the ECU starts each self-test from scratch.

It then needs several complete drive cycles to confirm every sensor is working within its expected range, and during this period the check engine light can illuminate even though no real fault exists.

The relearning process covers idle speed, air-fuel mixture, throttle position and the OBD-II emissions monitors required for compliance.

Can Loose or Unplugged Sensors Cause the Warning Light?

Loose, disconnected or partially seated sensor connectors are one of the most frequent causes of a check engine light after a battery change, especially in tightly packed engine bays.

It’s easy to bump a Mass Air Flow (MAF) sensor plug, oxygen sensor lead or throttle body connector while moving cables or removing battery hold-down brackets.

When the ECU powers back up and a sensor reports no signal or an out-of-range value, it logs a fault code and illuminates the warning light immediately.

A careful visual inspection around the battery, intake and engine loom will often reveal the culprit.

Why Do Battery Terminal Issues Trigger Fault Codes?

Corroded or loose battery terminals cause voltage drops that the ECU interprets as electrical instability, which can trigger a check engine light along with other warning lights.

Even a new battery will perform poorly if it’s fitted onto dirty, oxidised or worn clamps because the connection resistance forces voltage to fluctuate under load.

Sensors that depend on a stable reference voltage may then send inconsistent data, compounding the problem and producing multiple fault codes.

Cleaning the terminals with a brush, applying terminal protector and torquing the clamps correctly during installation is essential for reliable operation.

What Happens If You Fit the Wrong Battery?

Fitting a battery with the incorrect Cold Cranking Amps (CCA), Amp Hour (Ah) rating or chemistry will likely trigger a check engine light because the vehicle’s charging system can no longer match its voltage profile to what the battery needs.

An undersized battery will sag under heavy electrical loads such as cold starting, headlights and heated rear screens, which the ECU detects as low system voltage.

Fitting a standard flooded battery to a vehicle designed for AGM (Absorbent Glass Mat) is particularly problematic, because start-stop systems and energy recuperation rely on the higher cycling capacity of AGM cells.

The AA notes that vehicles with start-stop technology require AGM batteries, and fitting another type impairs the fuel saving technology and reduces the serviceable life of the battery.

Does Skipping Battery Registration Cause Check Engine Lights?

Skipping battery registration on European vehicles like BMW, Mercedes-Benz, Audi and Volkswagen will trigger warning lights because the Battery Management System (BMS) continues to apply the old battery’s charging profile to the new one.

The AA confirms that some vehicles are equipped with a Battery Management System which requires new batteries to be registered with the system.

Without registration, the alternator may overcharge or undercharge the battery, the ECU detects voltage anomalies and warning lights including the check engine light can appear.

Battery registration requires a diagnostic scan tool capable of communicating with the BMS module, which is something most general workshops in New Zealand don’t carry.

Which Error Codes Commonly Appear After a Battery Change?

Several specific OBD-II codes commonly appear after a battery replacement, most relating to emissions monitors that haven’t yet completed a full drive cycle.

These codes don’t always indicate a real fault.

They often clear on their own once the vehicle has been driven through enough varied conditions for the relevant readiness monitors to set.

The table below compares the codes seen most often by auto electricians after a battery swap.

Code GroupSystem AffectedLikely Cause After Battery ChangeSelf-Clears?
P0130 to P0167O2 Sensor Heater CircuitHeater monitor incomplete after resetOften, after 1 to 3 drive cycles
P0440 to P0457EVAP SystemPressure readings haven’t normalisedUsually, after warm-cold cycles
P0505 to P0507Idle Air ControlIdle parameters lost during resetYes, after idle relearn
P0171, P0174Fuel Trim LeanShort-term fuel trims reset to zeroYes, within 50 to 100 km
U-Series CodesCommunication BusModules lost handshake brieflyOften need scan tool clear

Understanding which group the code falls into helps decide whether to drive and wait or book a diagnostic appointment.

Why Do O2 Sensor Codes Appear After Battery Disconnection?

O2 (oxygen) sensor heater circuit codes are very common after a battery disconnection because the heater monitor needs specific operating conditions to complete its self-test.

The heater inside each oxygen sensor brings the element up to operating temperature quickly so the ECU can read accurate exhaust readings within seconds of start-up.

After a reset, the heater monitor is marked “not ready” and the system needs at least one cold-start to warm-up cycle to confirm the heaters are functioning.

If you drive only short trips without letting the engine reach full temperature, the heater monitor may never complete and the code can persist for longer than expected.

What Causes EVAP System Codes After a Battery Swap?

EVAP (Evaporative Emission Control) codes appear after battery swaps because the system relies on stable pressure readings that take time to re-establish after a reset.

The EVAP system traps fuel vapours from the tank and tests itself by sealing the system and watching for pressure changes, which only happens under very specific temperature and fuel-level conditions.

When the ECU loses power, the EVAP monitor resets and may report a fault if it tries to test before conditions are right.

These codes don’t necessarily mean there’s an actual leak, and they generally clear after the vehicle has been driven through both warm and cool ambient conditions.

How Do Idle Control Codes Get Triggered?

Idle control codes are triggered after a battery swap because the ECU loses its learned idle values and the throttle body or idle air control valve needs to re-establish its baseline.

You may notice that the engine idles rough, surges between revs or stalls at intersections in the first few days after a battery change.

This is the ECU relearning the throttle position required to keep the engine at the correct idle speed under different loads such as air conditioning, headlights and power steering.

On most vehicles the idle stabilises within a few warm-up cycles, but persistent rough idling beyond a week suggests a fault that needs to be inspected.

How Do You Diagnose and Clear the Light?

To diagnose and clear a check engine light after a battery change, scan the vehicle with an OBD-II reader, perform a visual inspection of all connections around the battery and engine bay, then drive through several complete cycles to allow the monitors to set.

If the light persists after these steps, the issue is unlikely to be a simple reset problem and needs professional diagnosis.

Combining a code scan with hands-on inspection is far more reliable than guessing, because the codes show exactly which system is reporting a fault and where to focus the investigation.

What Can an OBD-II Scanner Tell You?

An OBD-II scanner reads the diagnostic trouble codes (DTCs) stored in the ECU and tells you exactly which system or sensor triggered the warning light, along with whether the code is current or stored from a past event.

Basic code readers show only the code number and a short description, while professional-grade scanners display live sensor data, freeze-frame information and readiness monitor status.

If your OBD scanner shows codes that all relate to a single battery disconnection event, the issue is almost certainly reset-related rather than mechanical.

If multiple unrelated systems report faults at once, a deeper inspection is warranted.

What Should You Look For During a Visual Inspection?

A visual inspection should focus on every connector, hose and bracket that was touched or moved during the battery installation, paying close attention to anything within arm’s reach of the battery tray.

Check the negative and positive cables for tight, clean clamps and confirm the battery hold-down is secure so the unit can’t move under braking.

Look for sensor plugs that are partially seated, wiring harnesses pinched against the body or bracket, blown fuses in the engine bay fuse box and any signs of physical damage from tools.

If everything looks correct and the light persists, the vehicle should be scanned to identify the specific code.

How Many Drive Cycles Does the ECU Need to Reset?

The ECU typically needs between three and 10 complete drive cycles to fully reset and turn off the check engine light, with most cars completing the process within a week of normal driving.

A complete drive cycle generally requires a cold start, a period of warm-up at idle, mixed city and highway driving above 70 km/h and a cool-down period.

Short trips around town don’t always satisfy every monitor’s enable criteria, particularly the EVAP and catalyst monitors which need very specific conditions.

If the light remains on after five or more proper drive cycles or 200 km of driving, the issue is unlikely to be a simple ECU reset and needs further investigation.

When Should You Worry About the Check Engine Light?

You should be concerned about a check engine light when it flashes, when the vehicle is running poorly or when the light has been on for more than five days of normal driving.

These symptoms suggest a real fault rather than a temporary reset issue and warrant immediate professional attention to avoid causing further damage.

Continuing to drive a vehicle with active drivability problems can damage expensive components such as the catalytic converter, oxygen sensors and turbochargers.

What Does a Flashing Check Engine Light Mean?

A flashing check engine light indicates a severe fault, most often an engine misfire, that is causing raw unburnt fuel to enter the exhaust and damage the catalytic converter.

Catalytic converters operate at very high temperatures and can be destroyed within minutes of a sustained misfire.

If your check engine light starts flashing after a battery change, stop driving as soon as it’s safe to do so and call for assistance rather than continuing to your destination.

This is not a problem that should be left to clear on its own under any circumstances.

What Performance Issues Indicate a Serious Problem?

Performance issues such as hard starting, rough idling that doesn’t settle, stalling at intersections, poor fuel economy, hesitation under acceleration or unusual exhaust smells indicate that the check engine light reflects a real fault.

These symptoms suggest the new battery has either exposed a pre-existing fault or that something went wrong during installation, such as a reversed connection that damaged a sensor or control module.

Driving with any of these symptoms risks turning a minor electrical fault into a major mechanical failure.

Booking a diagnostic scan with a qualified auto electrician is the safest course of action.

How Long Should You Wait Before Getting It Checked?

You should wait no longer than five to seven days of normal driving before getting a persistent check engine light checked professionally.

This timeframe gives the ECU enough opportunity to complete its monitors and clear codes that genuinely relate to the battery reset, while not allowing a real fault to cause further damage.

If the light has been on for a week or more with no improvement, or if you notice any change in how the vehicle drives, book an appointment with an auto electrician.

Catching faults early is always cheaper than waiting for a roadside breakdown.

Why Is a Professional Diagnosis Worth the Cost?

A professional diagnosis is worth the cost because it pinpoints the exact cause of the check engine light using calibrated equipment, prevents unnecessary parts replacement and protects against expensive consequential damage to related systems.

Modern vehicles produce hundreds of possible fault codes, many of which point to multiple potential causes that require live data analysis to confirm.

Guessing your way through repairs typically costs more in replaced-but-unneeded parts than a single diagnostic appointment.

How Does Misdiagnosis Lead to Unnecessary Repairs?

Misdiagnosis leads to unnecessary repairs because a single fault code can have several possible causes, and replacing parts based on the code alone often misses the real underlying issue.

For example, a P0420 catalyst efficiency code can be caused by a faulty oxygen sensor, a real catalyst failure, an exhaust leak, fuel trim issues or even a software bug in the ECU.

Replacing the catalytic converter without confirming the cause can mean spending well over a thousand dollars only to find the light comes back on within a week.

A scan that includes live data, freeze-frame information and oxygen sensor waveforms quickly narrows the cause to the actual fault.

Why Are European Vehicles Especially Sensitive?

European vehicles like BMW, Mercedes-Benz, Audi and Volkswagen are especially sensitive to battery changes because they rely heavily on integrated electronic control systems and require battery registration through the BMS.

Without registration, the alternator continues to charge as though the old battery is still fitted, which over time leads to overcharging or undercharging and triggers further warning lights.

Many of these vehicles also need module coding or adaptation after a battery swap to restore comfort features like one-touch windows, sunroof position memory and adaptive headlights.

Workshops without manufacturer-level diagnostic equipment often can’t complete these procedures, which is one reason European cars frequently end up at specialist auto electricians after a routine battery replacement elsewhere.

How Can You Avoid Check Engine Light Issues Next Time?

You can avoid check engine light issues during future battery changes by using a memory saver, fitting a battery that exactly matches the manufacturer’s specifications and having the work done by a qualified auto electrician with the right diagnostic tools.

Taking these precautions protects the ECU’s learned data, ensures the new battery integrates properly with the vehicle’s electronics and prevents the most common post-replacement faults.

For modern vehicles with start-stop systems, BMS modules or sensitive infotainment, these steps aren’t optional extras but standard best practice.

Should You Use a Memory Saver During Battery Replacement?

Yes, using a memory saver during battery replacement is strongly recommended for modern vehicles because it maintains a small power supply to the ECU and prevents the loss of learned values, fault history and convenience settings.

The device plugs into the OBD-II port or 12V accessory socket and provides enough power to keep the volatile memory alive while the main battery is disconnected.

Without a memory saver, the radio, navigation, seat positions, window calibration and ECU adaptations all need to be reset after the new battery is fitted.

For vehicles with anti-theft radios, you may also need a PIN code from the dealer to reactivate the system, which a memory saver avoids entirely.

How Important Is Matching Manufacturer Specifications?

Matching the manufacturer’s battery specifications is critical because the wrong CCA, Ah rating, terminal layout or chemistry will trigger warning lights and shorten the battery’s life.

The vehicle’s handbook or a parts lookup will specify the correct battery type, including whether the car requires AGM, Enhanced Flooded Battery (EFB) or standard flooded lead-acid construction.

According to the AA, generally, in New Zealand conditions provided the battery is maintained, the fitment is correct for the vehicle and the battery is kept at 100% state of charge, it is expected to last 3 to 5 years.

Fitting an undersized battery to save money usually costs more in the long run through reduced lifespan and electrical faults.

Why Is Professional Installation Recommended?

Professional installation by a qualified auto electrician is recommended because they have the diagnostic tools, memory savers and registration software needed to complete the job without triggering warning lights.

A workshop like Eurosparx will scan the vehicle before disconnecting the old battery to capture any existing codes, then use a memory saver to protect the ECU, register the new battery with the BMS where required and clear any post-installation codes once the swap is complete.

This is particularly important for European vehicles, hybrid models and any car with start-stop technology, where DIY installation can easily lead to a dashboard full of warning lights.

It’s worth remembering that the AA reports up to 43% of breakdowns they attend are battery related, so getting the replacement done correctly the first time matters for ongoing reliability.

Recent NZTA changes also mean that from 1 November 2026, WoF and CoF A inspections will check that no warning or malfunction indicators are showing for Automatic Emergency Braking (AEB) and Lane Keep Assist systems where fitted, so unresolved post-replacement warning lights could increasingly affect your warrant of fitness.

Need Help With a Check Engine Light After a Battery Change?

A check engine light after a battery change doesn’t always signal a serious problem, but if it stays on after several drive cycles or your vehicle isn’t running right, you need a proper scan and diagnosis rather than guesswork.

As experienced auto electricians in Auckland, we at Eurosparx can scan your vehicle, identify any fault codes, register your new battery with the BMS where required and get the light cleared quickly.

Contact our team today by calling 09 218 7789 to book a diagnostic appointment.

Frequently Asked Questions

Can I drive my car with the check engine light on after a battery change?

You can usually drive short distances if the check engine light is solid and the vehicle drives normally, as it’s often just the ECU completing its self-tests after a reset. Don’t drive if the light is flashing, the engine runs roughly, or you notice stalling, poor power or unusual smells, as these indicate a real fault that needs immediate professional attention.

How long does it take for the check engine light to turn off after a battery change?

The check engine light usually turns off within three to 10 complete drive cycles after a battery change, which typically takes a few days to a week of normal mixed driving. A complete cycle includes cold start, warm-up, mixed city and highway driving, and cool-down. If the light remains on after a week of regular driving, professional diagnosis is needed.

Do I need to register my new car battery in New Zealand?

You need to register your new battery if your vehicle has a Battery Management System (BMS), which includes most BMW, Mercedes-Benz, Audi, Volkswagen and other modern European cars built since around 2002. The AA confirms some vehicles require new batteries to be registered with the system. Without registration, warning lights appear and the alternator charges incorrectly.

Can a loose battery terminal cause the check engine light to come on?

Yes, a loose or corroded battery terminal can absolutely cause the check engine light to come on, because the resulting voltage drops make the ECU detect unstable power and sensor readings. Even with a brand-new battery, dirty or loose clamps create resistance that affects the entire electrical system. Cleaning the terminals and torquing the clamps correctly often resolves the warning light entirely.

Will an auto parts store turn off the check engine light for me?

Some auto parts stores in New Zealand offer a free OBD scan that reads and clears codes, but they generally can’t perform battery registration, module coding or adaptations that European vehicles need after a battery change. If the light keeps returning after clearing, or your car requires BMS registration, a qualified auto electrician with manufacturer-level diagnostic equipment is the appropriate option.

Can the wrong battery damage my car’s electronics?

Yes, fitting the wrong battery can damage your car’s electronics because incorrect voltage profiles, low CCA ratings or the wrong chemistry can cause the alternator to overcharge or undercharge the new battery. Over time this stresses sensitive modules like the ECU, BMS and infotainment unit. Fitting a flooded battery to a car that requires AGM is particularly likely to cause electronic faults.

Categories
Auto Electrical

Why Your Indicator Is Blinking Fast – What It Means and How to Fix It

A fast-blinking indicator in your car usually points to one of three things: a blown indicator bulb, an LED bulb fitted without a load resistor or compatible flasher relay, or a corroded socket or wiring fault in the indicator circuit.

The good news is that all three are fixable, but ignoring the warning can leave you with a failed Warrant of Fitness and a real safety risk on Auckland’s busy roads.

Why Is Your Indicator Blinking Faster Than Usual?

A fast-blinking indicator means your vehicle’s flasher circuit has detected that the electrical load on that side has dropped below what it expects.

The system is designed to double the flash rate as a built-in warning that something has gone wrong with a turn signal, most commonly a blown bulb or an incompatible LED upgrade.

Modern cars use this fault-detection logic so the driver doesn’t have to get out and inspect the lights every trip.

Most New Zealand vehicles use either a dedicated flasher relay or a body control module (BCM) to monitor current draw through the indicator circuit.

When the current drops, the system assumes a bulb has failed and increases the flash rate as an alert.

The technical name for this rapid blinking is “hyperflashing”, and it’s deliberate, not a fault with the wiring on its own.

A Blown or Failing Indicator Bulb

The most common cause of a fast-blinking indicator is a single blown bulb at either the front, rear, or side repeater position on the affected side.

Halogen indicator bulbs have a finite lifespan and will fail eventually, especially in older Japanese imports and European vehicles that have done high mileage.

When the filament breaks, the bulb stops drawing current, and the flasher circuit interprets this as a fault.

The opposite-side indicator and dashboard arrow will continue to flash, but at roughly double the normal speed.

Replacing the failed bulb with one of matching specification will restore the normal flash rate in almost every case.

LED Bulbs Fitted Without a Load Resistor or Compatible Relay

LED indicator bulbs draw far less current than the halogen bulbs they replace, which causes the vehicle’s flasher circuit to behave as though a bulb has blown.

This is the second most common cause of hyperflashing in New Zealand vehicles, especially among drivers who have upgraded their indicators for a brighter or more modern look without changing any of the supporting components.

A standard 21W indicator bulb draws roughly 1.75 amps, while a typical LED equivalent draws less than 0.2 amps.

The flasher relay or BCM sees this large drop in current and treats it the same as a burnt-out filament.

Fitting load resistors in parallel with each LED, or replacing the flasher relay with an LED-compatible unit, brings the load back up and stops the rapid blinking.

Corroded Sockets, Bad Earth Points, or Damaged Wiring

A fast-blinking indicator can also be caused by corroded bulb sockets, poor earth connections, or chafed wiring that increases resistance in the circuit.

This is more common on older vehicles, vehicles parked near the coast, and any car that has had aftermarket lighting work done without proper waterproofing of the connectors.

Salt air in coastal Auckland suburbs accelerates corrosion on exposed electrical contacts, and a corroded socket will mimic a partial bulb failure even when the bulb itself is fine.

An auto electrician will test the circuit with a multimeter to find voltage drops or high-resistance joints that aren’t obvious from a visual inspection alone.

How Do You Diagnose a Fast-Blinking Indicator at Home?

You can usually diagnose a fast-blinking indicator in under five minutes by activating the hazard lights and walking around your parked vehicle.

Compare both sides for any bulbs that are dim, dark, or flickering, and check the front, rear, and side repeater positions.

If a bulb is clearly out, you’ve found the issue.

For LED upgrades, the giveaway is that the rapid blinking started immediately after a bulb change rather than appearing gradually.

If every bulb visibly lights up and you haven’t changed any of them recently, the next step is to check for corrosion or moisture in the bulb sockets and wiring connectors.

Walking Around the Vehicle With the Hazards On

Turn on the hazard lights with the vehicle parked safely off the road, then walk around and check each of the six indicator positions, which are the two front, two rear, and two side repeaters on most modern vehicles.

A failed bulb will be obvious because it won’t light at all or will be noticeably dimmer than its pair.

Do this during daylight or under good workshop lighting so you can clearly see which lamp is failing.

If both sides hyperflash, the issue is more likely a flasher relay, BCM fault, or systemic wiring problem rather than a single bulb.

Checking If LED Bulbs Have Been Fitted

If your indicators only started blinking quickly after someone installed new bulbs, the cause is almost certainly LED-related hyperflashing.

Remove one of the indicator bulbs and check whether it has a filament inside the glass, which means it’s a halogen, or an array of small diodes, which means it’s an LED.

Genuine OEM replacement bulbs from a reputable supplier will usually match the original specification, but online and overseas purchases often don’t include the resistors or CANBUS decoders needed for compatibility with New Zealand vehicles, especially Japanese imports with sensitive flasher systems.

How Do You Fix a Fast-Blinking Indicator?

The fix depends entirely on the cause: replace the failed bulb if one has blown, install load resistors or an LED-compatible flasher relay if LEDs have been fitted, or repair the corroded socket or wiring if the circuit itself is the problem.

None of these are particularly expensive, but each requires the correct diagnosis first to avoid wasted parts.

In most cases, a straightforward bulb replacement is the answer.

If that doesn’t restore normal flashing, the issue is electrical and benefits from professional diagnosis with a multimeter or scope.

Replacing a Blown Indicator Bulb

Replace the failed bulb with one that matches the original part number or wattage.

Most indicator bulbs in New Zealand cars use amber-coloured halogen bulbs in either the PY21W or P21W format, but always check your owner’s manual or the bulb already in the holder to confirm.

Make sure the new bulb seats properly in the socket and that the contacts are clean before testing.

After replacement, the indicator should return to its normal flash rate of roughly 60 to 90 cycles per minute, which is the design baseline used by most manufacturers under the SAE J590 industry standard.

Fixing LED Hyperflashing

To stop LED hyperflashing, either fit load resistors in parallel with each LED indicator bulb, or replace the flasher relay with an LED-compatible unit if your vehicle still uses a swappable relay.

Many modern cars have moved the flasher function into the body control module, in which case load resistors or CANBUS-ready bulbs become the only practical fix.

Load resistors generate significant heat in use and must be mounted to a clean metal surface away from plastic trim or wiring looms.

This is the main reason this work is best done by a qualified auto electrician rather than as a DIY job.

Repairing Corroded Sockets and Wiring

If both the bulb and the relay check out, the fault is in the wiring.

Inspect the bulb socket for green or white corrosion on the contacts, and check the earth point near the lamp for rust or paint contamination.

Cleaning corroded contacts with electrical contact cleaner and a small brush can restore the connection in mild cases.

For severe corrosion or broken connector pins, the socket should be replaced rather than repaired, as a poor connection in this circuit will keep coming back.

Common Indicator Faults Compared Side by Side

The table below compares the three main causes of a fast-blinking indicator so you can match the symptoms to the likely fault before booking a repair.

Each cause has its own diagnostic signs and fix, and getting these right the first time saves money on unnecessary parts.

CauseKey symptomsTypical fix
Blown halogen indicator bulbOne indicator position is dark or noticeably dim; fast blinking started suddenly without any recent work on the carReplace the bulb with a matching halogen of the same wattage and part code
LED bulb fitted without resistor or compatible relayFast blinking started right after a bulb upgrade; all bulbs visibly light up; bulbs look like small dotted arrays rather than filamentsFit load resistors in parallel with each LED, or install an LED-compatible flasher relay
Corroded socket, bad earth, or damaged wiringFast blinking is intermittent; bulbs work but may flicker; vehicle is older or kept in a coastal areaClean or replace the affected socket, repair the earth point, or replace damaged sections of wiring

Knowing which of these three categories your problem falls into is most of the diagnostic work.

Once you’ve narrowed it down, the actual fix is usually quick and inexpensive.

Does a Fast-Blinking Indicator Fail a Warrant of Fitness?

Yes, a fast-blinking indicator will typically fail a Warrant of Fitness inspection in New Zealand because it points to either a non-functioning lamp or an incorrectly operating indicator circuit.

The NZTA Vehicle Inspection Requirements Manual requires that direction indicator lamps operate in a way that is appropriate for the lamp and the vehicle, and that each lamp in a pair emits light of approximately equal intensity, colour, and frequency.

If one of the bulbs is blown, the vehicle will fail on a non-functioning mandatory lamp.

If LED bulbs have been fitted and fewer than 75% of the LEDs in the array operate, the vehicle fails on that basis as well.

The Land Transport Rule: Vehicle Lighting 2004 also requires a lamp-failure warning device to function where one was fitted as original equipment, which covers the dashboard arrow that flashes alongside your indicator.

When Should You Call an Auto Electrician?

You should call an auto electrician if you’ve already replaced the bulb and the rapid blinking continues, if you’ve fitted LED bulbs and aren’t comfortable installing load resistors yourself, or if there’s any sign of moisture, corrosion, or melted plastic at the bulb socket.

These signs point to a wiring fault that needs proper testing equipment to track down.

Continuing to drive with a faulty indicator circuit will sometimes lead to additional electrical issues, such as a blown fuse or damage to the flasher relay.

An experienced auto electrician will diagnose the fault with a multimeter or oscilloscope and fix it correctly the first time, which is faster and cheaper than swapping parts in the hope of finding the problem.

Why Does a Working Indicator Matter for Road Safety?

Direction indicators are one of the main ways drivers signal their intentions to other road users, so a fault that makes them flash unpredictably is a serious safety problem.

NZTA Waka Kotahi reports that vehicle lighting problems contribute to around seven deaths and 88 injuries on New Zealand roads each year, and indicators are part of that picture.

A driver who can’t rely on their indicators may stop using them, and other road users will dismiss the unusual flash rate as something else.

Either way, the result is reduced communication on the road, which matters more on rural New Zealand routes where lane changes happen at higher speeds.

Need Help With Your Vehicle’s Fast-Blinking Indicators?

A fast-blinking indicator is usually caused by a failed bulb, an LED upgrade fitted without the right resistors or relay, or a corroded socket in the circuit, and sorting it early keeps your vehicle WoF-compliant and safe to drive on Auckland roads.

As auto electricians in Auckland, Eurosparx can diagnose and repair any indicator or wiring fault on your vehicle.

Contact our team today by calling 09 218 7789 to book in for an auto electrical inspection.

Frequently Asked Questions

Why is my indicator blinking fast but no bulb is out?

If all your bulbs are working but the indicator still blinks rapidly, the most likely cause is a corroded socket, a poor earth connection, or LED bulbs without load resistors. A high-resistance joint in the circuit will reduce current enough to trigger hyperflashing even when every bulb still lights up. An auto electrician can test the circuit and find the fault.

Can I fix a fast-blinking indicator myself?

You can replace a blown indicator bulb yourself in most vehicles using basic tools and a matching replacement bulb. Fixing LED hyperflashing or wiring corrosion is more involved, as load resistors generate heat and need careful mounting, and wiring repairs need a multimeter. If you aren’t confident with auto electrical work, a qualified auto electrician is the safer choice.

Will hyperflashing damage my car?

Hyperflashing on its own won’t damage your car because it’s a designed warning signal, not a fault. The underlying cause will sometimes cause further problems though, such as a failed bulb leading to a blown fuse, or improperly installed load resistors melting nearby trim. The flash rate itself is harmless, but the fault behind it should be fixed promptly.

Do LED indicator bulbs pass a Warrant of Fitness in New Zealand?

LED indicator bulbs can pass a Warrant of Fitness in New Zealand if they meet the equipment, condition, and performance requirements set out in the Land Transport Rule: Vehicle Lighting 2004. At least 75% of the LEDs in any array must operate, the light emitted must be amber, and the lamp must flash correctly without hyperflashing.

How long does it take to fix a fast-blinking indicator?

A simple bulb replacement takes about 5 to 15 minutes once the correct part is on hand. Fitting load resistors or replacing a flasher relay usually takes between 30 minutes and an hour depending on the vehicle. Wiring repairs involving corrosion or damaged sockets can take longer, particularly if the connector or harness needs to be replaced.

Categories
Car Batteries

How Long Should a Car Battery Really Last in NZ?

If you’re wondering how long your car battery should last in New Zealand, you’re not alone. It’s one of the most common questions Kiwi drivers ask, and the answer isn’t always straightforward. Battery life depends on a range of factors, from the type of vehicle you drive to the climate you live in and how often you use your car. In this article, we’ll cover the typical lifespan of a car battery in NZ, what affects its longevity, the warning signs that it’s failing, and what you can do to get the most out of it.

How Long Does a Car Battery Last in New Zealand?

In New Zealand, a car battery will typically last between three and five years. Some batteries may push past the five-year mark, but this is the exception rather than the rule. Most automotive professionals recommend getting your battery tested once it reaches the three-year point, even if it seems to be working fine. A battery can lose a significant amount of its capacity without showing obvious signs of trouble until the day it refuses to start your car.

The three-to-five-year range is a general guide, and the actual lifespan you get from your battery will depend on several variables. Drivers in Auckland, for example, benefit from a relatively mild climate compared to parts of the South Island, which can help batteries last a bit longer. However, Auckland’s stop-start traffic and high humidity can introduce their own challenges. Short trips around suburbs like Avondale, Mt Albert, or Henderson mean the alternator doesn’t always get enough time to fully recharge the battery, which can shorten its life over time.

It’s also worth noting that not all batteries are created equal. A quality battery from a reputable brand, properly matched to your vehicle, will almost always outlast a cheap, generic option. European vehicles like BMW, Audi, and Volkswagen often require specific battery types with higher specifications, and fitting the wrong battery can lead to premature failure or even damage to your car’s electrical system.

What Factors Affect Car Battery Life?

Driving Habits and Trip Length

Your driving habits play a major role in how long your battery lasts. If you mainly drive short trips around town, your battery is under more stress than you might think. Every time you start your engine, the battery delivers a large burst of energy to the starter motor. On a short trip, the alternator may not run long enough to fully replace the charge that was used during startup. Over weeks and months, this leads to a gradual decline in the battery’s overall charge level, a condition known as chronic undercharging.

Chronic undercharging causes sulphation, which is a buildup of lead sulphate crystals on the battery plates. Once sulphation becomes severe, it permanently reduces the battery’s ability to hold a charge. Drivers who regularly commute on the motorway or take longer trips give their alternator enough time to keep the battery topped up, which helps prevent this issue. If your car sits unused for extended periods, such as a second vehicle that only gets driven on weekends, the battery can also slowly discharge on its own due to the electrical systems that remain active even when the engine is off.

Climate and Temperature

New Zealand’s climate is generally kinder to car batteries than extreme environments overseas, but it still has an impact. Heat is actually the biggest enemy of battery life. High temperatures accelerate the chemical reactions inside the battery, which causes the internal components to degrade faster. While Auckland doesn’t experience the extreme heat found in places like Australia, summer temperatures combined with engine bay heat can still take a toll over the years.

Cold weather, on the other hand, reduces a battery’s ability to deliver power. This is why batteries tend to fail on cold winter mornings. The cold doesn’t usually cause the damage itself, but it exposes a battery that has already weakened over time. If you live in a cooler part of the Auckland region or regularly travel to colder areas, your battery needs to be in good condition to handle those temperature drops reliably.

Vehicle Type and Electrical Demands

Modern vehicles place much higher demands on their batteries than cars from even ten or fifteen years ago. Today’s cars are packed with electronic systems, from infotainment screens and GPS units to advanced driver assistance systems (ADAS), keyless entry, and multiple control modules that stay active even when the car is parked. All of these systems draw power from the battery, and the more electronics your vehicle has, the harder the battery has to work.

European vehicles, in particular, are known for their complex electrical architectures. Cars like Mercedes-Benz, BMW, and Audi often use AGM (Absorbent Glass Mat) batteries instead of standard lead-acid batteries because they need to support higher electrical loads and start-stop engine systems. These AGM batteries are more expensive, but they’re designed to handle the repeated deep discharges that come with start-stop technology. Fitting a standard flooded battery in a vehicle that requires an AGM battery is a common mistake that leads to early failure and potential electrical faults. Japanese vehicles like Toyota, Honda, and Nissan also have their own specific battery requirements, and it’s always important to match the correct battery to your vehicle’s specifications.

Battery Quality and Fitment

The quality of the battery you choose matters more than most people realise. Budget batteries might save you money upfront, but they often use thinner plates and lower-quality materials, which means they won’t last as long or perform as reliably. A good-quality battery from a trusted brand, correctly sized and rated for your specific vehicle, is one of the best investments you can make in your car’s reliability.

Proper fitment is just as important. A battery that’s too small or doesn’t have the correct terminal configuration can cause poor connections, vibration damage, and charging issues. In some modern vehicles, the battery also needs to be registered or coded to the car’s computer system when it’s replaced. This is especially common in European cars with intelligent battery management systems. If the new battery isn’t registered, the car’s charging system may not operate correctly, which can lead to overcharging or undercharging and a much shorter battery life.

Warning Signs Your Car Battery Is Failing

Slow Engine Cranking

One of the most obvious signs of a failing battery is when the engine cranks slowly when you turn the key or press the start button. Instead of the engine firing up quickly and confidently, you’ll notice a sluggish, laboured cranking sound. This happens because the battery no longer has enough power to turn the starter motor at full speed. If you notice this, especially on a mild day when cold weather isn’t a factor, it’s a strong sign that your battery is nearing the end of its life and should be tested as soon as possible.

Dimming Lights and Electrical Issues

If your headlights seem dimmer than usual, particularly at idle, or if you notice your interior lights flickering, the battery could be struggling to keep up with the vehicle’s electrical demands. You might also experience issues with power windows moving slower than normal, the radio cutting out, or the infotainment system resetting on its own. While these symptoms can sometimes point to alternator problems or other electrical faults, the battery is often the first thing to check.

Dashboard Warning Lights

Many modern vehicles have a battery warning light on the dashboard that will illuminate if the charging system detects a problem. This light might look like a small battery icon or could be part of a broader electrical system warning. Don’t ignore this light. It could indicate a failing battery, a faulty alternator, or a wiring issue. Getting a proper diagnostic check will help pinpoint the exact cause so you’re not left stranded.

Swollen Battery Case or Corrosion

If you pop the bonnet and notice that the battery case looks swollen or bloated, that’s a sign of internal damage, often caused by overcharging or excessive heat. A swollen battery should be replaced immediately, as it can be a safety hazard. Also look for corrosion around the battery terminals. A white or greenish powdery buildup on the terminals can prevent a good electrical connection and cause starting problems. While corrosion can sometimes be cleaned, heavy buildup is often a sign that the battery is venting acid and should be replaced.

How to Get the Most Out of Your Car Battery

Take Regular Longer Drives

If most of your driving consists of short trips around Auckland’s suburbs, try to take a longer drive of at least 20 to 30 minutes once a week. This gives the alternator enough time to fully recharge the battery and helps prevent the chronic undercharging that leads to premature failure. A drive on the motorway or a trip out to the Waitākere Ranges or along the western coast will do the job nicely and give your battery the charge it needs to stay healthy.

Keep the Battery Clean and Secure

Periodically check your battery terminals for corrosion and clean them if needed. A wire brush and a mixture of baking soda and water can remove light corrosion effectively. Make sure the battery is properly secured in its tray as well. Vibration from driving on rough roads can damage the internal plates of the battery over time, so a firm hold-down clamp is essential. This is a simple maintenance step that many people overlook, but it can genuinely extend your battery’s life.

Limit Electrical Use When the Engine Is Off

Leaving your headlights on, playing the radio, or charging your phone with the engine off all drain the battery without the alternator running to replenish it. Even leaving a dashcam connected when the car is parked overnight can slowly drain the battery over time. If you use accessories like these, be mindful of how much power they draw and consider disconnecting them when the car isn’t running. Some modern vehicles have a battery protection feature that will cut power to certain systems when the voltage drops too low, but not all cars have this, and it’s better to be proactive.

Get Regular Battery Tests

The best way to avoid an unexpected flat battery is to have it tested regularly, especially once it’s past the three-year mark. A professional battery test measures the cold cranking amps (CCA) and overall health of the battery, giving you a clear picture of how much life it has left. This is a quick test that can be done during a routine service or as a standalone check. Knowing the state of your battery before winter arrives can save you from a cold morning breakdown.

When Should You Replace Your Car Battery?

If your battery is more than three years old and you’re starting to notice any of the warning signs mentioned above, it’s time to have it tested and likely replaced. Even without symptoms, replacing a battery that’s approaching the four-to-five-year mark is a smart preventative measure, especially if you rely on your vehicle for daily commuting or work. The cost of a new battery is far less than the inconvenience and potential expense of a roadside breakdown or needing a tow.

When it comes time to replace your battery, make sure you choose the right one for your vehicle. As mentioned earlier, European and Japanese vehicles often have specific battery requirements, and fitting the wrong type can cause ongoing problems. It’s also important that the new battery is installed correctly and, where necessary, registered to the vehicle’s computer system. Having a qualified auto electrician handle the replacement ensures everything is done properly and that your car’s electrical system continues to function as it should.

Need a Car Battery Test or Replacement in Auckland?

A car battery in New Zealand should last between three and five years, but the actual lifespan depends on your driving habits, the climate, your vehicle type, and the quality of the battery itself. Regular testing, proper maintenance, and choosing the right battery for your car are the best ways to avoid unexpected breakdowns and get the most value from your investment.

As a trusted car battery specialist in Auckland, Eurosparx can test your existing battery, advise on the best replacement for your vehicle, and install it correctly, including battery registration for European vehicles that require it. We stock quality batteries for both Japanese and European cars and can have you back on the road quickly. Contact our team today by calling 09 218 7789.

Frequently Asked Questions

How long does a car battery last in New Zealand?

A car battery in New Zealand typically lasts between three and five years. The exact lifespan depends on factors like your driving habits, the climate you drive in, and the type of vehicle you own. Regular testing after the three-year mark is recommended to catch any decline in performance before the battery fails completely and leaves you stranded.

What are the signs that my car battery is dying?

Common signs of a failing car battery include slow engine cranking, dimming headlights, flickering interior lights, and electrical accessories behaving erratically. You may also see a battery warning light on your dashboard or notice corrosion or swelling around the battery itself. If you experience any of these symptoms, have your battery tested by a professional as soon as possible.

Does short-trip driving affect car battery life?

Yes, frequent short trips can significantly reduce your car battery’s lifespan. Short drives don’t give the alternator enough time to fully recharge the battery after starting the engine. Over time, this leads to chronic undercharging and sulphation of the battery plates, which permanently reduces its capacity. Taking a longer drive of 20 to 30 minutes at least once a week can help counter this.

Do European cars need a special type of battery?

Many European vehicles, particularly those with start-stop technology, require an AGM (Absorbent Glass Mat) battery rather than a standard flooded lead-acid battery. AGM batteries are designed to handle deeper discharges and higher electrical demands. Fitting the wrong battery type can cause charging issues and premature failure, and some European cars also require the new battery to be registered to the vehicle’s computer system.

How can I make my car battery last longer?

You can extend your car battery’s life by taking regular longer drives to keep it fully charged, keeping the terminals clean and free of corrosion, ensuring the battery is securely mounted, and avoiding excessive use of electrical accessories when the engine is off. Having your battery professionally tested at least once a year after it reaches three years old will also help you stay ahead of any issues.

Categories
Auto Electrical Car Accessories

Adding an Aftermarket Alarm: Is It Worth It?

If you’re thinking about adding an aftermarket alarm to your vehicle, you’re not alone. Car theft remains a real concern for Auckland drivers, and factory-fitted security systems don’t always offer the level of protection you might expect. Whether you drive a European sedan through Ponsonby or a Japanese SUV around West Auckland, the question of whether an aftermarket alarm is a worthwhile investment comes up time and again. This article breaks down the real benefits, potential drawbacks, and practical considerations so you can make an informed decision about protecting your vehicle.

Why Factory Alarms Often Fall Short

Most modern vehicles come with some form of factory-fitted security, but these systems are often quite basic. A standard factory alarm might include central locking, an engine immobiliser, and a simple siren that sounds when a door is forced open. While these features are better than nothing, they’re widely understood by experienced thieves. Because factory systems are the same across thousands of identical vehicles, anyone who learns to bypass one can potentially bypass them all. This is a particular concern for popular models that are frequently targeted in Auckland.

Factory alarms also tend to lack advanced features like GPS tracking, smartphone notifications, and tilt sensors. These are the kinds of tools that can make a genuine difference when it comes to both deterring theft and recovering a stolen vehicle. If your car only has the basics, an aftermarket alarm can fill those gaps and offer a much more comprehensive layer of security tailored to your specific needs and driving habits.

Benefits of Installing an Aftermarket Alarm

Superior Theft Deterrence

The most obvious benefit of an aftermarket alarm is improved theft deterrence. A visible alarm system, complete with a flashing LED indicator on the dashboard, sends a clear signal to would-be thieves that your car has additional protection. Most opportunistic criminals are looking for easy targets, and the presence of an aftermarket alarm can be enough to make them move on to a less protected vehicle. This is especially relevant in areas of Auckland where car crime rates are higher, including some parts of South and West Auckland.

Beyond the visual deterrent, aftermarket alarms offer more sophisticated triggering mechanisms. While a factory alarm might only respond to a forced door entry, a quality aftermarket system can detect glass breakage, movement inside the cabin, impacts to the vehicle body, and even changes in the vehicle’s tilt angle, which is useful for detecting wheel theft. These multiple layers of detection make it far harder for a thief to access your vehicle without triggering the alarm.

GPS Tracking and Vehicle Recovery

One of the standout features available with many aftermarket alarm systems is GPS tracking. If your vehicle is stolen, a GPS-enabled alarm allows you to track its location in real time through a smartphone app or web portal. This information can be passed directly to the police, dramatically increasing the chances of recovering your vehicle quickly and in good condition. Without GPS tracking, a stolen vehicle can be stripped for parts or shipped out of the region before you even realise it’s gone.

Some premium aftermarket systems also allow for remote engine immobilisation. This means that if your car is stolen, you or the monitoring service can remotely disable the engine, bringing the vehicle to a safe stop. This kind of feature goes well beyond what any factory-fitted system offers and can be the difference between getting your car back and losing it for good.

Smartphone Integration and Real-Time Alerts

Modern aftermarket alarm systems often come with smartphone connectivity, allowing you to receive instant alerts if your alarm is triggered. Whether you’re at work in the Auckland CBD or at home in Avondale, you’ll know within seconds if something is happening to your vehicle. Many systems also let you arm, disarm, and check the status of your alarm remotely, giving you complete control from wherever you are.

This kind of real-time communication is something factory alarms simply don’t provide. With a factory system, you’re typically reliant on hearing the siren yourself or hoping a passer-by notices the alarm going off. Smartphone integration means you’re always in the loop, which can speed up your response time and improve the chances of preventing a theft before the vehicle is driven away.

Insurance Benefits

In some cases, having an aftermarket alarm installed can positively affect your car insurance premiums. Some insurance providers in New Zealand offer discounts or more favourable terms for vehicles fitted with approved aftermarket security systems. It’s worth checking with your insurer before installation, as the savings over time can help offset the cost of the alarm itself. Even where a direct discount isn’t offered, having a quality alarm system fitted can strengthen your position if you ever need to make a theft-related claim.

Insurers generally view aftermarket alarms as a sign that the vehicle owner is taking reasonable steps to protect their property. This can be particularly beneficial if you own a high-value European vehicle, which tends to attract higher premiums due to the increased risk of theft and the cost of replacement parts.

Potential Drawbacks to Consider

Upfront Cost

The most common concern about aftermarket alarms is the cost. A quality system, professionally installed, typically ranges from a few hundred dollars to over a thousand, depending on the features you choose. Basic systems with a siren, immobiliser, and remote are at the lower end, while systems with GPS tracking, smartphone integration, and advanced sensors sit at the higher end. For some vehicle owners, this upfront cost can feel significant, especially if the car itself isn’t particularly high in value.

However, it’s important to weigh this cost against the potential financial impact of a car theft. The inconvenience, the excess on your insurance policy, the loss of personal belongings inside the vehicle, and the potential increase in your premiums after a claim can all add up quickly. When you look at the numbers, a one-time investment in a quality alarm system often makes solid financial sense, particularly for vehicles that are commonly targeted by thieves.

False Alarms

False alarms are a frustration that some aftermarket alarm owners experience. A poorly installed or overly sensitive system can be triggered by heavy rain, strong winds, passing trucks, or even a cat jumping on the bonnet. Frequent false alarms are not only annoying for you and your neighbours, but they can also lead to complacency, where people start ignoring the alarm altogether because they assume it’s just going off for no reason.

The key to avoiding false alarms is professional installation and proper calibration. When an aftermarket alarm is fitted by an experienced auto electrician, the sensitivity of each sensor is carefully adjusted to suit your vehicle and the environment where it’s typically parked. This is one of the biggest reasons why professional installation matters so much. A DIY or budget installation might save you money upfront, but it can lead to ongoing headaches and a system that doesn’t perform reliably.

Compatibility with Your Vehicle’s Electrical System

Modern vehicles, especially European models like BMW, Audi, Mercedes-Benz, and Volkswagen, have highly complex electrical systems with multiple electronic control units communicating over CAN bus networks. Installing an aftermarket alarm on these vehicles requires specialist knowledge to ensure the new system integrates correctly without causing faults, warning lights, or interference with existing features like keyless entry, push-button start, or factory immobilisers.

A poorly integrated alarm can cause all sorts of issues, from battery drain to intermittent electrical faults that are difficult and expensive to diagnose. This is why it’s essential to have the work done by an auto electrician who has specific experience with your vehicle’s make and model. In Auckland, specialists who work regularly with European and Japanese vehicles are best placed to handle these installations correctly the first time.

Choosing the Right Aftermarket Alarm System

Assess Your Security Needs

Before choosing a system, think about what you actually need. If you park in a secure garage at home and a monitored car park at work, your requirements are different from someone who parks on the street overnight in a high-theft area. Consider factors like the value of your vehicle, how visible it is when parked, and whether you carry expensive equipment or tools in the car. A tradie who leaves tools in a work van in West Auckland has very different security needs from someone with a daily commuter car parked in a locked garage in Remuera.

It’s also worth thinking about the features that matter most to you. If vehicle recovery is your main concern, GPS tracking should be a priority. If deterrence is what you’re after, a system with a loud siren, flashing lights, and a visible LED indicator might be sufficient. An experienced auto electrician can help you match the right system to your situation and budget, so you’re not paying for features you don’t need or missing out on ones that could make a real difference.

Quality of Components

Not all aftermarket alarms are created equal. Cheaper systems sourced from generic suppliers may use lower-quality components that are more prone to failure and less effective at deterring theft. Look for well-known brands that are widely used and supported in New Zealand. Quality components are more reliable, come with better warranties, and are easier to service or upgrade down the track.

Your installer should be able to recommend reputable brands and explain the differences between the options available. Don’t be tempted to buy the cheapest unit you can find online and ask someone to fit it. The alarm itself is only as good as the installation, and pairing a quality product with professional fitting gives you the best possible outcome.

Professional Installation Is Essential

This point cannot be overstated. A professional installation by a qualified auto electrician is the single most important factor in getting a reliable, effective aftermarket alarm. The installer needs to understand your vehicle’s wiring, integrate the alarm with existing systems, mount sensors in the correct locations, and calibrate everything properly. Shortcuts during installation lead to problems later, including false alarms, battery drain, and even damage to your vehicle’s electrical system.

A professional installer will also ensure the alarm’s wiring is neatly routed and hidden, making it much harder for a thief to locate and disable the system. If the wiring is easily visible or accessible, a knowledgeable thief can bypass even the best alarm in a matter of minutes. Proper concealment of wiring and components is a hallmark of a quality installation.

The Auckland Context: Why It Matters Here

Auckland consistently sees some of the highest rates of vehicle-related crime in New Zealand. From opportunistic break-ins in shopping centre car parks to organised vehicle theft rings, the risks are real and varied. Suburbs across West Auckland, South Auckland, and even central areas experience regular vehicle crime, making security a practical concern for a wide range of drivers.

On top of that, Auckland’s diverse vehicle fleet means that thieves have a broad range of targets. Popular Japanese models like Toyota Hilux, Mazda Demio, and Subaru Legacy are frequently stolen due to their high demand for parts. European vehicles, while less commonly targeted in terms of volume, are attractive because of their higher resale value and the demand for their components. Regardless of what you drive, taking proactive steps to secure your vehicle is a sensible move in the Auckland environment.

It’s also worth noting that catalytic converter theft has become increasingly common across Auckland. While an alarm won’t prevent every type of theft, a system with tilt sensors and impact detection can alert you if someone is attempting to jack up your vehicle or work underneath it. This added layer of protection is something many Auckland vehicle owners are now considering when choosing an aftermarket alarm.

Aftermarket Alarms vs. Other Security Options

An aftermarket alarm is just one tool in the vehicle security toolkit. Steering wheel locks, wheel clamps, and gear shift locks provide a visible physical deterrent. Dash cameras with parking mode can record suspicious activity around your vehicle. GPS trackers that operate independently of an alarm system can be hidden in the vehicle as a dedicated recovery tool.

For most people, the best approach is a combination of measures. An aftermarket alarm provides active deterrence and real-time alerts, while a physical device like a steering wheel lock adds a visible obstacle. Together, these layers of security make your vehicle a much harder target. Your auto electrician can advise on the best combination of products based on your vehicle, your budget, and your typical parking situation.

Need Help Choosing and Installing an Aftermarket Alarm?

Adding an aftermarket alarm to your vehicle is a worthwhile investment for most Auckland drivers, particularly if your factory security system is basic or your vehicle is parked in higher-risk areas. The key is choosing the right system for your needs and having it professionally installed to avoid issues with false alarms, electrical faults, or poor integration with your vehicle’s existing systems.

At Eurosparx, we are experienced auto electricians based in Avondale, West Auckland, specialising in European and Japanese vehicles. We supply and install quality aftermarket alarm systems, ensuring full integration with your vehicle’s electrical system and proper calibration for reliable, hassle-free operation. Whether you need a straightforward alarm upgrade or a comprehensive security solution with GPS tracking and smartphone alerts, our team can help. Contact us today by calling 09 218 7789 or visit our website at eurosparx.co.nz to learn more about our services.

Frequently Asked Questions

Is an aftermarket alarm worth the cost?

For most vehicle owners in Auckland, an aftermarket alarm is a worthwhile investment. The upfront cost is relatively modest compared to the financial and personal impact of a vehicle theft. Quality systems offer features like GPS tracking, smartphone alerts, and advanced sensors that go well beyond what factory alarms provide, giving you significantly better protection and peace of mind.

Will an aftermarket alarm void my vehicle’s warranty?

A professionally installed aftermarket alarm should not void your vehicle’s warranty, provided the installation is done correctly and does not damage existing components. It is important to use a qualified auto electrician who understands your vehicle’s electrical system. If you have concerns, check with your vehicle’s manufacturer or dealer before proceeding with the installation.

How long does it take to install an aftermarket alarm?

Installation time depends on the complexity of the alarm system and the vehicle. A basic system can typically be installed in two to three hours, while a more advanced system with GPS tracking and multiple sensors may take half a day or more. Professional installation ensures everything is properly integrated, calibrated, and tested before you drive away.

Can an aftermarket alarm cause electrical problems in my car?

If installed incorrectly, an aftermarket alarm can cause issues such as battery drain, warning lights, or interference with factory systems. This is why professional installation by a qualified auto electrician is essential. An experienced installer will integrate the alarm with your vehicle’s existing wiring and electronics without causing faults or long-term problems.

Do aftermarket alarms work with keyless entry and push-button start vehicles?

Yes, quality aftermarket alarm systems are designed to work with modern vehicles that have keyless entry and push-button start. However, these vehicles require more careful installation due to their complex electrical architecture. A specialist auto electrician with experience in European and Japanese vehicles will know how to integrate the alarm without affecting your existing keyless and start systems.

What features should I look for in an aftermarket alarm?

Key features to consider include a loud siren, LED dashboard indicator, impact and tilt sensors, glass-break detection, GPS tracking, and smartphone integration. The right combination depends on your vehicle, where you park, and your budget. An auto electrician can assess your situation and recommend a system that offers the best protection for your specific needs.

Categories
Auto Electrical

How to Stop False Alarms in Your Car Security System

Few things are more frustrating than your car alarm going off in the middle of the night for no apparent reason. False alarms from car security systems are a common problem for vehicle owners across Auckland, and they can cause everything from sleep disruption to strained relationships with neighbours. In this article, we’ll walk you through the most common causes of false car alarms, how to stop them from happening, and when it’s time to call in a professional auto electrician to sort the issue out for good.

Common Causes of False Car Alarms

Before you can fix the problem, it helps to understand what’s triggering it. Car security systems are designed to detect specific inputs like vibration, door movement, or changes in voltage. When any of these sensors malfunction or receive incorrect signals, the alarm can go off without any real threat. Knowing the root cause will save you time and help you target the right fix.

Faulty or Overly Sensitive Shock Sensors

Shock sensors are one of the most common culprits behind false car alarms. These sensors detect vibrations or impacts to the vehicle, and when they’re set too high, even a passing truck, a heavy gust of wind, or a cat jumping on the bonnet can set them off. Over time, shock sensors can also degrade and become unreliable, sending false signals to the alarm module even when nothing has touched the car.

If your alarm seems to go off randomly during the night or in windy conditions, overly sensitive shock sensors are likely to blame. Many aftermarket alarm systems allow you to adjust the sensitivity level, but finding the right balance between security and avoiding nuisance triggers can be tricky without the right tools and experience.

Weak or Dying Car Battery

A car battery that is losing its charge can cause all sorts of electrical issues, including triggering your alarm. Most car alarm systems monitor the vehicle’s voltage level, and when the battery drops below a certain threshold, the system can interpret this as someone tampering with the electrical system. This is especially common with older batteries that struggle to hold a charge overnight or during cold Auckland mornings.

If your car alarm tends to go off after the vehicle has been sitting for several hours or overnight, it’s worth having your battery tested. A battery that reads around 12.4 volts or lower when the engine is off may not be providing enough stable power to keep the alarm system happy. Replacing an old battery is often one of the simplest and most effective fixes for false alarms.

Corroded or Damaged Wiring

The wiring that connects your alarm system to the various sensors, door switches, and the vehicle’s main electrical system can deteriorate over time. Corrosion, fraying, and loose connections can all send erratic signals that confuse the alarm module. This is particularly common in older vehicles or cars that have had aftermarket alarm systems installed with less-than-ideal wiring practices.

Damaged wiring can be difficult to diagnose without proper equipment because the issue may only occur intermittently. A wire might make good contact most of the time but lose connection when the car moves slightly or when temperatures change. An experienced auto electrician can trace the wiring and identify these types of faults using diagnostic tools.

Faulty Door Latch Sensors and Boot Switches

Your car alarm is connected to switches in each door, the boot, and often the bonnet. These switches tell the alarm system whether a door or panel is open or closed. When one of these switches fails or develops a poor connection, the alarm can think a door is being opened when it isn’t. You might notice this if your alarm triggers shortly after locking the car, or if it goes off at seemingly random intervals.

On European vehicles in particular, door latch mechanisms can be quite complex and prone to wear. A failing door latch actuator might send intermittent signals that the alarm interprets as unauthorised entry. Diagnosing this often requires scanning the vehicle’s body control module for fault codes that point to a specific door or latch assembly.

Aftermarket Alarm System Issues

Aftermarket alarm systems can be excellent when installed correctly, but poor-quality installations are a frequent source of false alarms. If the system wasn’t wired properly to begin with, or if it’s an older unit that’s no longer functioning reliably, it can trigger at random. Cheap aftermarket units may also lack the refined sensitivity settings found in factory-fitted systems, making them more prone to nuisance activations.

If your vehicle has an aftermarket alarm that’s causing issues, it may be worth having an auto electrician assess whether the system can be repaired and adjusted, or whether it would be better to remove it entirely and rely on the factory immobiliser and alarm if one is fitted. In many cases, a properly configured factory system offers more than enough protection without the headaches of a poorly installed aftermarket unit.

How to Stop Your Car Alarm From Going Off

Adjust the Shock Sensor Sensitivity

If your alarm has adjustable shock sensors, reducing the sensitivity is often the first and easiest step. On many aftermarket systems, the shock sensor is a small box mounted somewhere under the dashboard with a dial or screw that lets you lower the sensitivity. Turning it down slightly can prevent the alarm from reacting to minor vibrations while still triggering for genuine impacts like someone trying to break a window.

If you’re not sure where the sensor is located or how to adjust it, an auto electrician can find it quickly and set it to an appropriate level. It’s better to get this done properly than to turn the sensitivity so low that the alarm becomes ineffective. The goal is to find a middle ground where legitimate threats still trigger the system.

Replace or Test Your Car Battery

As mentioned earlier, a weak battery is one of the most common and easily overlooked causes of false alarms. Get your battery tested at an auto electrician or battery specialist. If the battery is more than three to four years old and showing signs of weakness, replacing it is a straightforward fix that can eliminate voltage-related false alarms. Make sure the replacement battery is the correct specification for your vehicle, as an undersized battery can cause similar issues.

It’s also worth checking the battery terminals for corrosion while you’re at it. Corroded terminals can create resistance in the connection, leading to voltage drops that mimic a failing battery. Cleaning the terminals and applying a protective coating is a quick job that can make a real difference to the stability of your vehicle’s electrical system.

Check and Clean Door and Boot Switches

If you suspect a door or boot switch is causing the problem, start by observing whether your vehicle’s interior lights behave normally when you open and close each door. If a light stays on or flickers when it shouldn’t, that door’s switch may be the issue. On many vehicles, these switches are simple pin-type mechanisms that can get dirty or worn over time.

Cleaning or replacing a faulty door switch is a relatively simple repair for an auto electrician. On some vehicles, the switch is integrated into the door latch assembly, which makes it a bit more involved to replace. Either way, fixing a dodgy switch not only stops false alarms but also prevents the associated battery drain from an interior light that stays on.

Have the Alarm System Professionally Diagnosed

If you’ve tried the basic fixes and the false alarms continue, it’s time for a professional diagnosis. An auto electrician with the right diagnostic equipment can read fault codes from your vehicle’s alarm and body control modules, test individual sensors, and trace wiring faults that aren’t visible to the naked eye. This is particularly important for European vehicles like BMW, Audi, Mercedes-Benz, and Volkswagen, where the alarm system is deeply integrated into the vehicle’s electronics.

A professional diagnosis can often pinpoint the exact cause within a short time, saving you from the trial-and-error approach of replacing parts one at a time. It’s the most efficient way to get to the bottom of persistent false alarm issues, especially when the cause isn’t immediately obvious.

Remove or Replace a Faulty Aftermarket Alarm

If an aftermarket alarm is the source of the problem and it can’t be repaired or adjusted, removing it may be the best option. A poorly installed aftermarket system can cause ongoing electrical issues beyond just false alarms, including battery drain and interference with other vehicle systems. An auto electrician can safely remove the system and restore the original wiring, ensuring everything functions as it should.

If you still want an aftermarket security system, consider having a quality unit professionally installed. A properly fitted alarm with correctly calibrated sensors will provide reliable security without the constant false activations. The key difference is always in the quality of the installation and the components used.

Important Considerations for Auckland Vehicle Owners

Weather and Environmental Factors

Auckland’s climate can play a role in false car alarms. The region experiences a mix of humidity, wind, and temperature fluctuations that can affect sensitive alarm components. High winds are particularly notorious for setting off overly sensitive shock sensors, especially in areas like West Auckland where properties may be more exposed to prevailing weather. If you find your alarm goes off more frequently on windy nights, adjusting the shock sensor sensitivity should be your first step.

Humidity and salt air, particularly for vehicles parked near the coast, can also accelerate corrosion on electrical connections and wiring. Regular inspections of your vehicle’s electrical system can help catch these issues before they start causing problems. Keeping connectors clean and protected is a simple preventative measure that can extend the life of your alarm system and other electrical components.

Neighbourhood and Noise Considerations

False car alarms don’t just affect you; they affect everyone around you. In residential areas across Auckland, a car alarm that goes off repeatedly at night can lead to complaints from neighbours and even involvement from local council noise control. Beyond the social aspect, a car alarm that cries wolf too often means people start ignoring it entirely, which defeats the purpose of having one in the first place.

Taking the time to sort out a false alarm issue isn’t just about convenience. It’s about maintaining the effectiveness of your security system and being a considerate member of your community. If your alarm has been going off regularly, getting it fixed sooner rather than later is the right call.

The Role of Proper Vehicle Diagnostics

Modern vehicles, especially European models, have highly integrated electronic systems where the alarm is just one part of a larger network of modules that communicate with each other. A fault in one module can sometimes have knock-on effects that trigger the alarm. For example, a failing comfort control module in a Volkswagen or a faulty general module in a BMW could cause alarm-related symptoms that have nothing to do with the alarm itself.

This is why proper diagnostic equipment is so important when troubleshooting persistent false alarms. Generic code readers may not pick up on faults in body control or comfort modules, so it’s worth visiting a specialist who has manufacturer-level or advanced aftermarket diagnostic tools. Getting the right diagnosis from the start prevents wasted time and money on parts that don’t fix the actual problem.

Need Help Fixing Your Car Alarm? Contact Eurosparx

False car alarms are a nuisance, but they’re almost always fixable once you identify the cause. Whether it’s a sensitive shock sensor, a weak battery, worn-out door switches, or a faulty aftermarket system, the right diagnosis makes all the difference. If you’ve tried the basic troubleshooting steps and the problem persists, a professional auto electrician can get to the root of the issue quickly.

At Eurosparx, we’re auto electricians based in Avondale, West Auckland, specialising in European and Japanese vehicles. We have the diagnostic tools and experience to track down and fix false alarm problems, along with any other auto electrical faults your vehicle might have. If your car alarm has been driving you and your neighbours up the wall, give our team a call today on 09 218 7789 or visit us at eurosparx.co.nz to book an appointment.

Frequently Asked Questions

Why does my car alarm keep going off for no reason?

The most common causes of false car alarms are overly sensitive shock sensors, a weak or dying car battery, faulty door latch switches, corroded wiring, or issues with an aftermarket alarm system. Environmental factors like strong winds can also trigger sensitive sensors. An auto electrician can diagnose the specific cause using proper diagnostic equipment and fix the issue efficiently.

Can a low car battery cause my alarm to go off?

Yes, a weak or dying car battery is one of the most common causes of false alarms. Car alarm systems monitor voltage levels, and when the battery drops below a certain point, the system may interpret this as tampering. If your battery is more than three to four years old or your alarm goes off after the car has been sitting overnight, getting the battery tested and replaced if necessary can often solve the problem.

How do I adjust the sensitivity on my car alarm?

On many aftermarket alarm systems, the shock sensor has a small adjustment dial or screw, usually located on a sensor box mounted under the dashboard. Turning the dial down reduces sensitivity so the alarm won’t react to minor vibrations. If you’re unsure where the sensor is located or how to adjust it correctly, an auto electrician can set it to an appropriate level for you.

Should I remove my aftermarket car alarm if it keeps causing problems?

If an aftermarket alarm system is causing persistent false alarms and can’t be repaired or properly adjusted, removing it may be the best option. Poorly installed aftermarket alarms can cause ongoing electrical issues including battery drain. An auto electrician can safely remove the system and restore original wiring. Many modern vehicles already have a factory-fitted immobiliser and alarm that provides adequate security.

How much does it cost to fix a car alarm that keeps going off?

The cost depends on the cause of the false alarms. Simple fixes like a battery replacement or shock sensor adjustment are relatively affordable. More complex issues involving wiring repairs, door latch replacements, or aftermarket alarm removal will cost more. The most cost-effective approach is to have the system properly diagnosed first so you’re only paying to fix the actual problem rather than guessing.

Can an auto electrician fix my factory-fitted car alarm?

Yes, an experienced auto electrician with the right diagnostic tools can diagnose and repair factory-fitted alarm systems. This is especially important for European vehicles like BMW, Audi, and Volkswagen where the alarm is integrated into the vehicle’s broader electronic network. Specialist diagnostics can identify faults in body control modules and related systems that may be triggering false alarms.

Categories
Auto Electrical Caravans & Motorhomes

Dual Battery Systems for Caravans: What You Need to Know

If you’re planning to hit the open road in your caravan, having a reliable power source is one of the most important things to get right. A dual battery system allows you to run your caravan’s accessories and appliances without draining the battery that starts your vehicle. Whether you’re a weekend camper or a full-time traveller, understanding how dual battery systems work and what’s involved in setting one up will help you make the right choice for your needs. This guide covers everything you need to know about dual battery systems for caravans, including how they work, the different types available, and what to consider when getting one installed in Auckland.

How a Dual Battery System Works

A dual battery system uses two separate batteries in your setup. The first battery is your vehicle’s starter battery, which is dedicated to starting your engine and running essential vehicle electronics. The second battery, often called the auxiliary or house battery, powers everything in your caravan such as lights, fridges, USB chargers, water pumps, and other 12-volt accessories. The two batteries are connected through a management device that controls how power flows between them, ensuring that your starter battery is always protected and ready to start the engine.

When your vehicle’s engine is running, the alternator charges both batteries. The management device monitors voltage levels and directs surplus charge to the auxiliary battery once the starter battery is sufficiently charged. When you turn the engine off and use your caravan’s accessories, only the auxiliary battery is drawn down. This means you can run your fridge overnight at a campsite without any risk of being unable to start your vehicle the next morning. It’s a simple concept, but getting the components right and having the system properly installed makes all the difference in terms of performance and safety.

Types of Dual Battery Systems

Voltage Sensitive Relay (VSR) Systems

A voltage sensitive relay, or VSR, is one of the most common and straightforward types of dual battery management. The VSR monitors the voltage of your starter battery and automatically connects the auxiliary battery for charging once the starter battery reaches a set voltage, typically around 13.3 volts. When the engine is turned off and the voltage drops, the VSR disconnects the two batteries so that only the auxiliary is used for your caravan’s accessories.

VSR systems are affordable and easy to install, which makes them a popular choice for many caravan owners. They work well with older vehicles that use traditional alternators. However, many newer vehicles, particularly European models, use smart alternators that vary their charging output to improve fuel efficiency. In these cases, a VSR may not charge the auxiliary battery as effectively because the alternator doesn’t consistently produce the higher voltages needed to trigger the relay. If you drive a newer vehicle, it’s worth discussing this with your auto electrician before opting for a VSR system.

DC-DC Charger Systems

A DC-DC charger is a more advanced solution that has become the preferred option for most modern caravan setups. Unlike a VSR, which simply connects the two batteries, a DC-DC charger actively regulates and optimises the charging voltage and current being sent to the auxiliary battery. This means it can work effectively with smart alternators and ensures the auxiliary battery receives a proper multi-stage charge, which significantly extends battery life.

DC-DC chargers are also compatible with a wider range of battery types, including lithium batteries, AGM batteries, and gel batteries. Many units also include a solar input, allowing you to connect solar panels on your caravan’s roof to charge the auxiliary battery when the vehicle is parked. This is especially useful for extended trips where you might be off-grid for several days. While DC-DC chargers cost more than a VSR, the improved charging performance and compatibility with modern vehicles make them a worthwhile investment for most caravan owners.

Battery Management Systems (BMS)

For those running lithium batteries, a battery management system is an essential component. Lithium batteries require precise control over charging and discharging to prevent damage and ensure safety. A BMS monitors individual cell voltages, temperature, and current flow, and will shut down the battery if any parameter goes outside safe limits. Most quality lithium batteries come with an integrated BMS, but it’s important to make sure your entire system is set up to work together correctly.

A properly configured BMS works alongside your DC-DC charger to deliver the exact charging profile that lithium batteries need. This combination provides excellent performance, with lithium batteries offering significantly more usable capacity and a much longer lifespan compared to traditional lead-acid options. If you’re considering a lithium-based dual battery system for your caravan, professional installation is strongly recommended to make sure all components are compatible and safely wired.

Choosing the Right Auxiliary Battery

AGM Batteries

Absorbent Glass Mat, or AGM, batteries are a popular choice for caravan auxiliary battery systems. They are sealed, maintenance-free, and can handle deep discharge cycles better than standard lead-acid batteries. AGM batteries are also spill-proof, which makes them safer and more versatile in terms of mounting positions inside your vehicle or caravan. They offer a good balance between cost and performance, making them suitable for caravan owners who need reliable power without the higher price tag of lithium.

One thing to keep in mind with AGM batteries is that you should ideally only discharge them to about 50% of their total capacity to maintain a healthy lifespan. This means a 100Ah AGM battery effectively gives you around 50Ah of usable power. If you’re running high-draw appliances like a compressor fridge or multiple devices at once, you may need a larger capacity AGM battery or consider stepping up to lithium for more usable energy.

Lithium (LiFePO4) Batteries

Lithium iron phosphate batteries, commonly referred to as LiFePO4, have become increasingly popular in caravan setups over the past few years. They are significantly lighter than AGM batteries, can be discharged to 80-90% of their total capacity, and have a much longer cycle life, often lasting several thousand charge cycles. This means a 100Ah lithium battery gives you roughly 80-90Ah of usable power, nearly double what you’d get from an equivalent AGM battery.

The main downside of lithium batteries is the upfront cost, which is considerably higher than AGM. However, when you factor in the longer lifespan, lighter weight, and greater usable capacity, many caravan owners find that lithium works out to be better value over time. It’s also important to ensure your charging system, whether it’s a DC-DC charger, solar controller, or mains charger, is set to the correct lithium charging profile. Incorrect charging can damage lithium batteries and create safety risks, so having a professional auto electrician handle the installation is essential.

Solar Integration with Your Dual Battery System

Adding solar panels to your caravan’s dual battery system is one of the best ways to keep your auxiliary battery topped up when you’re parked at a campsite or travelling off-grid. A solar panel mounted on your caravan’s roof feeds power through a solar charge controller, which regulates the voltage and current going into your auxiliary battery. Many DC-DC chargers include a built-in solar input, which simplifies the setup by combining both charging sources into a single unit.

The size of the solar panel you need depends on your power consumption and how much time you spend off-grid. For a typical caravan setup running a fridge, lights, and charging phones or tablets, a panel in the range of 160 to 200 watts is usually a good starting point. If you have higher power demands or spend extended periods without driving, you might consider a larger panel or multiple panels. Your auto electrician can help you calculate your power needs and recommend the right solar setup for your specific situation.

It’s also worth noting that solar panels work best in direct sunlight, and their output drops significantly on cloudy days or when partially shaded by trees. In New Zealand, you’ll generally get good solar production during summer, but winter months and overcast conditions in Auckland can reduce output. Planning for a combination of alternator charging while driving and solar charging while parked gives you the most reliable power supply throughout your trip.

Wiring and Cable Sizing

One of the most critical aspects of a dual battery installation is getting the wiring right. The cables connecting your starter battery, DC-DC charger or VSR, and auxiliary battery need to be the correct gauge to handle the current flowing through them. Undersized cables can cause voltage drop, meaning your auxiliary battery won’t charge properly, and in worst-case scenarios, undersized wiring can overheat and create a fire risk.

The required cable size depends on the length of the cable run and the amount of current being carried. In a caravan setup, the cable run from the vehicle’s engine bay to the auxiliary battery in the caravan can be quite long, especially once you account for routing through the vehicle and along the trailer. For most dual battery installations, 6 B&S (13.5mm²) or 8 B&S (8.36mm²) cable is commonly used, but your auto electrician will calculate the exact requirement based on your specific setup. All connections should be properly crimped, insulated, and protected with appropriate fuses to ensure safety and reliability.

Fusing is another essential part of the system. Both the starter battery and auxiliary battery should have fuses installed as close to the battery terminals as possible. These fuses protect the wiring in the event of a short circuit and are a critical safety feature. A properly fused and wired dual battery system will give you years of trouble-free service, while a poorly installed system can be both unreliable and dangerous.

Important Considerations Before Installation

Assessing Your Power Needs

Before choosing components for your dual battery system, it’s important to work out how much power you actually need. Start by listing all the appliances and accessories you plan to run from the auxiliary battery, along with their power consumption in watts or amps. A typical compressor fridge might draw around 2-4 amps per hour on average, while LED lights might use less than 1 amp. By adding up your total consumption and estimating how many hours per day each item will be used, you can calculate your daily power requirement in amp-hours.

Once you know your daily power requirement, you can select a battery with enough capacity to meet your needs with a comfortable margin. As a general rule, it’s a good idea to have at least 20-30% more capacity than your calculated daily requirement. This accounts for variations in charging conditions and helps maintain battery health over time. Your auto electrician can help you with these calculations and recommend a system that matches your travel style and power demands.

Vehicle Compatibility

Not all vehicles are the same when it comes to dual battery installations. As mentioned earlier, many newer vehicles, especially European brands like Volkswagen, BMW, and Mercedes-Benz, use smart alternators that don’t produce a constant charging voltage. This can affect how the auxiliary battery charges and makes a DC-DC charger essential rather than optional. At Eurosparx, we specialise in both European and Japanese vehicles, so we understand the specific electrical characteristics of different makes and models.

The physical space available under the bonnet or in the vehicle’s cabin is another factor to consider. Some vehicles have limited room for an additional battery or charger unit, which may mean mounting components in alternative locations such as the boot or inside the caravan itself. The routing of cables also needs to be planned carefully to avoid interference with other vehicle systems and to ensure a clean, professional installation.

Compliance and Safety

In New Zealand, any electrical work on a vehicle should be carried out to a safe and professional standard. While there isn’t a specific certification required for 12-volt auto electrical work in the same way as mains electrical work, having a qualified auto electrician handle the installation ensures that everything is done correctly and safely. This includes proper cable sizing, fusing, connections, and mounting of all components. A professional installation also means you can get support if any issues arise down the track, and it protects your vehicle’s warranty by ensuring no damage is done to the existing electrical system.

Need a Dual Battery System Installed for Your Caravan?

A well-designed dual battery system is essential for anyone looking to enjoy the freedom of caravan travel without worrying about running out of power. From choosing the right battery type and charger to ensuring proper wiring and solar integration, every part of the system matters. As auto electricians in Avondale, West Auckland, Eurosparx can help you design and install a complete dual battery system tailored to your caravan and travel needs. We specialise in European and Japanese vehicles and have the expertise to ensure your system is safe, reliable, and built to last. Contact our team today by calling 09 218 7789 or visit us at eurosparx.co.nz to get started.

Frequently Asked Questions

What is the difference between a VSR and a DC-DC charger for a dual battery system?

A VSR (voltage sensitive relay) is a simple switch that connects your auxiliary battery to the starter battery for charging when the engine is running. A DC-DC charger actively regulates the voltage and current to provide a proper multi-stage charge. DC-DC chargers work better with modern vehicles that have smart alternators and are compatible with all battery types including lithium, making them the preferred choice for most caravan setups.

Can I use a lithium battery as my auxiliary caravan battery?

Yes, lithium (LiFePO4) batteries are an excellent choice for caravan auxiliary batteries. They are lighter, provide more usable capacity, and last significantly longer than AGM batteries. However, they require a compatible DC-DC charger and solar controller set to the correct lithium charging profile. Professional installation by a qualified auto electrician is recommended to ensure all components work together safely.

How do I know what size auxiliary battery I need for my caravan?

To determine the right battery size, calculate your daily power consumption by listing all the appliances you plan to run and their amp draw. Add up the total amp-hours used per day, then choose a battery with at least 20-30% more capacity than your daily requirement. An auto electrician can help you with these calculations to make sure your system meets your needs.

Will a dual battery system work with my vehicle’s smart alternator?

Yes, but you will need a DC-DC charger rather than a basic VSR. Smart alternators, common in newer European and Japanese vehicles, vary their output to save fuel, which means a VSR may not trigger correctly. A DC-DC charger compensates for this by actively regulating the charge to your auxiliary battery regardless of the alternator’s output voltage.

Do I need solar panels with my dual battery system?

Solar panels are not essential but are highly recommended, especially if you plan to camp off-grid for extended periods. A solar panel keeps your auxiliary battery charged when the engine isn’t running, reducing your reliance on driving to recharge. For most caravan setups in New Zealand, a 160-200 watt panel is a good starting point, and many DC-DC chargers include a built-in solar input for easy integration.

Categories
Auto Electrical Caravans & Motorhomes

How to Wire a Caravan for 12V and 240V Power

Wiring a caravan for both 12V and 240V power systems is essential for anyone looking to enjoy the comforts of home while travelling or camping throughout New Zealand. Whether you’re setting up a new caravan or upgrading an existing electrical system, understanding how these two power systems work together will ensure you have reliable electricity for all your appliances and devices. This comprehensive guide covers everything Auckland caravan owners need to know about properly wiring their vehicles for dual voltage operation, from the basic components required to safety considerations and professional installation requirements.

Understanding the Dual Power System in Caravans

The Role of 12V Power

The 12V system in your caravan serves as the primary power source when you’re travelling or camping off-grid without access to mains electricity. This low-voltage system runs directly from your caravan’s leisure battery, which is separate from your tow vehicle’s starter battery. The 12V system typically powers essential items such as interior lighting, water pumps, rangehood fans, and USB charging points. Because it operates at a lower voltage, the 12V system is safer to work with and doesn’t require the same level of electrical certification as 240V installations.

Your 12V system charges through multiple methods depending on your setup. The most common charging method is through your tow vehicle while driving, using a DC-to-DC charger or Anderson plug connection. When connected to mains power at a holiday park, your 240V charger will also top up the leisure battery. Many Auckland caravan owners also install solar panels as a third charging method, providing sustainable power generation during extended off-grid stays.

The Role of 240V Power

The 240V system in your caravan provides mains-equivalent power for running larger appliances that require more electricity than the 12V system can deliver. This includes items such as air conditioning units, microwaves, electric kettles, and standard household power points for laptops and phone chargers. The 240V system only operates when your caravan is connected to an external mains power source, typically found at powered campsites, holiday parks, or your home.

In New Zealand, all 240V electrical work must be completed by a registered electrician due to the serious safety risks associated with mains voltage. This requirement exists because improper 240V wiring can result in electric shock, fire, or death. The 240V system in your caravan must meet the specific requirements outlined in AS/NZS 3001, which covers electrical installations in caravans and motorhomes.

Essential Components for 12V Wiring

Leisure Battery Selection

Choosing the right leisure battery forms the foundation of your 12V system. Unlike standard car batteries designed for short bursts of high power to start an engine, leisure batteries are deep-cycle batteries built to provide steady power over extended periods. The three main types available to Auckland caravan owners are lead-acid, AGM (Absorbed Glass Mat), and lithium batteries. Each type offers different benefits in terms of cost, weight, lifespan, and depth of discharge capabilities.

Lead-acid batteries remain the most affordable option but require regular maintenance and can only be discharged to about 50% without causing damage. AGM batteries offer maintenance-free operation and better discharge capabilities, making them popular for mid-range caravan setups. Lithium batteries, while significantly more expensive upfront, provide the best performance with deeper discharge cycles, longer lifespan, and considerably lighter weight. For Auckland’s climate and typical caravan usage patterns, AGM batteries often represent the best balance between cost and performance for most owners.

Wiring and Cable Requirements

Selecting the correct wire gauge for your 12V system is crucial for safety and efficiency. Unlike 240V systems where voltage drop is less critical, 12V systems are highly sensitive to voltage loss over distance. Using cables that are too thin will result in excessive voltage drop, causing lights to dim, pumps to run slowly, and overall poor system performance. The cable size you need depends on the current draw of your appliances and the distance from the battery to each device.

For most caravan 12V circuits, you’ll use automotive-grade cable ranging from 2.5mm² for lighting circuits up to 6mm² or larger for high-draw items like fridges and inverters. All connections should use proper automotive crimping terminals rather than household electrical connectors, and every connection point should be protected from moisture and vibration. Heat shrink tubing over crimped connections provides excellent protection against the damp conditions often encountered in New Zealand camping environments.

Fuses and Circuit Protection

Proper fuse protection is essential for every circuit in your 12V system. Fuses protect your wiring from overheating and potentially causing a fire if a short circuit occurs or if too many appliances are connected to a single circuit. Each circuit should have its own appropriately rated fuse installed as close to the battery as practical. A central fuse box makes managing multiple circuits easier and provides a single location for troubleshooting fuses that keep blowing.

The fuse rating for each circuit should match the cable size and expected load. For example, a lighting circuit using 2.5mm² cable might use a 10-amp fuse, while a fridge circuit using 4mm² cable would typically use a 15-amp fuse. Installing a main fuse or circuit breaker between your battery and the fuse box provides an additional layer of protection for your entire system. This main protection should be rated slightly higher than the combined total of your individual circuit fuses.

Essential Components for 240V Wiring

Inlet Connection and RCD Protection

The 240V system in your caravan begins at the external inlet socket, where you connect the mains power lead from a powered site or your home. This inlet must be a weatherproof unit specifically designed for caravan installations, positioned in an accessible location on the exterior of your caravan. The inlet connects to an internal consumer unit that houses the main switch and RCD (Residual Current Device) protection for the entire 240V system.

RCD protection is mandatory for all caravan 240V installations in New Zealand. The RCD constantly monitors the electrical current flowing through the system and will instantly cut power if it detects any imbalance that might indicate current leaking to earth through a person or faulty appliance. This protection can save lives by disconnecting power within milliseconds of detecting a fault. Your caravan’s RCD should be tested regularly using the test button to ensure it’s functioning correctly.

Power Points and Circuit Layout

Planning your 240V power point locations requires careful consideration of where you’ll use mains-powered appliances in your caravan. Common locations include the kitchen area for kettles and microwaves, near seating areas for laptop charging, and in the bedroom area for phone chargers or CPAP machines. Each power point must be properly rated for the expected load and installed in accordance with New Zealand electrical standards.

The circuit layout typically includes separate circuits for power points and fixed appliances like air conditioning units. This separation ensures that a fault on one circuit doesn’t affect the entire 240V system and allows for appropriate circuit breaker sizing. All circuits must be properly labelled at the consumer unit so you can easily identify which breaker controls each part of your caravan’s electrical system.

Battery Charger Integration

A quality battery charger connects your 240V and 12V systems, automatically charging your leisure battery whenever you’re connected to mains power. Modern multi-stage chargers adjust their output based on the battery’s state of charge, providing bulk charging when the battery is low and switching to float mode once fully charged. This intelligent charging extends battery life and ensures your 12V system is always ready for off-grid use.

When selecting a battery charger, choose a unit rated appropriately for your battery bank size. A general rule is to select a charger rated at about 10-20% of your battery’s amp-hour capacity. For example, a 100Ah battery would pair well with a 10-20 amp charger. Larger chargers will charge faster but may generate more heat, while smaller chargers are gentler on the battery but take longer to reach full charge.

Connecting the Two Systems Together

Isolation and Safety Considerations

While both the 12V and 240V systems exist within your caravan, they must remain properly isolated from each other except at specific approved connection points. The only legitimate connection between the two systems is through the battery charger, which safely converts 240V mains power to appropriate 12V charging current. Never attempt to directly connect components from one system to the other, as this creates serious safety hazards and violates electrical standards.

Physical separation of the two systems helps prevent accidental cross-connection during future maintenance or modifications. Running 12V and 240V cables in separate conduits or on opposite sides of the caravan structure makes identification easier and reduces the risk of confusion. Using different coloured cables for each system provides immediate visual identification, with red and black commonly used for 12V positive and negative, while standard mains colours are used for 240V wiring.

Switchboard and Distribution Layout

A well-organised electrical distribution layout makes your caravan’s systems easier to understand, maintain, and troubleshoot. The 240V consumer unit should be mounted in an accessible location, typically in a cupboard or wardrobe area, with clear labelling of all circuit breakers. Adjacent to this, your 12V fuse box can be mounted with similar clear labelling. Keeping both distribution points in the same general area simplifies the overall electrical layout and makes fault-finding more straightforward.

Consider including a volt meter or battery monitor in your 12V distribution area. These devices provide valuable information about your battery’s state of charge, allowing you to manage your power consumption when camping off-grid. More advanced monitors can also show current draw, historical usage patterns, and estimated remaining runtime based on your current consumption rate.

Safety Requirements and Compliance in New Zealand

Legal Requirements for Electrical Work

New Zealand’s electrical regulations are clear about who can perform different types of electrical work. All 240V wiring must be completed by a registered electrician who holds the appropriate practising licence. This requirement exists regardless of the location of the work, meaning DIY 240V installation in your caravan is illegal and potentially dangerous. The completed 240V installation must be inspected and certified with a Certificate of Compliance before the system is energised.

The 12V system has fewer regulatory restrictions, and competent DIY installers can complete much of this work themselves. However, incorrect 12V wiring can still cause fires or damage expensive equipment, so understanding proper techniques and safety practices remains essential. If you’re unsure about any aspect of 12V wiring, consulting with a qualified auto electrician can prevent costly mistakes and ensure your system is safe and reliable.

Standards and Certification

Caravan electrical installations in New Zealand must comply with AS/NZS 3001, which sets out specific requirements for electrical systems in recreational vehicles. This standard covers everything from the type of components that can be used to the installation methods and testing procedures required. Compliance with this standard ensures your caravan’s electrical system is safe for use in all conditions you might encounter while travelling.

When having work completed on your caravan’s 240V system, always request a copy of the electrical certificate and keep it with your caravan’s documentation. This certificate may be required for insurance purposes and demonstrates that the work was completed to the required standard. If purchasing a used caravan, checking for valid electrical certification provides peace of mind about the safety of the installed systems.

Common Mistakes to Avoid

Undersized Cabling and Poor Connections

One of the most frequent errors in caravan electrical systems is using cables that are too small for the intended load. This problem is particularly common in 12V systems, where the consequences of voltage drop might not seem immediately dangerous but lead to poor performance and potential overheating of cables. Always calculate the expected current draw and cable length, then select cable sizes with a reasonable safety margin above the minimum requirement.

Poor quality connections are another common source of problems in caravan electrical systems. The constant vibration experienced during travel can work loose connections that would remain secure in a stationary installation. Using proper crimping tools, quality terminals, and providing strain relief for all cables helps ensure connections remain sound throughout years of use. Soldered connections, while sometimes used, can become brittle under vibration and are generally not recommended for automotive applications.

Inadequate Ventilation for Batteries

Lead-acid and AGM batteries produce hydrogen gas during charging, which can create an explosion risk if allowed to accumulate in an enclosed space. Your battery compartment must include adequate ventilation to the outside of the caravan, allowing any gases to safely dissipate. Lithium batteries don’t produce hydrogen but still generate heat during charging and discharging, requiring appropriate ventilation to prevent overheating.

The battery compartment should also be separated from the living area to prevent any gases entering spaces where occupants might be affected. A sealed battery box with external venting provides the best protection while keeping the battery accessible for maintenance and monitoring. Ensure that ventilation openings cannot become blocked by stored items and check them periodically to confirm they remain clear.

Need Help Wiring Your Caravan?

Properly wiring a caravan for both 12V and 240V power requires careful planning, quality components, and adherence to New Zealand electrical standards. While the 12V system offers more flexibility for DIY installation, the 240V system must always be completed by a registered electrician to ensure safety and legal compliance.

As experienced auto electricians in Auckland, Eurosparx can help you with all aspects of caravan electrical installation and upgrades. From designing a complete dual-voltage system to troubleshooting existing wiring issues, our team has the expertise to ensure your caravan’s electrical system is safe, reliable, and capable of powering all your adventures. Contact our team today by calling 09 218 7789.

Categories
Auto Electrical

Anderson Plug Installation and Maintenance Guide

Whether you’re setting up a caravan, camper trailer, or need reliable power connections for your 4WD accessories, understanding how to properly install and maintain Anderson plugs is essential for any vehicle owner. This comprehensive guide covers everything you need to know about Anderson plug installation, from selecting the right components to keeping your connections in top condition for years of reliable service.

How to Install an Anderson Plug

Gather Your Tools and Materials

Before starting your Anderson plug installation, you’ll need to collect the right tools and materials for the job. At minimum, you’ll require an Anderson plug housing (typically 50 amp for most automotive applications), appropriately rated terminals, quality automotive-grade cable, a crimping tool designed for Anderson terminals, wire strippers, and heat shrink tubing. For a professional finish, you’ll also want a multimeter to test your connections and cable ties to secure your wiring neatly.

Selecting the correct cable size is critical to your installation’s success and safety. For most 50 amp Anderson plug setups, 6mm² (or 8 B&S) cable is the standard choice, though longer cable runs may require thicker gauge wire to prevent voltage drop. Always check your specific application’s current requirements and choose cable rated to handle the maximum expected load with some margin for safety.

Preparing the Cables

Start by measuring and cutting your cables to the required length, leaving a little extra to account for any routing adjustments. Strip approximately 10-12mm of insulation from the end of each cable, being careful not to nick or damage any of the copper strands. Damaged strands can reduce the cable’s current-carrying capacity and create potential failure points in your connection.

If you’re working with tinned cable, which is common in marine and high-quality automotive applications, the preparation process is the same. Tinned cable offers better corrosion resistance, making it an excellent choice for vehicles that may be exposed to water crossings or coastal conditions. Regardless of cable type, ensure the exposed copper is clean and free from oxidation before proceeding with terminal crimping.

Crimping the Terminals

Proper crimping is arguably the most important step in Anderson plug installation, as a poor crimp can lead to high resistance, heat buildup, and eventual connection failure. Insert the stripped cable end fully into the terminal barrel, ensuring all strands are contained within the crimping area. Position the terminal in your crimping tool and apply firm, even pressure to create a solid mechanical and electrical connection.

After crimping, inspect the terminal carefully. The crimp should be tight and uniform, with no loose strands visible. Give the cable a firm tug to ensure it won’t pull free from the terminal. A quality crimp will actually be stronger than the cable itself, meaning the cable would break before the crimp fails. If you have any doubts about your crimp quality, cut it off and start again, as a dodgy crimp is not worth the risk.

For added protection and longevity, slide a piece of heat shrink tubing over the connection before inserting the terminal into the housing. This provides strain relief and prevents moisture from wicking into the cable through the terminal connection. Use a heat gun to shrink the tubing evenly, being careful not to overheat and damage the cable insulation.

Assembling the Anderson Plug

With your terminals properly crimped, you’re ready to assemble the Anderson plug. The housing consists of two identical halves that interlock to form the complete plug. Each half contains a slot for one terminal, with the positive and negative positions typically marked on the housing. Pay careful attention to polarity, as reversing the connections can damage sensitive electronic equipment.

Insert each terminal into its respective housing half by sliding it in until you hear and feel it click into place. The terminal’s spring retention clip should engage with the housing, holding it securely. Test the terminal by gently pulling on the cable; it should not move or come free. Once both terminals are seated, slide the two housing halves together until they lock.

The assembled plug should feel solid and the two halves should sit flush against each other. If there’s any gap or the halves don’t align properly, remove the terminals and check that they’re fully seated. An improperly assembled plug may not make good contact with its mating connector, leading to intermittent connections or overheating under load.

Mounting and Wiring

The location of your Anderson plug mounting point depends on your specific application. For towing setups, the plug is typically mounted at the rear of the vehicle, often near the towbar or on a dedicated mounting bracket. For auxiliary battery systems or dual battery setups, you may need Anderson plugs in multiple locations, such as the engine bay for charging connections and the rear for powering accessories.

When routing your cables, keep them away from heat sources like exhaust systems and moving parts that could cause chafing. Use grommets when passing cables through metal panels to prevent the sharp edges from cutting through the insulation over time. Secure cables at regular intervals with cable ties or proper automotive cable clips, ensuring there’s no excess slack that could catch on anything.

At the vehicle end of your installation, you’ll need to connect to your power source, whether that’s the main battery, an auxiliary battery, or a dedicated circuit. Always include an appropriately rated fuse or circuit breaker as close to the power source as possible. For a 50 amp Anderson plug circuit, a 60 amp fuse provides protection while allowing for brief current spikes during high-demand situations.

Anderson Plug Maintenance

Regular Inspection Routine

Establishing a regular inspection routine is the key to maintaining reliable Anderson plug connections. Before each trip, take a moment to visually inspect your plugs for any signs of damage, corrosion, or contamination. Look for cracks in the housing, bent or damaged terminals, and any discolouration that might indicate overheating. Catching small issues early prevents them from becoming major problems on the road.

Check that the plug halves still lock together firmly and that there’s no excessive play in the connection. Over time, the locking mechanism can wear, leading to loose connections that may disconnect unexpectedly or create intermittent contact. If you notice the connection becoming loose, it’s time to replace the affected plug before it causes issues during your travels.

Also inspect the cables leading to and from your Anderson plugs. Look for any signs of chafing, cracking in the insulation, or damage from heat exposure. Pay particular attention to areas where cables pass through panels or near moving parts, as these are common failure points. Any damaged cable should be repaired or replaced promptly to prevent short circuits or fire hazards.

Cleaning Your Anderson Plugs

Keeping your Anderson plug contacts clean ensures optimal electrical conductivity and prevents the buildup of resistance that can cause heating issues. For routine cleaning, use a dry cloth or compressed air to remove dust and debris from the plug contacts. Avoid using water or liquid cleaners inside the plug housing, as trapped moisture can promote corrosion.

For more thorough cleaning, electrical contact cleaner spray is your best option. This solvent-based cleaner evaporates quickly without leaving residue and is safe for use on electrical connections. Spray a small amount onto the contacts and work it in by connecting and disconnecting the plug several times. Wipe away any excess with a clean, lint-free cloth.

If you notice oxidation or light corrosion on your terminals, you can carefully clean them with a fine abrasive pad or specialised contact cleaning tool. Be gentle to avoid removing excessive material from the contacts, as this can affect the connection quality. After cleaning corroded contacts, apply a thin film of dielectric grease to help prevent future oxidation.

Protecting Against Corrosion

Corrosion is the enemy of reliable electrical connections, particularly for vehicles used in wet conditions or coastal areas where salt exposure is common. Applying dielectric grease to your Anderson plug contacts creates a barrier against moisture and prevents oxidation while still allowing good electrical contact between mating surfaces.

When your Anderson plug is not in use, always fit the dust cap if your plug came with one. If you don’t have a dust cap, consider purchasing one or making a simple cover to keep out dirt, dust, and moisture. Some vehicle owners keep a small plastic bag secured with a rubber band over unused plugs as a simple but effective protective measure.

For vehicles regularly exposed to harsh conditions, consider upgrading to Anderson plugs with covers or using mounting solutions that provide some protection from the elements. There are various aftermarket mounting brackets available that include hinged covers or recessed mounting positions that shield the plug from direct exposure to water and debris.

Testing Your Connections

Periodically testing your Anderson plug connections with a multimeter helps identify potential problems before they cause failures. Set your multimeter to measure DC voltage and connect it across the Anderson plug while under load. Compare this reading to the voltage at your battery; any significant difference indicates resistance in the circuit that should be investigated.

You can also perform a resistance test by measuring directly across the Anderson plug connection with your multimeter set to the ohms scale. A good connection should show minimal resistance, typically less than 0.1 ohms. Higher readings suggest dirty contacts, poor crimps, or corroded terminals that need attention.

For circuits that carry significant current, an infrared thermometer is a useful tool for checking connection temperature during operation. Measure the temperature of your Anderson plug and compare it to the ambient temperature. Some warming is normal under load, but if the plug becomes hot to touch or shows a temperature rise significantly above the surrounding components, there’s likely a problem with the connection that requires immediate attention.

Common Anderson Plug Problems and Solutions

Overheating Connections

Overheating is one of the most serious issues that can affect Anderson plug installations, as it can lead to melted housings, damaged cables, and in extreme cases, electrical fires. The primary cause of overheating is high resistance in the connection, which can result from poor crimps, dirty or corroded contacts, loose connections, or undersized cables for the application.

If you notice your Anderson plug running hot, stop using it immediately and investigate the cause. Check all crimped connections for quality and remake any that look questionable. Clean the contacts thoroughly and ensure the plug halves are mating correctly with good contact pressure. Verify that your cable size is appropriate for the current being carried over the distance involved.

Repeatedly connecting and disconnecting Anderson plugs under load can also contribute to contact damage and overheating. Always switch off or disconnect the power source before mating or separating Anderson plugs to prevent arcing that can pit and damage the contact surfaces. If your contacts show signs of arc damage, replace them before they cause further problems.

Intermittent Connections

Intermittent electrical connections can be frustrating to diagnose and can cause unexpected behaviour in connected equipment. In Anderson plug installations, intermittent issues are often caused by loose terminals, worn housings, or contaminated contacts. The vibration and movement experienced during driving can cause marginal connections to make and break contact repeatedly.

Start troubleshooting intermittent connections by checking that your terminals are fully seated in the housing and that the housing halves lock together properly. If the plug shows signs of wear or the locking mechanism is loose, replacement is usually the best solution. Attempting to modify or repair worn housings often leads to further problems down the track.

Contamination from road grime, dust, or moisture can also cause intermittent connections, particularly if the plug is mounted in an exposed location. A thorough cleaning with electrical contact cleaner often resolves these issues. If problems persist after cleaning, examine the contacts closely for pitting, corrosion, or physical damage that might require terminal replacement.

Physical Damage

Anderson plugs mounted in exposed locations are susceptible to physical damage from road debris, impacts during recovery operations, or accidental contact with obstacles. Cracked or broken housings should be replaced immediately, as they may not maintain proper contact pressure and can allow moisture and contamination to reach the terminals.

Bent or damaged terminals can prevent proper connection and may cause overheating due to reduced contact area. While minor bending can sometimes be corrected, it’s generally safer to replace damaged terminals rather than risk an unreliable connection. The cost of new terminals is minimal compared to the potential consequences of a failed connection in the field.

To prevent physical damage, consider the mounting location carefully during installation. Recessed mounting or protective covers can significantly reduce exposure to damage. If your plug must be mounted in a vulnerable position, regular inspection becomes even more important to catch any damage early.

Choosing the Right Anderson Plug for Your Application

Sizing Considerations

Anderson plugs come in various sizes, with the 50 amp version being the most common for automotive and caravan applications. However, this doesn’t mean all 50 amp plugs are equal or suitable for every installation. Understanding the actual current requirements of your system helps you choose the right components and ensure reliable operation.

For most auxiliary battery charging setups and moderate accessory loads, a standard 50 amp Anderson plug with 6mm² cable provides plenty of capacity. Higher current applications, such as high-output alternator charging systems or running large inverters, may benefit from using larger cable even with the same 50 amp plug, or stepping up to a higher-rated connector system altogether.

Consider not just your current needs but also potential future upgrades when planning your installation. It’s much easier to install appropriately sized components from the start than to upgrade later. A slightly over-specified system will run cooler and last longer than one operating at its limits.

Quality Matters

Not all Anderson plugs are created equal, and the quality of components you choose directly affects the reliability and longevity of your installation. Genuine Anderson Power Products connectors are manufactured to strict standards and offer consistent quality, though they come at a premium price. Quality aftermarket alternatives exist, but be wary of extremely cheap options that may not meet the same standards.

Signs of poor-quality Anderson plugs include loose-fitting terminals, housings that don’t lock together securely, and terminals that don’t crimp properly. These issues can lead to connection problems, overheating, and premature failure. Spending a little more on quality components from reputable suppliers is worthwhile considering the critical role these connections play in your electrical system.

When purchasing components, buy from established automotive electrical suppliers who can provide guidance and stand behind their products. Avoid generic electrical components from unknown sources, particularly for high-current applications where quality really matters.

Need Help With Anderson Plug Installation?

Proper Anderson plug installation and maintenance ensures reliable power connections for your caravan, camper, or 4WD accessories, keeping you powered up wherever your adventures take you. While many vehicle owners successfully complete their own installations, professional assistance guarantees optimal results and peace of mind.

As experienced auto electricians in Auckland, Eurosparx can help you with all aspects of Anderson plug installation and maintenance. Whether you need a simple plug fitted or a complete dual battery system with multiple connection points, our team has the expertise to deliver a professional, reliable installation. Contact us today by calling 09 218 7789 to discuss your requirements.