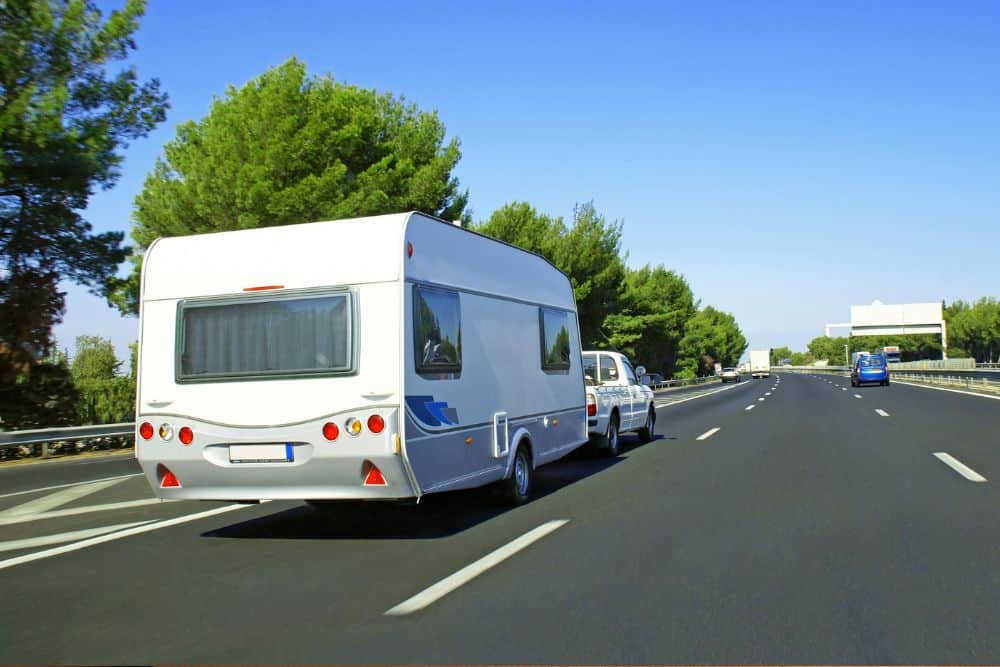

If you’re planning to hit the open road in your caravan, having a reliable power source is one of the most important things to get right. A dual battery system allows you to run your caravan’s accessories and appliances without draining the battery that starts your vehicle. Whether you’re a weekend camper or a full-time traveller, understanding how dual battery systems work and what’s involved in setting one up will help you make the right choice for your needs. This guide covers everything you need to know about dual battery systems for caravans, including how they work, the different types available, and what to consider when getting one installed in Auckland.
How a Dual Battery System Works
A dual battery system uses two separate batteries in your setup. The first battery is your vehicle’s starter battery, which is dedicated to starting your engine and running essential vehicle electronics. The second battery, often called the auxiliary or house battery, powers everything in your caravan such as lights, fridges, USB chargers, water pumps, and other 12-volt accessories. The two batteries are connected through a management device that controls how power flows between them, ensuring that your starter battery is always protected and ready to start the engine.
When your vehicle’s engine is running, the alternator charges both batteries. The management device monitors voltage levels and directs surplus charge to the auxiliary battery once the starter battery is sufficiently charged. When you turn the engine off and use your caravan’s accessories, only the auxiliary battery is drawn down. This means you can run your fridge overnight at a campsite without any risk of being unable to start your vehicle the next morning. It’s a simple concept, but getting the components right and having the system properly installed makes all the difference in terms of performance and safety.
Types of Dual Battery Systems
Voltage Sensitive Relay (VSR) Systems
A voltage sensitive relay, or VSR, is one of the most common and straightforward types of dual battery management. The VSR monitors the voltage of your starter battery and automatically connects the auxiliary battery for charging once the starter battery reaches a set voltage, typically around 13.3 volts. When the engine is turned off and the voltage drops, the VSR disconnects the two batteries so that only the auxiliary is used for your caravan’s accessories.
VSR systems are affordable and easy to install, which makes them a popular choice for many caravan owners. They work well with older vehicles that use traditional alternators. However, many newer vehicles, particularly European models, use smart alternators that vary their charging output to improve fuel efficiency. In these cases, a VSR may not charge the auxiliary battery as effectively because the alternator doesn’t consistently produce the higher voltages needed to trigger the relay. If you drive a newer vehicle, it’s worth discussing this with your auto electrician before opting for a VSR system.
DC-DC Charger Systems
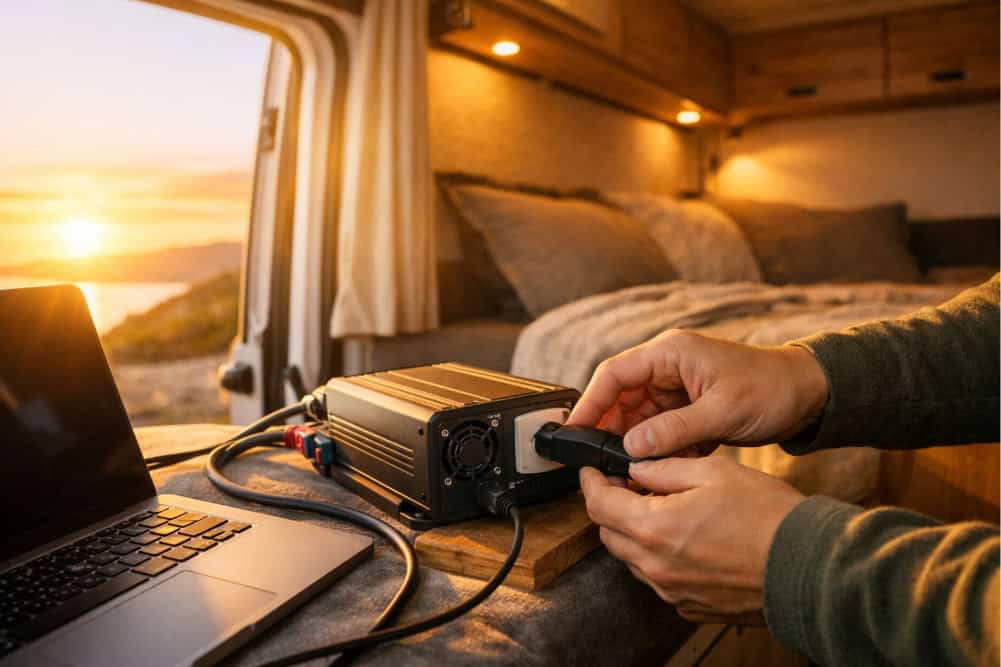
A DC-DC charger is a more advanced solution that has become the preferred option for most modern caravan setups. Unlike a VSR, which simply connects the two batteries, a DC-DC charger actively regulates and optimises the charging voltage and current being sent to the auxiliary battery. This means it can work effectively with smart alternators and ensures the auxiliary battery receives a proper multi-stage charge, which significantly extends battery life.
DC-DC chargers are also compatible with a wider range of battery types, including lithium batteries, AGM batteries, and gel batteries. Many units also include a solar input, allowing you to connect solar panels on your caravan’s roof to charge the auxiliary battery when the vehicle is parked. This is especially useful for extended trips where you might be off-grid for several days. While DC-DC chargers cost more than a VSR, the improved charging performance and compatibility with modern vehicles make them a worthwhile investment for most caravan owners.
Battery Management Systems (BMS)
For those running lithium batteries, a battery management system is an essential component. Lithium batteries require precise control over charging and discharging to prevent damage and ensure safety. A BMS monitors individual cell voltages, temperature, and current flow, and will shut down the battery if any parameter goes outside safe limits. Most quality lithium batteries come with an integrated BMS, but it’s important to make sure your entire system is set up to work together correctly.
A properly configured BMS works alongside your DC-DC charger to deliver the exact charging profile that lithium batteries need. This combination provides excellent performance, with lithium batteries offering significantly more usable capacity and a much longer lifespan compared to traditional lead-acid options. If you’re considering a lithium-based dual battery system for your caravan, professional installation is strongly recommended to make sure all components are compatible and safely wired.
Choosing the Right Auxiliary Battery
AGM Batteries
Absorbent Glass Mat, or AGM, batteries are a popular choice for caravan auxiliary battery systems. They are sealed, maintenance-free, and can handle deep discharge cycles better than standard lead-acid batteries. AGM batteries are also spill-proof, which makes them safer and more versatile in terms of mounting positions inside your vehicle or caravan. They offer a good balance between cost and performance, making them suitable for caravan owners who need reliable power without the higher price tag of lithium.
One thing to keep in mind with AGM batteries is that you should ideally only discharge them to about 50% of their total capacity to maintain a healthy lifespan. This means a 100Ah AGM battery effectively gives you around 50Ah of usable power. If you’re running high-draw appliances like a compressor fridge or multiple devices at once, you may need a larger capacity AGM battery or consider stepping up to lithium for more usable energy.
Lithium (LiFePO4) Batteries
Lithium iron phosphate batteries, commonly referred to as LiFePO4, have become increasingly popular in caravan setups over the past few years. They are significantly lighter than AGM batteries, can be discharged to 80-90% of their total capacity, and have a much longer cycle life, often lasting several thousand charge cycles. This means a 100Ah lithium battery gives you roughly 80-90Ah of usable power, nearly double what you’d get from an equivalent AGM battery.
The main downside of lithium batteries is the upfront cost, which is considerably higher than AGM. However, when you factor in the longer lifespan, lighter weight, and greater usable capacity, many caravan owners find that lithium works out to be better value over time. It’s also important to ensure your charging system, whether it’s a DC-DC charger, solar controller, or mains charger, is set to the correct lithium charging profile. Incorrect charging can damage lithium batteries and create safety risks, so having a professional auto electrician handle the installation is essential.
Solar Integration with Your Dual Battery System
Adding solar panels to your caravan’s dual battery system is one of the best ways to keep your auxiliary battery topped up when you’re parked at a campsite or travelling off-grid. A solar panel mounted on your caravan’s roof feeds power through a solar charge controller, which regulates the voltage and current going into your auxiliary battery. Many DC-DC chargers include a built-in solar input, which simplifies the setup by combining both charging sources into a single unit.
The size of the solar panel you need depends on your power consumption and how much time you spend off-grid. For a typical caravan setup running a fridge, lights, and charging phones or tablets, a panel in the range of 160 to 200 watts is usually a good starting point. If you have higher power demands or spend extended periods without driving, you might consider a larger panel or multiple panels. Your auto electrician can help you calculate your power needs and recommend the right solar setup for your specific situation.
It’s also worth noting that solar panels work best in direct sunlight, and their output drops significantly on cloudy days or when partially shaded by trees. In New Zealand, you’ll generally get good solar production during summer, but winter months and overcast conditions in Auckland can reduce output. Planning for a combination of alternator charging while driving and solar charging while parked gives you the most reliable power supply throughout your trip.
Wiring and Cable Sizing
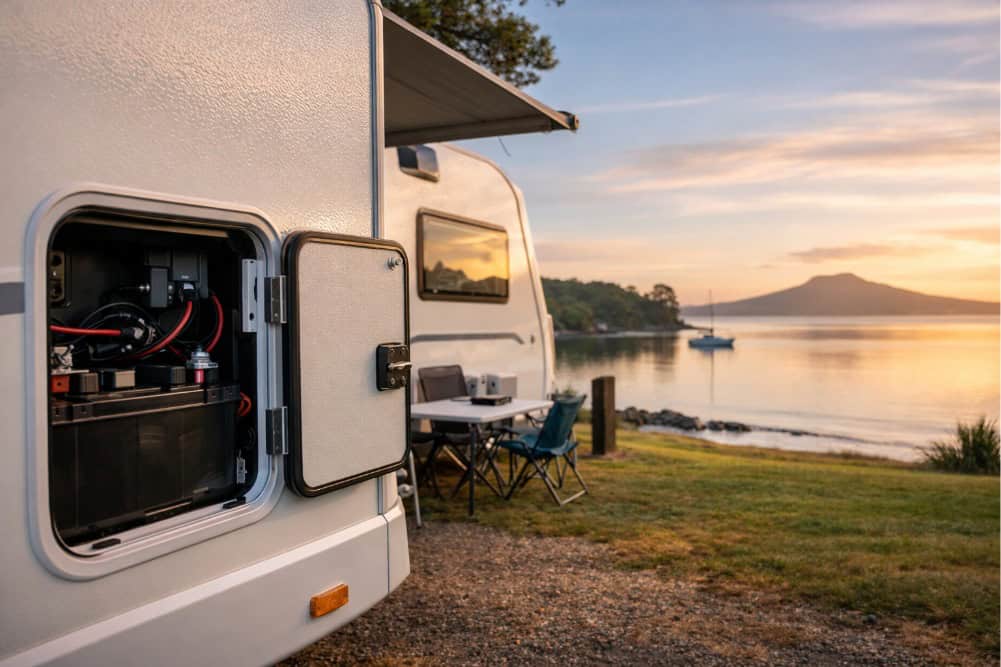
One of the most critical aspects of a dual battery installation is getting the wiring right. The cables connecting your starter battery, DC-DC charger or VSR, and auxiliary battery need to be the correct gauge to handle the current flowing through them. Undersized cables can cause voltage drop, meaning your auxiliary battery won’t charge properly, and in worst-case scenarios, undersized wiring can overheat and create a fire risk.
The required cable size depends on the length of the cable run and the amount of current being carried. In a caravan setup, the cable run from the vehicle’s engine bay to the auxiliary battery in the caravan can be quite long, especially once you account for routing through the vehicle and along the trailer. For most dual battery installations, 6 B&S (13.5mm²) or 8 B&S (8.36mm²) cable is commonly used, but your auto electrician will calculate the exact requirement based on your specific setup. All connections should be properly crimped, insulated, and protected with appropriate fuses to ensure safety and reliability.
Fusing is another essential part of the system. Both the starter battery and auxiliary battery should have fuses installed as close to the battery terminals as possible. These fuses protect the wiring in the event of a short circuit and are a critical safety feature. A properly fused and wired dual battery system will give you years of trouble-free service, while a poorly installed system can be both unreliable and dangerous.
Important Considerations Before Installation
Assessing Your Power Needs
Before choosing components for your dual battery system, it’s important to work out how much power you actually need. Start by listing all the appliances and accessories you plan to run from the auxiliary battery, along with their power consumption in watts or amps. A typical compressor fridge might draw around 2-4 amps per hour on average, while LED lights might use less than 1 amp. By adding up your total consumption and estimating how many hours per day each item will be used, you can calculate your daily power requirement in amp-hours.
Once you know your daily power requirement, you can select a battery with enough capacity to meet your needs with a comfortable margin. As a general rule, it’s a good idea to have at least 20-30% more capacity than your calculated daily requirement. This accounts for variations in charging conditions and helps maintain battery health over time. Your auto electrician can help you with these calculations and recommend a system that matches your travel style and power demands.
Vehicle Compatibility
Not all vehicles are the same when it comes to dual battery installations. As mentioned earlier, many newer vehicles, especially European brands like Volkswagen, BMW, and Mercedes-Benz, use smart alternators that don’t produce a constant charging voltage. This can affect how the auxiliary battery charges and makes a DC-DC charger essential rather than optional. At Eurosparx, we specialise in both European and Japanese vehicles, so we understand the specific electrical characteristics of different makes and models.
The physical space available under the bonnet or in the vehicle’s cabin is another factor to consider. Some vehicles have limited room for an additional battery or charger unit, which may mean mounting components in alternative locations such as the boot or inside the caravan itself. The routing of cables also needs to be planned carefully to avoid interference with other vehicle systems and to ensure a clean, professional installation.
Compliance and Safety
In New Zealand, any electrical work on a vehicle should be carried out to a safe and professional standard. While there isn’t a specific certification required for 12-volt auto electrical work in the same way as mains electrical work, having a qualified auto electrician handle the installation ensures that everything is done correctly and safely. This includes proper cable sizing, fusing, connections, and mounting of all components. A professional installation also means you can get support if any issues arise down the track, and it protects your vehicle’s warranty by ensuring no damage is done to the existing electrical system.
Need a Dual Battery System Installed for Your Caravan?
A well-designed dual battery system is essential for anyone looking to enjoy the freedom of caravan travel without worrying about running out of power. From choosing the right battery type and charger to ensuring proper wiring and solar integration, every part of the system matters. As auto electricians in Avondale, West Auckland, Eurosparx can help you design and install a complete dual battery system tailored to your caravan and travel needs. We specialise in European and Japanese vehicles and have the expertise to ensure your system is safe, reliable, and built to last. Contact our team today by calling 09 218 7789 or visit us at eurosparx.co.nz to get started.
Frequently Asked Questions
What is the difference between a VSR and a DC-DC charger for a dual battery system?
A VSR (voltage sensitive relay) is a simple switch that connects your auxiliary battery to the starter battery for charging when the engine is running. A DC-DC charger actively regulates the voltage and current to provide a proper multi-stage charge. DC-DC chargers work better with modern vehicles that have smart alternators and are compatible with all battery types including lithium, making them the preferred choice for most caravan setups.
Can I use a lithium battery as my auxiliary caravan battery?
Yes, lithium (LiFePO4) batteries are an excellent choice for caravan auxiliary batteries. They are lighter, provide more usable capacity, and last significantly longer than AGM batteries. However, they require a compatible DC-DC charger and solar controller set to the correct lithium charging profile. Professional installation by a qualified auto electrician is recommended to ensure all components work together safely.
How do I know what size auxiliary battery I need for my caravan?
To determine the right battery size, calculate your daily power consumption by listing all the appliances you plan to run and their amp draw. Add up the total amp-hours used per day, then choose a battery with at least 20-30% more capacity than your daily requirement. An auto electrician can help you with these calculations to make sure your system meets your needs.
Will a dual battery system work with my vehicle’s smart alternator?
Yes, but you will need a DC-DC charger rather than a basic VSR. Smart alternators, common in newer European and Japanese vehicles, vary their output to save fuel, which means a VSR may not trigger correctly. A DC-DC charger compensates for this by actively regulating the charge to your auxiliary battery regardless of the alternator’s output voltage.
Do I need solar panels with my dual battery system?
Solar panels are not essential but are highly recommended, especially if you plan to camp off-grid for extended periods. A solar panel keeps your auxiliary battery charged when the engine isn’t running, reducing your reliance on driving to recharge. For most caravan setups in New Zealand, a 160-200 watt panel is a good starting point, and many DC-DC chargers include a built-in solar input for easy integration.