
Eurosparx

Categories
Brakes

Brake Disc Skimming Vs Replacement: When Should You Do Either?

Brake disc skimming vs replacement

Maintaining the safety of your vehicle is essential, and the braking system plays a critical role in this.

However, when your brake discs start showing signs of wear, it can be difficult to decide whether you should opt for brake disc skimming or replace them entirely.

This guide will help you understand the key differences between skimming and replacing brake discs and the circumstances under which each option is best suited.

When to Consider Brake Disc Skimming

Brake disc skimming involves removing a thin layer of the disc surface to eliminate any grooves or unevenness caused by wear. This process restores a smoother surface for the brake pads to press against, improving braking efficiency.

You might consider skimming your brake discs when:

  • There is uneven wear: If the brake discs have minor grooves, scores, or uneven wear, skimming can restore them to a condition that provides a smooth and consistent braking surface.
  • Disc thickness remains sufficient: Skimming is only possible if the discs are still above the manufacturer’s recommended minimum thickness. Thinner discs lose their effectiveness and could be unsafe.
  • You want a cost-effective solution: Skimming is generally more affordable compared to complete replacement, making it an attractive option when minor resurfacing is all that is needed.

Signs that indicate skimming may be needed include vibrations in the brake pedal or squealing noises, which can result from uneven disc wear. If the damage is minor, skimming could be a safe and economical solution.

When Brake Disc Replacement is Necessary

Brake disc replacement is often the best course of action when skimming is not a viable option. There are several situations where replacing the brake discs is absolutely essential for your safety and the vehicle’s performance.

  • Discs have reached the minimum thickness: Each brake disc has a minimum thickness specification set by the manufacturer. Once the discs are below this limit, they must be replaced rather than skimmed, as thin discs are prone to overheating and cracking.
  • Warped or severely damaged discs: If the brake discs are warped or have deep cracks, skimming may not solve the problem. Warped discs can cause the car to pull to one side when braking, affecting your control on the road.
  • Discs with excessive wear: If the brake discs have experienced significant wear and tear or have become uneven beyond repair, replacement is the only solution. Worn-out brake discs can affect your stopping distance and overall brake efficiency.
  • Previously skimmed too many times: There is a limit to how many times a brake disc can be skimmed. If your brake discs have been skimmed repeatedly in the past, they may have reached a point where further skimming would leave them below the safe thickness level.

Ultimately, brake disc replacement is recommended when safety is at risk. Replacing the discs will ensure that your braking system performs optimally, particularly in emergency situations when a reliable braking response is needed.

Key Differences Between Brake Disc Skimming and Replacement

Understanding the key differences between brake disc skimming and replacement is crucial for making the right decision for your vehicle:

  1. Cost: Skimming is often less expensive than replacing brake discs. If your discs have minor wear and there is sufficient thickness remaining, skimming could be a practical and cost-effective solution. On the other hand, replacement comes with higher costs but offers the assurance of brand-new, safe, and efficient braking components.
  2. Extent of Damage: Skimming can only address minor damage, such as shallow grooves or slight warping. If the damage is severe, replacement becomes the only safe option. Deep grooves, significant warping, or cracks necessitate replacing the brake discs to restore your vehicle’s safety.
  3. Safety Considerations: When your brake discs are worn beyond the minimum safety limit, replacement is the only way to maintain braking efficiency and prevent brake failure. Skimming is safe only when there is enough disc material to maintain its integrity.

Additional Considerations for Brake Disc Maintenance

Proper maintenance of brake discs not only extends their lifespan but also ensures your safety on the road. Here are some extra pointers to keep in mind:

  • Regular Inspections: Regularly inspect your brake discs for visible signs of damage, such as grooves, warping, or uneven wear. Timely identification of issues can prevent larger problems and improve the efficiency of your braking system.
  • Replace Brake Pads as Needed: If your brake pads are worn out, they can cause further damage to the brake discs. Replacing brake pads on time can prevent premature disc wear, which would otherwise necessitate skimming or replacement.
  • Monitor Brake Performance: Pay attention to any changes in braking performance, such as vibrations, squealing, or longer stopping distances. Such changes can indicate that the brake discs or pads need attention.
  • Driving Habits: Gentle braking and avoiding sudden, hard stops can help reduce wear on both the brake pads and discs. Abrupt braking generates more heat, which can lead to warping and accelerated wear.

Need Help Deciding Between Brake Disc Skimming and Replacement?

At Eurosparx, our skilled team of brake service experts in Auckland can help you determine whether your brake discs need skimming or replacement. We offer comprehensive brake inspection services to assess the condition of your brake discs and recommend the most suitable option based on their condition and your budget.

Get in touch with Eurosparx today by calling 09 218 7789 to get your brake discs sorted!


Categories
Brakes

What’s the Difference Between Cheap & Expensive Brake Pads?

Cheap vs Expensive Brake Pads

Choosing the right brake pads for your vehicle can be tricky, especially when faced with a wide range of price options.

Whether you’re considering cheaper alternatives or wondering if spending more is worthwhile, understanding the key differences between brake pad types is essential.

This guide will walk you through the distinctions between cheap and expensive brake pads, helping you make an informed decision for your car in Auckland.

Quality & Material Composition

One of the biggest factors that sets cheap and expensive brake pads apart is the material they’re made from. Brake pads typically come in several different materials, including organic, semi-metallic, and ceramic.

  • Cheap Brake Pads: Generally, the more affordable brake pads are made from organic materials or low-quality semi-metallic compounds. These pads often contain a mix of rubber, glass, and resins, making them less durable. Organic pads are typically quieter but wear out more quickly, which means you might find yourself replacing them more often.
  • Expensive Brake Pads: Higher-priced brake pads are usually made from high-quality ceramic or premium semi-metallic materials. Ceramic brake pads, for instance, provide consistent braking performance, resist heat well, and produce less brake dust. This translates to improved longevity, reduced wear on your brake discs, and a cleaner, more efficient braking system overall.

Performance & Efficiency

Another critical difference between cheap and expensive brake pads is how well they perform, especially under different driving conditions.

  • Cheap Brake Pads: While inexpensive brake pads might be sufficient for everyday driving, they can struggle with heat dissipation. In stop-and-go traffic, or when driving on steep Auckland hills, these pads are prone to overheating, which can lead to brake fade. This means reduced braking efficiency, especially when you need it most.
  • Expensive Brake Pads: Premium brake pads are engineered for performance. They handle heat better, maintain consistent friction levels, and deliver reliable braking even during extreme conditions. Whether you’re navigating hilly roads or driving in unpredictable Auckland weather, these brake pads ensure you can stop effectively every time.

Longevity & Cost Over Time

The initial cost of brake pads is an obvious consideration, but it’s important to think about the long-term costs associated with cheaper versus more expensive options.

  • Cheap Brake Pads: While cheaper pads might save you money upfront, their shorter lifespan can lead to more frequent replacements. Over time, the cost of buying multiple sets of low-quality pads can exceed that of investing in a single high-quality set. Additionally, cheap brake pads are often harder on your brake discs, which could mean you’ll need to replace the discs sooner as well.
  • Expensive Brake Pads: Quality brake pads come at a higher initial cost, but they tend to last much longer and provide better overall protection for your braking system. Premium pads reduce wear on other brake components, ultimately saving you money in the long run by lowering the overall maintenance and replacement costs of your vehicle’s braking system.

Safety Considerations

Safety is another crucial factor when choosing between cheap and expensive brake pads. The quality of brake pads directly affects how quickly and smoothly your car stops, which can make all the difference in emergency situations.

  • Cheap Brake Pads: While affordable brake pads can meet the basic safety standards, they often provide inconsistent stopping power. They may also take longer to engage fully, which can compromise your safety if a sudden stop is required.
  • Expensive Brake Pads: High-quality brake pads are designed for reliability and performance. They offer smoother braking, quicker response times, and are less likely to fail under pressure. In Auckland’s busy streets or during heavy rain, having premium brake pads could be the difference between avoiding an accident and a close call.

Noise & Comfort

The comfort of your ride can also be impacted by the type of brake pads you choose, especially when it comes to noise levels and vibrations.

  • Cheap Brake Pads: Affordable brake pads often generate more noise, especially as they begin to wear out. The materials used in cheap pads may produce a squealing or grinding noise, which can become increasingly annoying over time.
  • Expensive Brake Pads: Premium pads, particularly ceramic ones, are known for their quiet operation. The materials used are designed to minimise noise and vibration, leading to a smoother and quieter ride. This can be particularly beneficial if you spend a lot of time driving in Auckland traffic where frequent braking is required.

Environmental Impact

The materials used in brake pads can also affect their environmental impact, particularly in terms of brake dust.

  • Cheap Brake Pads: Lower-quality pads tend to produce a significant amount of brake dust, which can settle on your wheels and even contribute to pollution. This brake dust often contains metallic particles that are harmful to the environment.
  • Expensive Brake Pads: Many premium brake pads are designed to produce less dust, and the dust they do produce is often less harmful. Ceramic pads, for example, are known for their low-dust properties, which not only keeps your wheels cleaner but also reduces the environmental impact.

Maintenance Considerations

The need for ongoing maintenance is another aspect where the price of brake pads can make a difference.

  • Cheap Brake Pads: With cheaper brake pads, you may need more frequent check-ups and replacements. They can wear down unevenly, which can put additional strain on your brake discs and increase the likelihood of needing further repairs.
  • Expensive Brake Pads: Quality brake pads require less frequent maintenance. They tend to wear evenly and provide a more stable braking performance, meaning fewer trips to your local brake repair shop. This can be particularly convenient if you want to keep maintenance costs and downtime to a minimum.

Which Brake Pads Are Best for You?

The choice between cheap and expensive brake pads ultimately depends on your driving habits and needs.

  • Everyday Commuter: If you mainly use your vehicle for short commutes around Auckland and don’t drive in challenging conditions, then more affordable brake pads might be sufficient for your needs. Just be mindful of the potential need for more frequent replacements.
  • Performance and Safety-Focused Drivers: If you frequently drive longer distances, navigate Auckland’s steep roads, or value enhanced safety, then investing in premium brake pads is the wiser choice. They provide consistent performance, greater reliability, and peace of mind when driving in busy or unpredictable conditions.

Summary: Choosing the Right Brake Pads for Your Vehicle in Auckland

When it comes to brake pads, the adage “you get what you pay for” often rings true.

Cheap brake pads can be a suitable option if budget is your primary concern, but they come with compromises in terms of performance, longevity, and safety.

On the other hand, investing in high-quality brake pads ensures better braking efficiency, less wear on other components, and ultimately greater peace of mind when driving on Auckland’s roads.

As a trusted brake service and repairs shop in Auckland, Eurosparx can help you choose the right brake pads for your vehicle. Whether you need budget-friendly options or are interested in the enhanced performance of premium pads, our experienced team is here to assist. Contact us today on 09 218 7789 to discuss your braking needs.

Categories
GPS Trackers

Best Place to Install a GPS Tracker On a Car

GPS Tracker for cars

When you decide to fit a GPS tracker in your car, picking the right spot is essential for both effective operation and keeping it hidden.

You might initially think of placing it on the exterior underbody because it’s easy to access and install, but have you thought about the problems caused by weather exposure and the possibility of tampering?

Alternatively, indoor spots like under the dashboard or inside the seats protect the device and keep it concealed, yet each option presents challenges with signal interference and the complexity of fitting it properly.

In this post, we will cover the options you have for installing your GPS tracker.

Criteria for GPS Tracker Placement

When choosing the ideal spot to install your GPS tracker, consider the tracker’s design and its power source.

It’s important to locate a spot that optimises signal reception, which means the tracker should have a clear view of the sky.

However, you also want to have the tracker concealed so that a would-be thief does not spot it and rip it out.

It may be useful to test different locations on your vehicle to find a good balance between strong signal reception and a hidden placement.

Tracker Design Considerations

When installing a GPS tracker, it’s essential to consider its placement in your car to ensure it works effectively.

If your tracker is designed to be discreet, you have more options for where to hide it – it could be placed under a seat or within the bumper.

However, if the tracker requires clear exposure for a strong signal, you might need to position it in more visible locations.

The power source of the tracker also affects where you can install it. Battery-operated trackers are simpler to install since they don’t require wiring. However, they need to be accessible to change the battery.

This means you might have to place them in areas like the glove compartment or under floor mats.

In contrast, hardwired trackers eliminate the need for frequent battery changes and can be hidden better.

Additionally, consider the tracker’s durability. A sturdy tracker can withstand harsh conditions, which broadens your placement choices.

Always check the signal strength once installed to verify that your chosen location doesn’t interfere with the tracker’s performance.

Ideal Interior Locations For GPS Trackers

When looking for the ideal interior locations for a GPS tracker, consider the glove compartment, under the dashboard, or hidden areas like under the seat or behind interior panels for optimal concealment and signal reception.

The glove compartment, especially when you place the tracker towards the back, is discreet yet accessible. This location allows for effective signal reception, making it a practical choice if you prefer a quick installation without much hassle.

Installing the tracker under the dashboard is another smart option. It keeps the device hidden and avoids interference from metal components, which can reduce signal strength. This ensures that your tracker operates efficiently, crucial for reliable tracking.

If you’re aiming for maximum secrecy, placing the tracker under the seat or behind an interior panel could be your best option. It’s a hidden location that minimises the risk of detection, yet still maintains good signal reception.

Optimal Exterior Spots

When fitting a GPS tracker on the exterior of your car, there are a couple of good options:

  • Inside the Engine Compartment: Positioning near the windshield wiper motor is ideal. It’s sheltered from weather and concealed, making it difficult for thieves to find and reach.
  • Bumper Frames and Brackets: These spots allow for covert placement. The tracker is well-hidden, but make sure it’s kept away from any heat sources.
  • Wheel Wells: Concealing the tracker in the wheel well keeps it invisible, although be mindful of possible exposure to debris. It’s wise to check this area regularly during car maintenance.

If you are placing your tracker on the exterior of your car, make sure to get one designed for exterior use that is waterproof.

Signal Strength Importance

You need to consider the signal strength when installing the GPS tracker.

You should try different spots on your vehicle to find the most effective location, as various materials can affect the signal.

Optimal Signal Locations

To ensure your GPS tracker works effectively, place it in areas with few obstructions to the sky, such as under the rear window or dashboard. These spots provide the best opportunity for clear signal reception, essential for keeping the accuracy and reliability of your tracker’s data.

Here are some important points to consider when choosing a placement:

  • Under the Dashboard: This location protects the tracker from external elements while allowing GPS signals to pass through the plastic material.
  • Inside the Rear Window Area: Glass doesn’t significantly block GPS signals, and placing the tracker here keeps it hidden yet effective.
  • Within Brake Light Housings: A clever spot that’s generally free of metal interference, improving signal clarity.
  • Under Seat Cushions: If the seats are mostly plastic or thinly made, this can be a concealed yet functional placement.

Choosing any of these locations helps ensure that your GPS tracker remains connected, giving you peace of mind with consistent and accurate location tracking.

Testing Installation Effectiveness

Once you have set up your GPS tracker, it’s essential to check the signal strength to ensure it tracks accurately and reliably.

To test this, turn on the tracker and look at the signal strength indicator on the device or its software.

Compare the signal readings with the recommended levels given in the instructions. These levels are crucial to confirm that your tracker is placed correctly for optimal functioning.

It’s important not to just check the signal immediately after setting it up; you should keep an eye on it regularly.

Changes in the environment or minor movements of your vehicle can affect the signal strength. If you notice that the signal is weaker than expected or gets worse over time, try moving the tracker slightly.

Often, a small change in position can significantly improve the signal quality.

In regions with typically low signal strength, you might need to think more carefully about where to place your device. It’s vital that your device maintains effective communication with GPS satellites to ensure it sends accurate location data and updates.

Always follow the guidelines provided when adjusting the tracker to improve the signal strength and ensure reliable tracking.

Signal Interference Factors

Several factors can disrupt the signal of your GPS tracker, which may affect its accuracy and reliability. When deciding where to position the tracker on your car, it’s important to consider what might interfere with the signal. Here are the key interference factors to be aware of:

  • Metal Surfaces: Large metal parts such as the car’s frame can obstruct GPS signals.
  • Dense Materials: Materials like concrete near your parking area can weaken signal reception.
  • Electronic Devices: Nearby electronic equipment can cause electromagnetic interference.
  • Antenna Orientation: The positioning of the tracker’s antenna impacts signal capture.

To optimise your tracker’s performance, choose a location with few obstructions.

Need a GPS Tracker Installed?

We at Eurosparx offer GPS tracker installation in Auckland and will make sure yours is installed in the best position for both performance and concealment. We also supply a wide range of high quality trackers.

Give us a call now on 09 218 7789, email us on info@eurosparx.co.nz or pop into our workshop at 597 Rosebank Road, Avondale 1026, Auckland.


Categories
GPS Trackers

How Long Does a GPS Tracker Battery Last?

How long does a GPS tracker battery last?

If you’ve ever wondered how long a GPS tracker battery lasts, you are in the right place. In this blog post we will answer how long you can expect the tracker’s battery to last, as well as factors that affect it’s lifespan.

Understanding the factors that affect GPS tracker battery life is crucial for ensuring uninterrupted tracking capabilities.

So, How Long Do GPS Tracker Batteries Last?

GPS tracker batteries can typically last from 15 days to 4 months before needing to be recharged, outlasting many similar products on the market.

To make sure tracking is continuous, most trackers will send you a notification when the battery level drops to 20%, reminding you to recharge it promptly. By using energy-saving modes, you can increase the battery life even more, improving the overall performance of your GPS tracker.

It’s worth noting that the battery life can vary depending on the location methods used, such as Bluetooth, Wi-Fi positioning, and GPS. Also, factors like daily movement patterns and how often the tracker updates can impact the overall battery life.

Factors Affecting GPS Tracker Battery Life

Factors impacting the battery life of a GPS tracker vary from usage conditions determining a lifespan of 7 days to 3 months to smart energy management modes that can extend it up to 5 months in certain cases.

The frequency of positions sent by the tracker directly affects its battery life, so adjusting how often it updates location data can help save power.

Daily movement also plays a role; constant movement drains the battery faster, requiring more frequent charging.

Interestingly, battery life can be longer in urban areas with Wi-Fi hotspots due to reduced reliance on GPS for positioning. This means that if your tracker can connect to Wi-Fi networks, it may last longer between charges in city environments.

Understanding these factors can help you optimise your GPS tracker’s battery life and ensure you get the most out of its tracking capabilities.

GPS Tracker Battery Types

When thinking about GPS tracker battery types, rechargeable options like lithium-ion (Li-ion) and lithium-polymer (Li-poly) are notable for their high energy density and quick charging abilities. Li-ion batteries are lightweight and compact, making them perfect for portable GPS tracker use. They also have a low self-discharge rate, meaning they can hold a charge when not in use. On the other hand, Li-poly batteries offer a flexible shape but have slightly lower energy density than Li-ion batteries.

Non-rechargeable options like alkaline or lithium batteries are also available but may result in higher long-term costs and environmental issues due to disposal problems. Even though non-rechargeable batteries might seem cheaper upfront, the need for frequent replacements can accumulate over time.

Therefore, when selecting a GPS tracker battery type, it’s crucial to consider factors like energy density, charging abilities, lifespan, and environmental impact to make an informed choice that matches your tracking requirements and sustainability aims.

Battery Saving Tips

To make your GPS tracker’s battery last longer, try these energy-saving tips:

  1. Use the energy-saving modes on your GPS tracker to manage power efficiently and extend battery life.
  2. Adjust how often the tracker updates its position when moving to balance accuracy with battery preservation.
  3. Switch to stationary mode when the tracker isn’t moving to save battery power by reducing activity.

Enhancing GPS Tracker Reliability Through Battery Optimisation

To make sure your GPS tracker works reliably, it’s important to optimise its battery performance. This is key for keeping tracking going without any interruptions.

You can make your GPS tracker’s battery last up to 5 months longer by using smart energy-saving modes. Adjusting how often your tracker updates its position based on how it moves is another good way to save battery. Remember that if your tracker moves a lot during the day, it can drain the battery faster and you may need to recharge it more often.

Changing the settings for when your tracker is stationary can help save battery by sending fewer position updates. Also, setting up alerts for when the battery is low will remind you to recharge it promptly, ensuring continuous tracking.

Conclusion

In summary, the battery life of a GPS tracker can vary from 15 days to 4 months, or even longer, depending on factors like energy management modes and location methods. By adjusting settings and using energy-saving features, users can improve the battery life of their GPS tracker.

It’s crucial to keep an eye on the battery level and recharge when needed to ensure the device remains reliable and functional for tracking purposes.

If you are looking to install a GPS tracker on your vehicle, contact us now by calling 09 218 7789 or emailing info@eurosparx.co.nz.

Categories
Auto Electrical

What Is An Auto Electrician And What Do They Do?

What Is An Auto Electrician?

Have you ever thought about the skilled individuals who work behind the scenes to ensure your vehicle’s electrical system runs smoothly?

An auto electrician is the unsung hero who troubleshoots and fixes issues in your car’s nerve centre. Their expertise in handling wires and circuits is essential for keeping your wheels turning without any hitches.

But what exactly does their job involve?

Let’s explore the world of auto electricians and discover the crucial role they play in maintaining the roadworthiness of your vehicle.

What Is An Auto Electrician?

Auto electricians specialise in diagnosing and fixing electrical systems in different types of vehicles. They work on a variety of vehicles, such as lorries, agricultural vehicles, and construction vehicles.

Using specialised equipment, auto electricians test and identify faults in vehicle electrical systems. They’re skilled in making necessary adjustments to engine systems to ensure optimal performance.

Additionally, auto electricians provide valuable advice to vehicle owners regarding essential repairs and improvements to electronic systems. Their expertise is crucial in maintaining the functionality and safety of the vehicles they work on.

The Duties and Responsibilities Of Auto Electricians

To grasp the main duties and responsibilities of an auto electrician, it’s important to understand their essential role in ensuring the proper functioning of various vehicle electrical systems. Auto electricians are experts in identifying and fixing electrical issues in vehicles, including diagnosing faulty components and systems. They’re in charge of fitting new electrical systems, upgrading existing ones, and performing diagnostic tests on vehicle electrical systems to guarantee optimal performance.

Additionally, auto electricians offer valuable advice to customers on electrical problems and ensure that all electrical components are operating correctly. They work on a wide range of vehicle systems such as ignition, fuel injection, heating, air-conditioning, lighting, and stereo systems. By adjusting electronic systems and components, auto electricians significantly contribute to enhancing vehicle performance. Their proficiency in vehicle electrical systems is crucial for maintaining vehicles running smoothly and efficiently.

Conclusion

Auto electricians are essential for maintaining vehicles by identifying and repairing electrical problems. Their expertise ensures that ignition and fuel injection systems work efficiently.

If you’re having an issue with your car’s electrical system, speak to us today by calling 09 218 7789 or emailing info@eurosparx.co.nz.

Categories
iDrive Throttle Controller

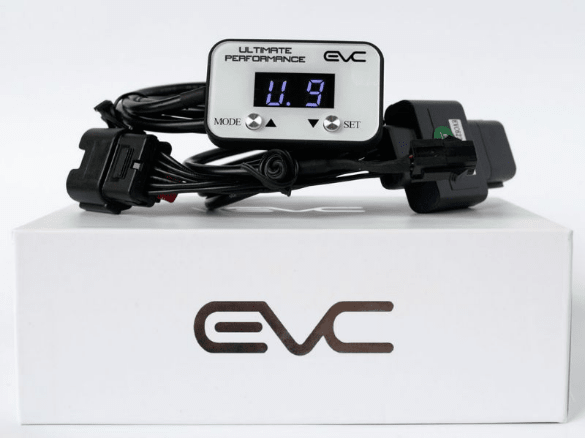
What Is The iDrive EVC Throttle Controller and How Can It Improve Your Vehicle?

An iDrive throttle controller is one of the most simple upgrades you can make to your car and immediately see the benefits and improvement in acceleration and throttle response.

iDrive EVC Throttle Controllers Auckland

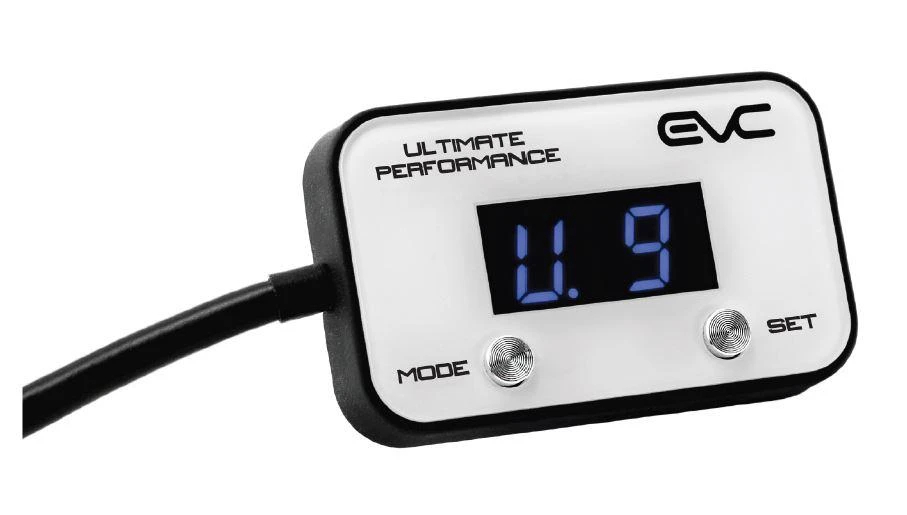
The EVC Throttle Controller, formerly known as iDrive, is plug and play controller that gives you more control over the vehicle and enhances the way it drives. It does this by sharpening or dampening your throttle curve and provides your pedal mapping with new points of reference.

Sharpening your throttle curve reduces throttle lag, changes how the torque is delivered to the wheels and improves acceleration, making for perfect throttle response for any situation or driving style.

Increased throttle response means that you will be able to feel the input of gas pedal and immediately activate your engine without any delay in power before accelerating.

EVC doesn’t interfere with the car’s electronic system, it only monitors and changes the signal that helps you control your cars power output.

The throttle controller can improve fuel efficiency and at the same time makes driving more fun. You will experience great control over vehicle throttle sensitivity as well as speed and horsepower.

If you are looking for an EVC Throttle Controller for your vehicle, we at Eurosparx are the official distributor for West Auckland for EVC and have a huge range of models. We offer free installation for every EVC Throttle Controller. Call us now to get yours!


Categories
iDrive Throttle Controller

How the iDrive Throttle Controller Can Improve Your Ute

Most modern vehicles, including utes, use an electronic system for the throttle known as “fly by wire”. Instead of a cable mechanically connecting the pedal to the throttle, the pedal has a sensor to read how much the pedal is pressed and then operated the throttle electronically to open it accordingly.

The problem with this is that many vehicles have a noticeable delay between the time you press the pedal and the time the throttle reacts. This is where iDrive comes in.

iDrive Throttle Controllers Auckland

The iDrive Throttle Controller allows you to adjust the reaction time of the throttle and the pedal, in order to match it to your driving style.

But there are other throttle controllers that can do that, what makes iDrive so special?

The iDrive unit is able to automatically adjust the throttle response based on pedal pressure and your driving style. That means if you are taking it easy and using the throttle gently, it will set itself to setting 1 (least responsive).

If you accelerate hard, such as in an overtaking maneuver, towing a trailer or just having a good time behind the wheel, it will change the setting to 9 (most responsive).

It also has an economy mode, which reduces responsiveness of the throttle in order to increase fuel economy.

And, should you want full control, you can manually set the controller between 1-9 to give you the exact response you are looking for.

If you are looking for an iDrive for your ute, we at Eurosparx are the official West Auckland distributor for iDrive and have units for:

  • Holden Colorado
  • Mitsubishi Triton
  • Ford Ranger
  • Nissan Navara
  • Toyota Hilux

We are able to supply the entire iDrive range so if we don’t have the model you are looking for, we can get it!
Get in contact with us now to get your iDrive by calling us on 09 218 7789 or emailing info@eurosparx.co.nz

Categories
Car Diagnostics

How to Read Car Diagnostic (OBD) Scan Codes

Modern cars are filled with electronics, and one of the benefits of this is that the car can often tell you what is wrong, eliminating lengthy troubleshooting procedures to find the problem.

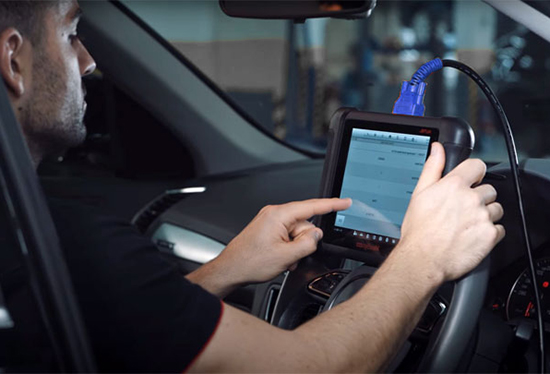
Running a diagnostic scan on your car can reveal if there are any issues, and if so, what they are. Here’s how it works.

How to Read Car Diagnostic OBD Scan Codes

Since 1996, all vehicles had to have an OBD (On-Board Diagnostics) II diagnostic system, which allows the car to be scanned using universal scanning tools which will produce error codes to tell you what the problem is.

This scan can reveal a wide range of problems all around the car including ignition timing issues, level of buildup in the engine, fuel injector performance, engine rpm levels, coolant temperature, airbag condition, lights and more. Since 1996, the diagnostic system has been further improved and now can tell you almost anything about the car.

The diagnostic tool will generally tell you what the problem is by producing a code. The standard for codes is as follows:

The codes range from P0100 to P1899. Each letter and number in the code represents a different section of the car.

The first letter is often a P, which stands for powertrain (engine, gearbox etc). B stands for the body (includes A/C and airbag), C stands for chassis (includes ABS) and U stands for Network Code (Wiring Bus).

The number 0 (the second digit) is a generic OBD code shared by most manufacturers, but some use a specific code here so the number 1 may show.

The third digit tells you the category of the problem:

  • 1 means there is an air or fuelling problem.
  • 2 means there is something wrong with the fuel injector circuit.
  • 3 means there is a problem with the ignition.
  • 4 means there is an emissions control problem.
  • 5 means there is a vehicle speed or idle control problem.
  • 6 means there is a computer or output circuit problem.
  • 7 or 8 means there is a transmission problem.

The fourth and fifth digits specify in detail what system is having a problem. These codes are set by the vehicle manufacturer so you (or the auto electrician doing the scan) will need to check with the manufacturer what they stand for.

If you need to have your car scanned to diagnose a problem, call us now on 09 218 7789 or pop into our shop at 597 Rosebank Road today!

Categories
Auto Electrical

How to Know If You Have A Faulty ECU (Computer)

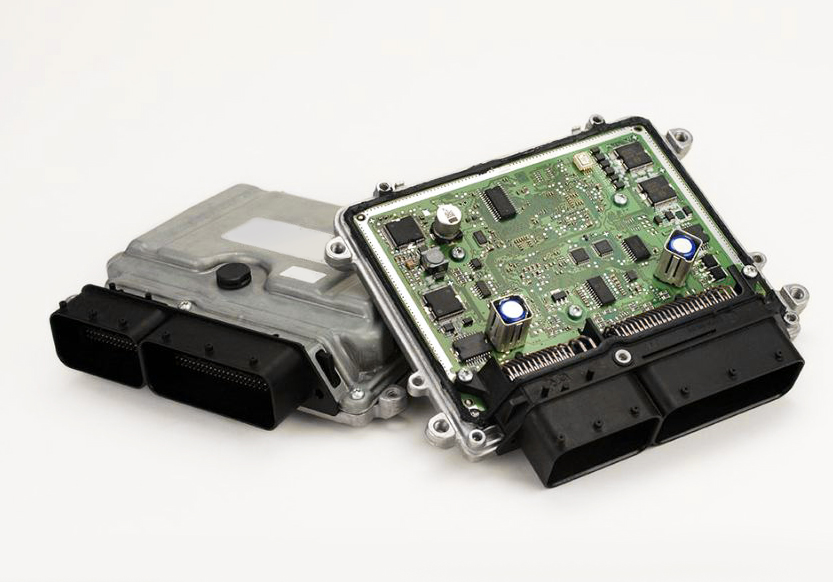
The ECU, also known as the computer, DME or ECM, is the main unit that controls your motor and allows it to run. When it starts to fail, your car won’t run right, or might not run at all. Here is why and how it fails, and how you can find out if that’s the problem.

How to Tell If You Have a Faulty ECU (Computer)

Common Symptoms ECU Failure
When your ECU starts failing, you will usually notice at least one of the following symptoms (sometimes more than one):

  • Check engine light comes on
  • Erratic idle
  • Engine turning off for no reason (stalling)
  • Intermittent starting problems
  • Overheating ECU
  • Connection issues between the ECU and the diagnostic scanner
  • Engine won’t start at all
  • Excessive fuel usage
  • Poor running condition of the motor

If you are experiencing any of these issues with your car, the first step you should take is to get the car scanned with a diagnostic tool. This will reveal if the ECU has produced any error codes and may tell you if the ECU is having problems or has failed. However, if the ECU has completely died, the scanner won’t be able to scan anything. This itself can be a sign that the ECU is dead.

If the scanner was unable to connect with the ECU to do a scan, the next step is to test to ensure the ECU is still plugged in properly and that it is getting a strong power and ground signal. This simple test can be done with a multimeter once you know which pins should be getting power and ground on the ECU plug (a simple internet search should tell you for your particular car).

If it is getting power and ground, the best test is to get a known working ECU and replace yours to see if that fixes the problem. If it does, you’ve had a bad ECU. If it doesn’t, the issue lies elsewhere.

Keep in mind that if this does fix the problem, it may pay to get the car checked out, because there was a reason the ECU died in the first place. You don’t want it to happen again.

If you are not getting power and ground, something else is causing the problem, such as a fuse or relay. Diagnosing this can get complicated fast, so unless you have experience it is probably best to go see an auto electrician.

If the scan revealed issues with the ECU, then you’ve got your answer and will have to replace the ECU.

If you are having electrical problems with your car, come and see us at Eurosparx. We have the latest tools and equipment to scan and diagnose all European and Japanese vehicles and can have a look at yours to let you know if you need a new ECU or if it can be repaired.


Categories
Auto Electrical

How to Quickly Test Your Car Battery to See If It’s Faulty

If you think that your car’s battery is faulty, here is a simple test you can do which will reveal if it is or not. You only need a simple multimeter (and possibly a friend) to complete this test.

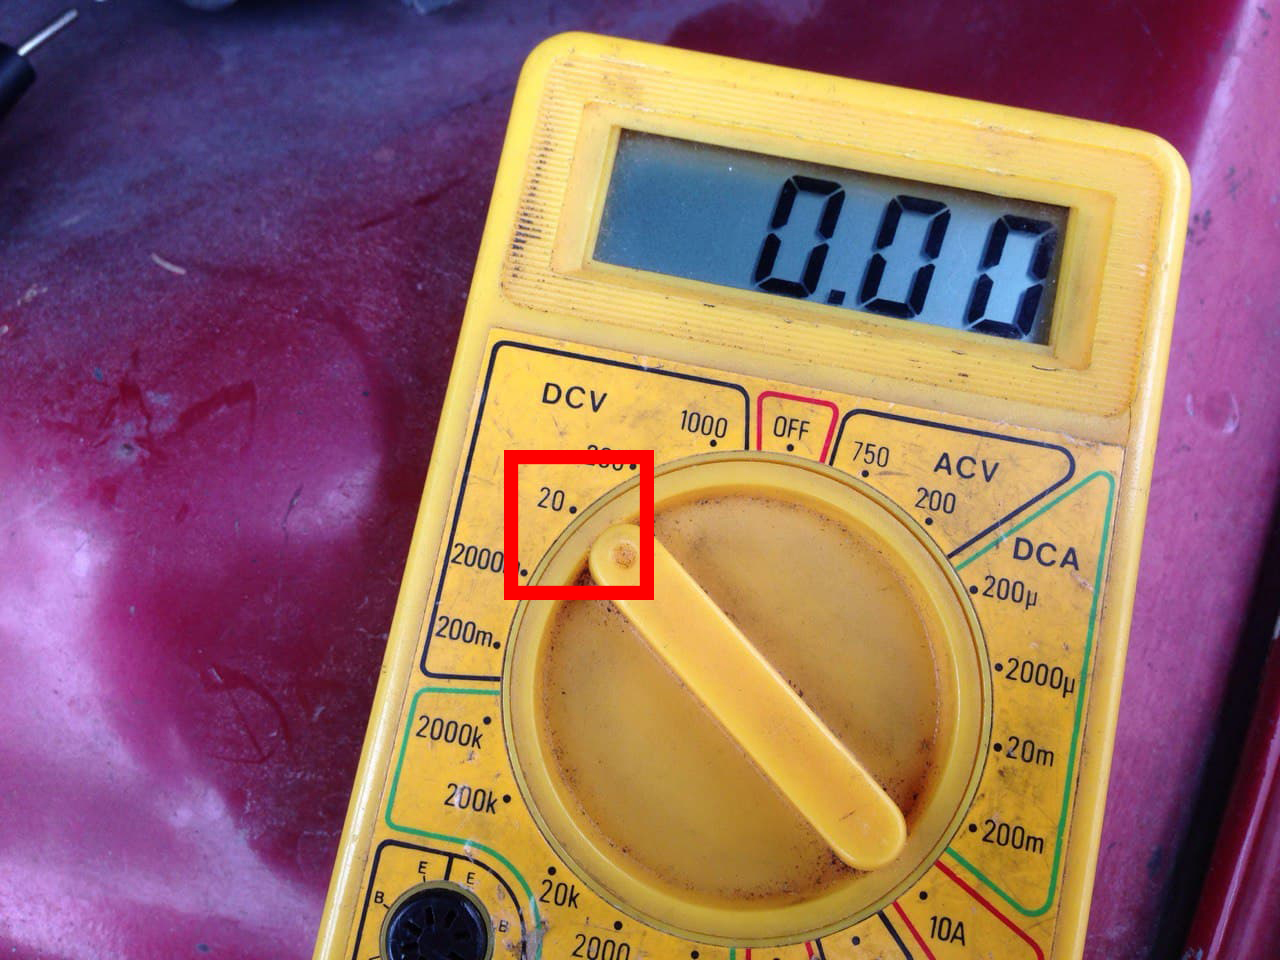
  1. Grab your multimeter, and if it’s not autoranging, set it to 20V DC.
    How to set your multimeter to test your car battery
  2. Turn off the ignition and any accessories that are still on, like lights, radio etc.
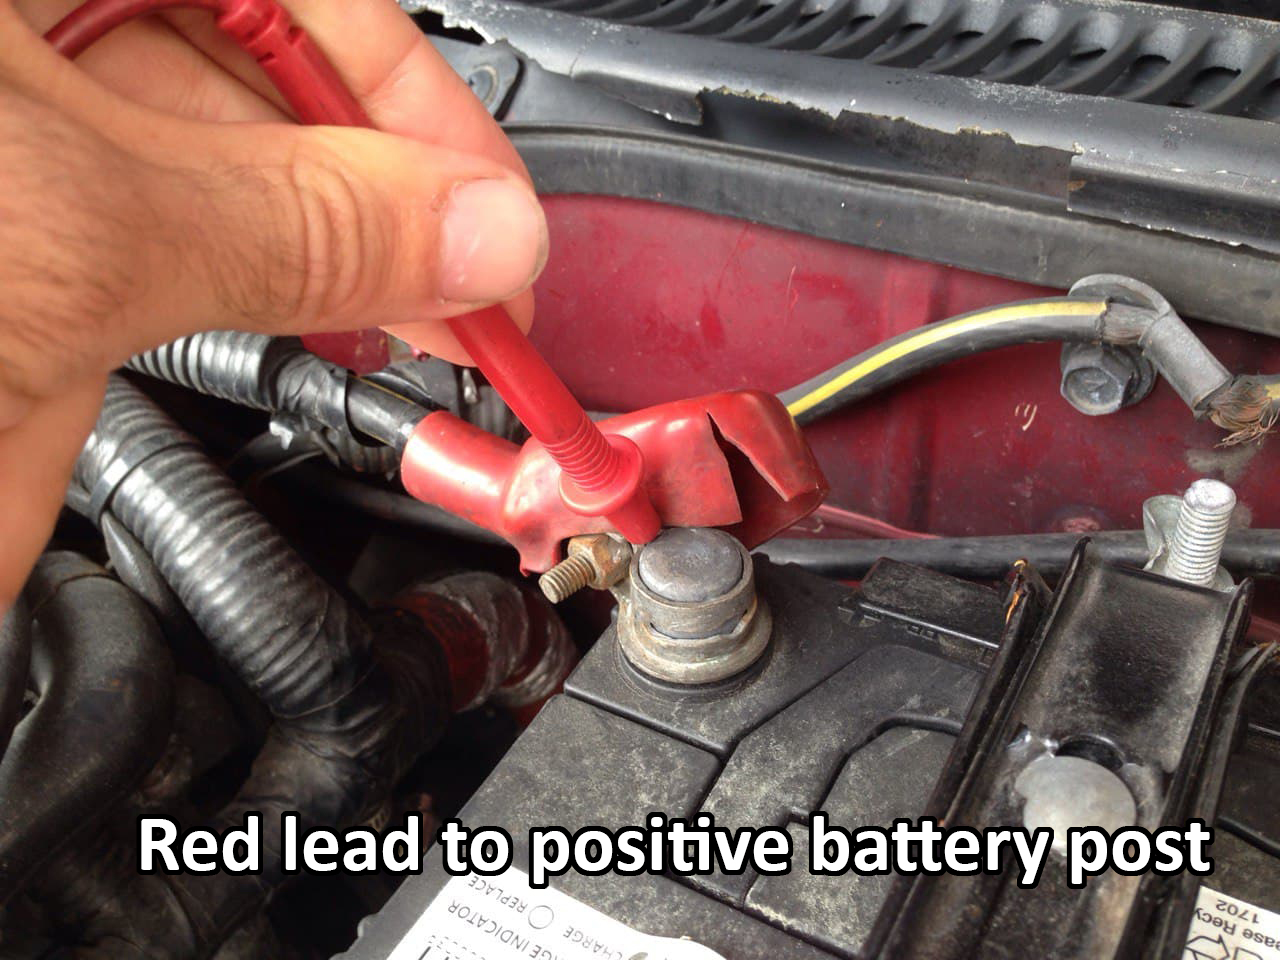
  3. Take the red lead of the multimeter and put it on the positive post of the battery
    Placing positive lead on positive battery post
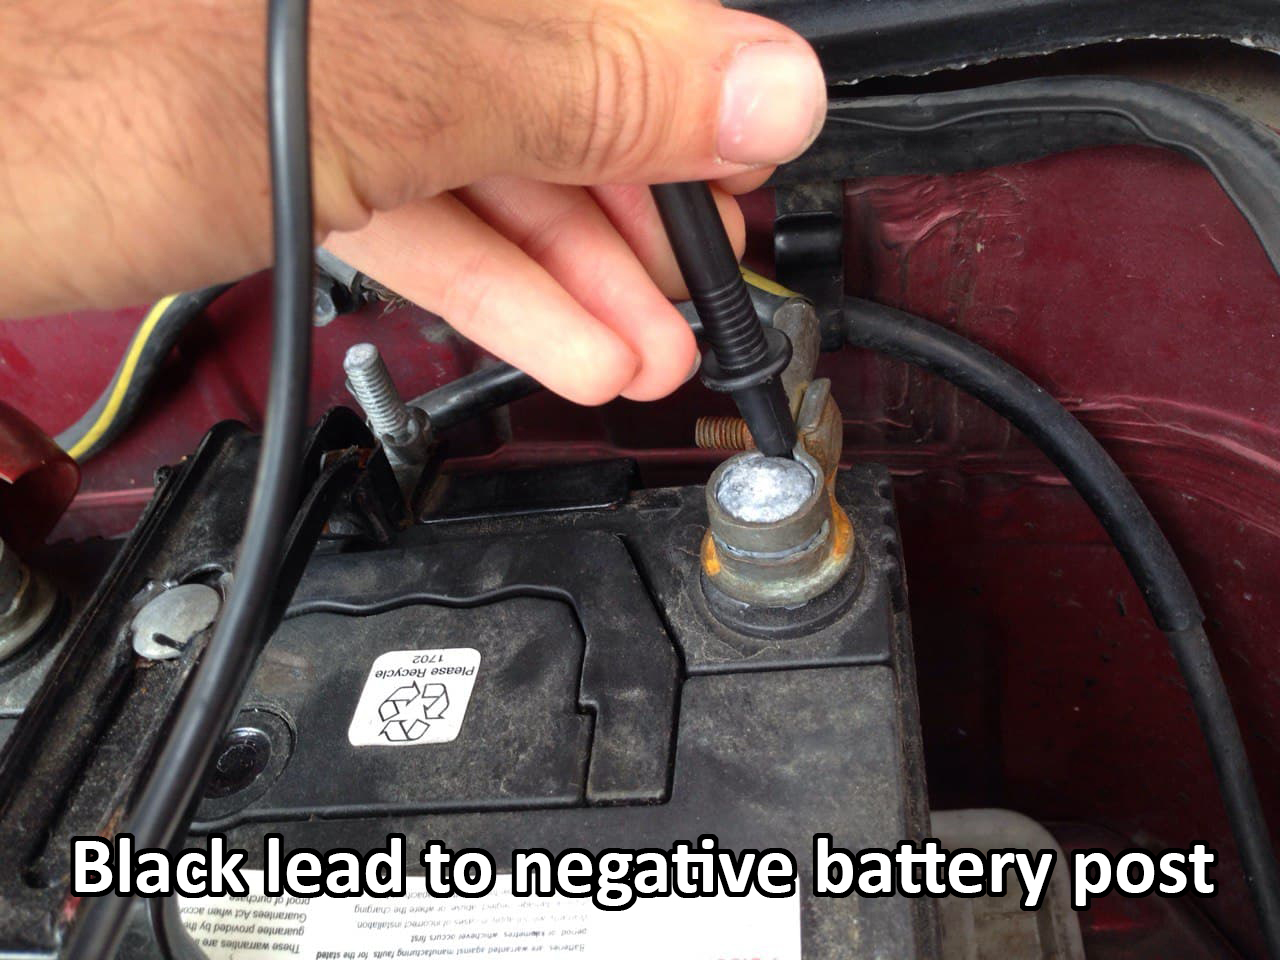
  4. Take the black lead of the multimeter and put it on the negative post of the battery.
    Placing negative lead on the negative battery post
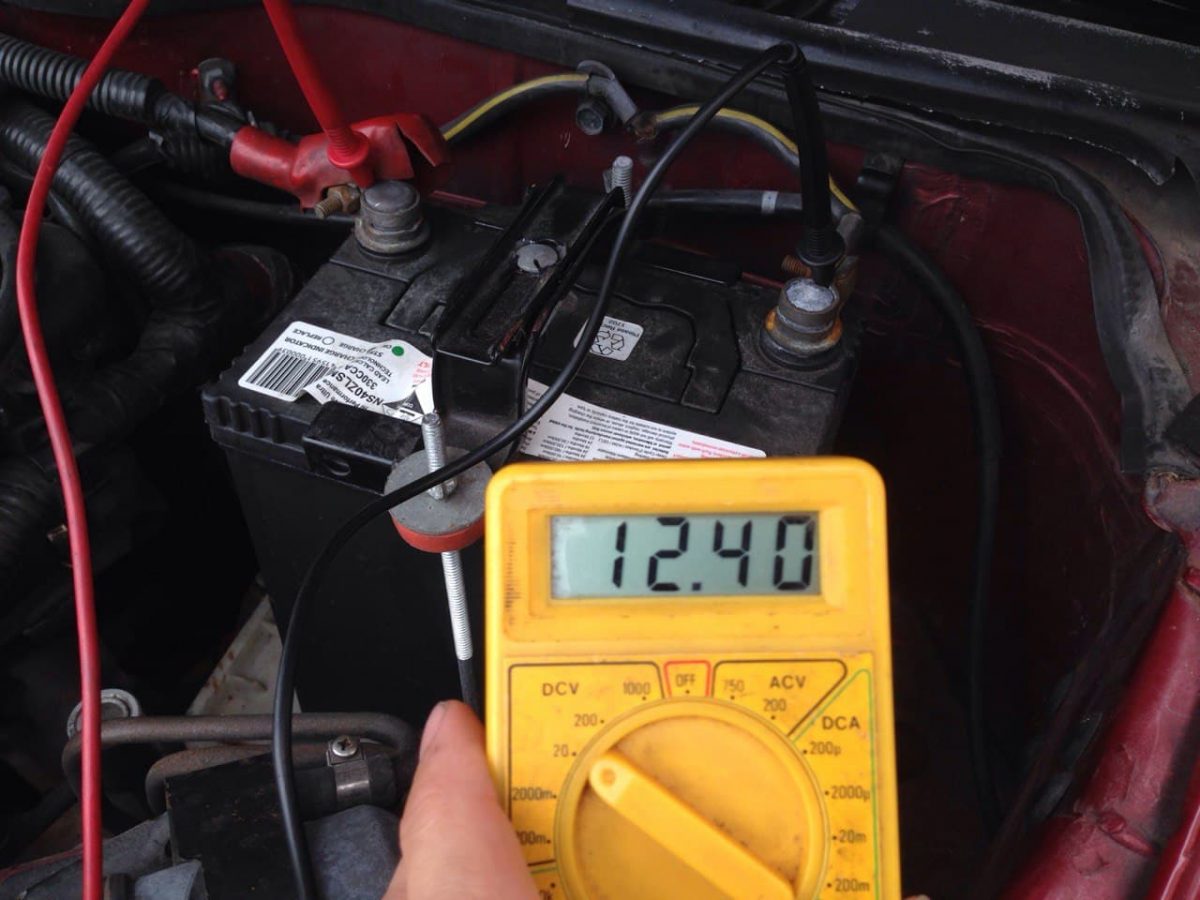
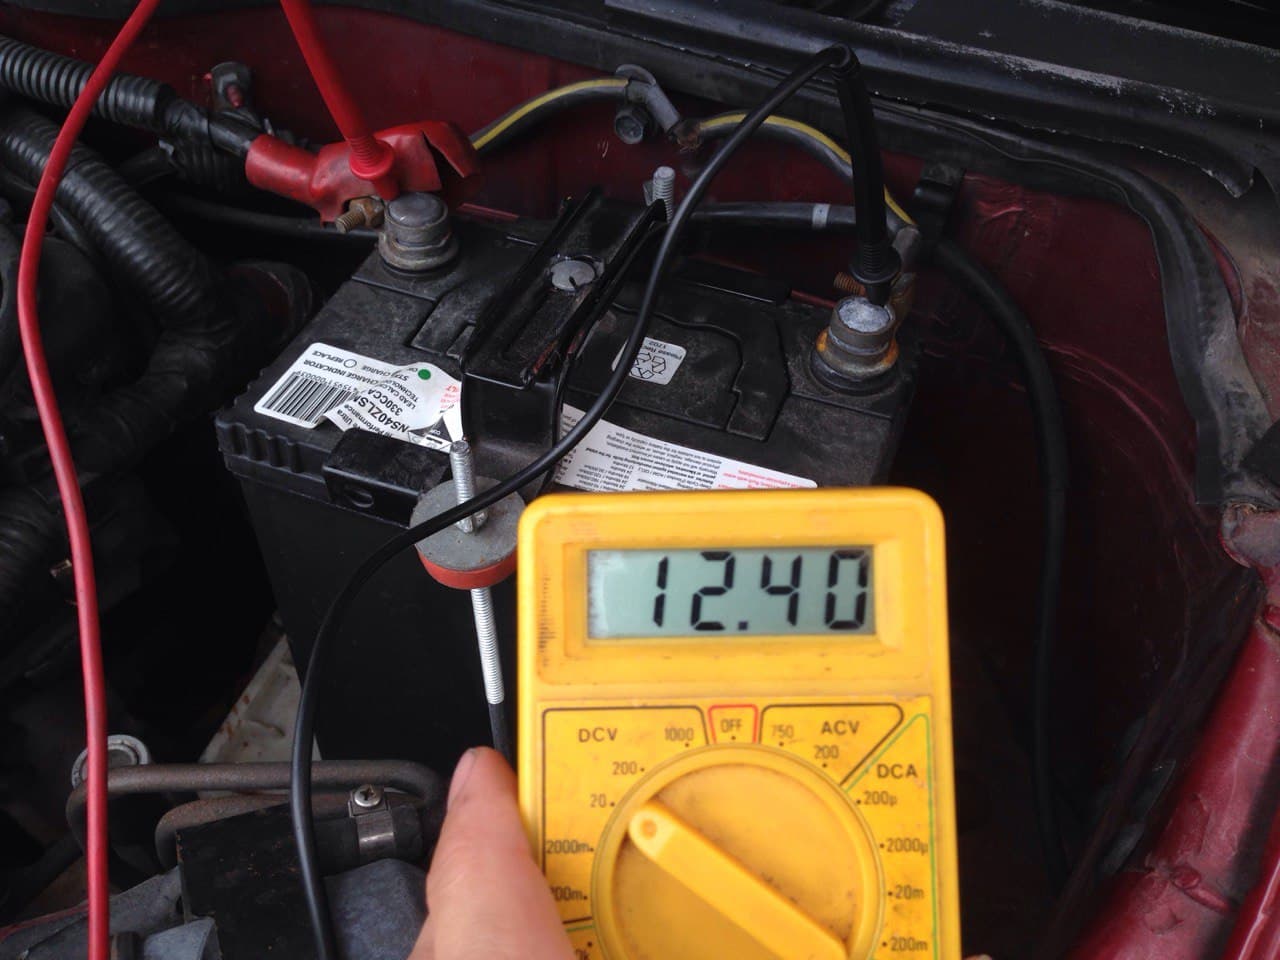
  5. Now see what the multimeter says. If it is showing anything below 12.4 volts, your battery could be faulty or needs to be charged.
    Multimeter reading of your car battery

If the battery has consistently been getting flat and it’s showing less than 12.4v on the test above, then odds are it needs to be replaced.

One further test you can do is a cranking test:

  1. Follow steps 1&2 above, then disable your vehicle’s ignition or fuel system (a quick way to do this is to full the fuel pump fuse out). This will allow the vehicle to crank without firing, which is what we need.
  2. Place the leads of the multimeter on the battery posts like before, red on positive and black on negative.
  3. Have your friend/helper to crank the car – for no longer the 15 seconds – and see what the multimeter says. If the voltage drops below 9.6 volts, you’ve got a weak battery on your hands.

One last quick tip. If you are seeing a negative reading on your multimeter (such as -12.6v), it means you have connected the multimeter leads the wrong way round to the battery. Don’t worry, this won’t cause any problems, it will just show you a negative reading.

If you’ve performed these tests and find you have a weak battery, give us a call now on 09 218 7789 and we will be able to sort you out a quality replacement car battery for an excellent price.