Long drives with children can be challenging, especially when boredom sets in and the familiar chorus of “are we there yet?” begins. Rear entertainment systems have become an increasingly popular solution for Auckland families looking to make their journeys more enjoyable for everyone in the vehicle. This article will explore everything you need to know about adding rear entertainment systems to your family vehicle, from the different types available to installation considerations and the benefits they offer.
Types of Rear Entertainment Systems Available
Overhead Flip-Down Monitors
Overhead flip-down monitors remain one of the most popular choices for family vehicles in Auckland. These systems mount to the ceiling of your vehicle, typically between the front and rear seats, and flip down when in use. When not needed, they fold flat against the roof, keeping them out of the way and maintaining a clean interior appearance. Modern flip-down monitors come in various sizes, ranging from 10 inches to 17 inches or larger, giving you flexibility based on your vehicle’s interior space and your family’s viewing preferences.
These monitors often come with built-in DVD players, though many newer models also include HDMI inputs, USB ports, and wireless connectivity options. This means your children can watch movies, play video games through a connected console, or stream content from tablets and smartphones. The central mounting position ensures that all rear passengers have a clear view of the screen, making it an excellent choice for vehicles that regularly carry multiple children.
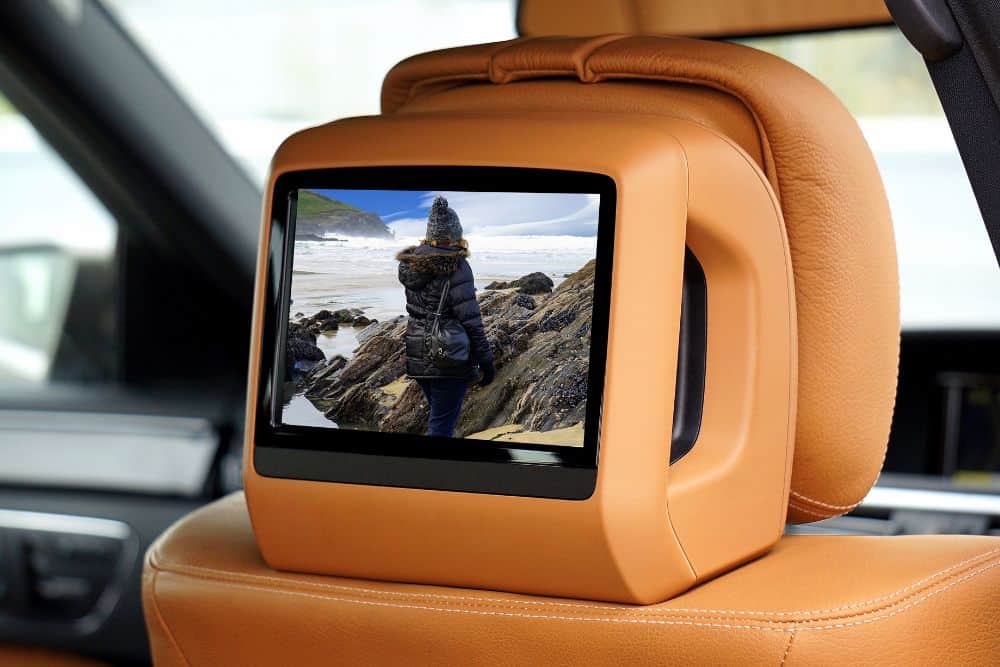
Headrest-Mounted Screens
Headrest-mounted entertainment systems offer a different approach, with individual screens built into or attached to the back of the front seat headrests. This setup provides each rear passenger with their own dedicated screen, which can be particularly beneficial when children have different viewing preferences. One child might want to watch a cartoon while another prefers to play a video game, and headrest systems make this possible without any arguments over what to watch.
These systems come in two main varieties: replacement headrests with built-in screens and portable units that attach to existing headrests. Replacement headrests provide a more integrated, factory-fitted appearance and are permanently installed in the vehicle. Portable options offer more flexibility, as they can be moved between vehicles or removed entirely when not needed. Many headrest systems now include wireless headphone capabilities, allowing passengers to listen to their content without disturbing others in the vehicle.
Portable and Tablet-Based Solutions
For families who want flexibility without permanent installation, portable entertainment solutions offer an attractive alternative. These systems typically involve mounting brackets or holders that secure tablets or portable DVD players to the back of front seats. While not as integrated as built-in options, they provide a cost-effective entry point into rear entertainment and can easily be transferred between vehicles.
Many Auckland families choose to use iPads or Android tablets with purpose-built vehicle mounts. These setups take advantage of the tablets’ existing content libraries, streaming capabilities, and app ecosystems. When combined with a quality mount and perhaps a dedicated vehicle power supply, tablets can provide an entertainment experience that rivals dedicated systems. Some families prefer this approach because the devices can also be used outside the vehicle for other purposes.
Key Features to Look For
Screen Quality and Size
When selecting a rear entertainment system, screen quality should be a primary consideration. Higher resolution screens provide clearer images and are easier on young eyes during extended viewing sessions. Look for systems that offer at least 1080p resolution, as this has become the standard for modern entertainment. Screen size matters too, but bigger is not always better. The ideal size depends on your vehicle’s interior dimensions and the typical viewing distance for rear passengers.
Anti-glare coatings are another important feature to consider, particularly for New Zealand’s bright sunny conditions. A screen that becomes washed out in direct sunlight will frustrate passengers and limit when the system can be used effectively. Quality systems incorporate coatings and screen technologies that maintain visibility even when light enters the vehicle from various angles.
Audio Options
Sound management is crucial in a vehicle environment where the driver needs to concentrate on the road. The best rear entertainment systems offer multiple audio output options to suit different situations. Wireless Bluetooth headphones allow children to enjoy their content at whatever volume they prefer without affecting the driver or other passengers. Many systems support multiple headphone connections simultaneously, so each child can have their own set.
For times when headphones are not desired, quality systems can route audio through the vehicle’s existing speaker system. This might be appropriate for family movie time during long holiday drives when everyone wants to watch and listen together. Some systems also include built-in speakers in the monitor itself, providing a middle-ground option that keeps sound localised to the rear seating area.
Connectivity and Input Options
Modern rear entertainment systems should offer a variety of input options to accommodate different media sources. HDMI inputs allow connection of gaming consoles, streaming devices, and other external equipment. USB ports enable playback of content stored on flash drives and can also charge mobile devices. Some systems include SD card slots for easy playback of downloaded movies and shows.
Wireless connectivity has become increasingly important in rear entertainment systems. Screen mirroring capabilities allow content from smartphones and tablets to be displayed on the vehicle’s screens without physical cables. This feature is particularly useful for streaming services that may not have direct compatibility with the entertainment system. Built-in WiFi in some premium systems even allows direct streaming when the vehicle is within range of a hotspot or when connected to a mobile data source.
Installation Considerations for Auckland Vehicles
Professional Installation Benefits
While some rear entertainment systems are marketed as DIY installations, professional installation offers significant advantages that make it worthwhile for most Auckland families. A qualified auto electrician understands how to properly integrate the system with your vehicle’s electrical system, ensuring reliable operation without risking damage to existing components. Professional installation also ensures that wiring is properly routed and concealed, maintaining your vehicle’s interior appearance.
Safety is another critical reason to choose professional installation. Rear entertainment systems must be securely mounted to prevent them from becoming projectiles in the event of sudden braking or an accident. An experienced installer knows how to properly anchor these systems and will ensure all mounting hardware is rated for automotive use. They will also position screens and cables so they do not interfere with seatbelts, airbags, or other safety equipment.
Professional installers can also advise on the best system and configuration for your specific vehicle and family needs. They understand the electrical demands of different systems and can ensure your vehicle’s alternator and battery can handle the additional load. This expertise helps avoid electrical issues after installing aftermarket accessories like premature battery drain or blown fuses that can occur with improper installations.
Vehicle-Specific Considerations
Different vehicle types present different installation challenges and opportunities. SUVs and minivans typically offer ample headroom for overhead flip-down monitors and often have existing power points that can be utilised. Smaller vehicles may be better suited to headrest-mounted systems or compact overhead units that do not compromise headroom for rear passengers.
The electrical system capacity of your vehicle is another important consideration. Older vehicles may require upgrades to handle the power demands of modern entertainment systems, particularly if you plan to run multiple screens, gaming consoles, or other high-draw accessories simultaneously. A professional auto electrician can assess your vehicle’s capacity and recommend any necessary upgrades to ensure reliable operation.
Some newer vehicles come pre-wired for rear entertainment systems, even if they were not originally equipped with one. Taking advantage of this existing wiring can simplify installation and reduce costs. Your installer can determine whether your vehicle has this wiring and the best way to utilise it.
Benefits of Rear Entertainment Systems for Families
Peaceful and Enjoyable Journeys
The most immediate benefit of a rear entertainment system is the transformation of travel time for both children and parents. Children who are engaged with movies, shows, or games are far less likely to become restless or disruptive during long journeys. This allows parents to focus on driving without constant interruptions, making travel safer and more relaxing for everyone. Many Auckland families report that rear entertainment systems have completely changed their experience of long drives to holiday destinations.
Beyond simply keeping children occupied, entertainment systems can make car time something children actually look forward to. Instead of dreading long trips, kids may become excited about the opportunity to watch their favourite shows or play games. This positive association with travel can make family outings more frequent and enjoyable, as parents no longer avoid longer drives due to concerns about children’s behaviour.
Educational Opportunities
Rear entertainment systems are not limited to passive entertainment. Many families use travel time for educational content, turning drives into learning opportunities. Educational programmes, audiobooks, and learning apps can all be enjoyed through a properly equipped entertainment system. Some parents find that their children are actually more receptive to educational content during car journeys, perhaps because there are fewer distractions than at home.
Language learning programmes, nature documentaries, and historical content can all be incorporated into family travel time. For Auckland families with children of different ages, individual headrest screens allow each child to engage with age-appropriate educational material. This flexibility means that a teenager studying for exams can watch revision content while a younger sibling enjoys an educational cartoon.
Value Addition to Your Vehicle
A professionally installed rear entertainment system can add value to your vehicle when it comes time to sell or trade in. Family-oriented buyers actively seek vehicles with entertainment features, and a quality system can make your vehicle more attractive in the competitive used car market. The key is ensuring the installation is done professionally, as poorly installed aftermarket systems can actually detract from a vehicle’s value.
Quality systems from reputable brands that are properly integrated with the vehicle’s interior will always command better resale value than cheap alternatives that look out of place. When choosing a system, consider it as an investment in both your family’s current enjoyment and your vehicle’s future value.
Need Help Adding Rear Entertainment to Your Family Vehicle?
Adding a rear entertainment system to your family vehicle can transform your travel experiences and bring peace to every journey with your children. As Auckland’s trusted auto electricians, Eurosparx can help you select and professionally install the perfect entertainment system for your vehicle and family needs. Contact our team today by calling 09 218 7789 to discuss your options and book an installation.