The electrical system in your vehicle plays a vital role in keeping everything running smoothly. From starting the engine to powering your lights, air conditioning, and entertainment system, auto electrics are deeply integrated into every part of a modern car. In this article, we’ll look at how often you should have your auto electrical system checked, why it matters for your car’s performance and reliability, and when to book an inspection with a certified auto electrician in New Zealand.
Recommended Frequency for Auto Electrical System Checks
Annual Electrical System Inspection
As a general rule, it’s a good idea to get your car’s electrical system checked at least once a year. This routine inspection helps identify developing issues before they turn into major – and costly – problems. It’s most commonly done as part of your annual vehicle servicing, but you can also request a standalone check from an auto electrician like Eurosparx if you suspect an issue.
New Zealand’s changing seasons and varied weather conditions can put extra strain on your car’s electrical components. An annual check ensures that your battery, wiring, alternator, and other critical components can withstand these conditions without fail.
Battery Checks Every 6–12 Months
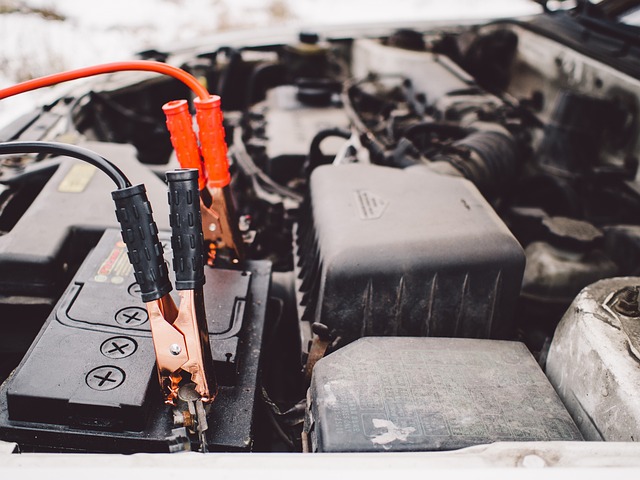
While the full electrical system only needs an annual inspection, your battery should be tested more frequently, especially if the car is older than three years. Many New Zealand drivers experience battery issues during the colder months, particularly in the South Island, where winter temperatures can affect battery performance. Having your battery checked every six months ensures it’s charging properly and holds enough power to keep your car running reliably.
A qualified auto electrician will test the battery voltage, examine terminal connections, and check for corrosion. If needed, they can advise whether it’s time to replace the battery before it fails unexpectedly.
Check After Major Modifications or Repairs
If you’ve recently installed aftermarket accessories like a new stereo, GPS system, dashboard camera, or alarm system, it’s important to have your electrical system checked. These installations often draw additional power or may be incorrectly connected, leading to overload on the circuit or battery drain.
Getting an inspection after major repairs to the engine or electrical components is also recommended. This ensures that the new or repaired parts are working harmoniously with the rest of the system and can prevent hidden issues down the line.
Frequent Checks for Older Vehicles
If your vehicle is more than ten years old, consider increasing the frequency of electrical checks. Older cars often have worn wiring, connectors corroded by moisture, or outdated components that can be unreliable. In New Zealand, where coastal air causes salt exposure and corrosion, regular inspections are an important preventative step.
Regular auto electrician visits can extend the life of your vehicle by catching small faults early. Older vehicles are also more prone to alternator and starter motor issues, which can be identified and corrected before they result in a breakdown.
Signs You Might Need an Electrical Check Sooner
Difficulty Starting the Vehicle
If the engine is slow to start, or you’re hearing clicking noises when trying to turn the key, the electrical system may be to blame. This often indicates a battery or starter motor problem. Even if the car eventually starts, this early warning sign shouldn’t be ignored.
Getting a diagnosis from an experienced auto electrician promptly can help prevent being stranded later on.
Dashboard Warning Lights
Modern cars are equipped with sensors that activate warning lights on the dashboard when something is amiss. If the battery light, check engine light, or any other unfamiliar icon appears, it’s worth booking an electrical diagnostic test as soon as possible.
These indicators can often point to issues with the alternator, fuse box, voltage regulation, or specific sensors which would require professional attention to resolve.
Dimming or Flickering Lights
Another common indication of electrical trouble is if your headlights, interior lights, or dashboard lights dim or flicker while driving. This usually suggests inconsistent power supply, possibly due to a failing alternator or a loose wire.
Inconsistent lighting is not only a nuisance—it can affect your safety while driving at night or in bad weather. An immediate inspection is recommended to determine the root of the problem.
Unusual Noises or Smells
Hearing buzzing sounds, noticing burning smells coming from vents, or detecting melted plastic odours can all point to electrical faults, especially issues with short circuits or overloaded wiring. These are high-risk situations that should be diagnosed and repaired quickly to avoid potential fires or failures.
Skilled auto electricians have the tools and know-how to pinpoint odd behaviour in your vehicle’s systems, especially if the problems are intermittent or appear under specific driving conditions.
Benefits of Regular Auto Electrical Checks
Prevent Costly Repairs
Just like regular oil and tyre changes, checking your electrical system proactively helps avoid costly repairs later on. For instance, discovering a weak alternator early could save your battery from being ruined, avoiding a double replacement.
Unexpected breakdowns not only cost money but also time and inconvenience, especially if they occur far from home or during bad weather. Preventative checks reduce the odds of being caught off guard.
Improved Vehicle Performance
A well-maintained electrical system keeps everything from your ignition to your power windows functioning efficiently. Smooth performance, quicker starts, and more responsive electronics are all benefits of a system operating at full capacity.
This is especially useful if you’re using auxiliary systems like dash cameras or mobile phone charging equipment, which rely on clean and consistent power.
Enhanced Fuel Efficiency and Emissions
Faulty electrical systems can indirectly affect your vehicle’s fuel efficiency. If the engine sensors aren’t receiving accurate data due to an electrical fault, they may adjust the fuel-air ratio incorrectly, leading to poor fuel consumption or increased emissions.
By keeping the ECU and all electronic communication systems in top shape, your vehicle will run smoother and cleaner, which is particularly valuable with evolving emission standards in New Zealand.
Special Electrical Needs in the New Zealand Climate
Moisture and Salt Exposure
Because much of New Zealand has a coastal climate, vehicles often face increased exposure to moisture and salt. These factors can accelerate corrosion of terminals, wiring insulation, and battery posts.
An experienced local auto electrician is familiar with environmental stressors unique to the area and can apply protective measures, such as terminal greasing and checking for seal integrity, during inspections.
Driving Conditions
New Zealand roads include a mix of urban driving, long distances between towns, and unsealed rural roads. These diverse conditions can contribute to vibration, shock load, and heat buildup in electrical connections.
Regular electrical system inspections help ensure the wiring harnesses and component mounts haven’t been shaken loose or prematurely worn down, which is a common concern for vehicles used in farming or construction industries.
Seasonal Considerations
Winter is a common time for battery failures, particularly after a cold snap when older batteries are already under strain. Before winter sets in, it’s advisable to have your battery voltage tested and terminals cleaned.
During summer, your vehicle’s electrical cooling fans and air conditioning system need to operate efficiently to prevent engine overheating or system failure. An electrical system check ensures those components receive enough power and are not being disrupted by another fault in the system.
Need Help With Auto Electrical System Checks?
Your vehicle’s electrical system is vital to nearly all its functions, so it’s important not to overlook its maintenance. Regular checks can prevent costly breakdowns, support better performance, and increase safety behind the wheel.
As expert auto electricians in New Zealand, Eurosparx can help ensure your electrical systems are working perfectly all year round. Whether you’re experiencing problems or just need peace of mind, contact our team today by calling 09 218 7789.